As an Amazon Associate, I earn from qualifying purchases.


Learn how easy it is to make delicious Instant Pot Yogurt. Real food, no fillers or additives – just simple creamy yogurt that you can adapt to your tastes and preferences.
Making your own homemade yogurt in the Instant Pot is so much easier than you’d think! Can you heat milk and stir things? Congrats – you’re now a yogurt maker! Let’s get to it.
If you are new to pressure cooking and the Instant Pot, check out this post on recipes for Instant Pot beginners.
Supply List
- Milk {I prefer whole milk, but see notes below}
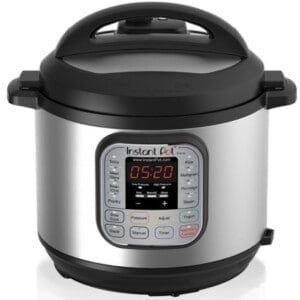
- Instant Pot
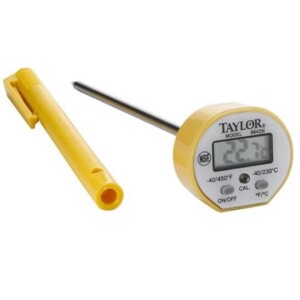
- Instant read thermometer
- Homemade Vanilla Extract
- Plain, additive-free yogurt as your starter. I use Fage Total Plain 2-5%.
The recipe below is for unsweetened and unflavored yogurt. If you want to use non-fat, 1%, or 2%, the process is the same, but your end product likely won’t be as creamy.
If your milk is labeled as Ultra-Pasteurized, you may be interested in making Instant Pot Cold Start Yogurt instead of this recipe. It cuts out a lot of steps with the same delicious results.
Can I Sweeten Homemade Yogurt?
You can absolutely add some sweetener (organic coffee creamer or sweetened condensed milk) and vanilla extract in step 6 if you’d like. I’ve tried it both ways and both work great.
My preference is to leave this unsweetened because it opens up more options for using it in various ways. Plain yogurt can be used in avocado dips, chicken salad, sweet potatoes fries dip, Greek Yogurt Egg Salad, or Instant Pot Potato Salad, etc. Leaving the yogurt plain also allows you to flavor it for individual family member’s tastes and preferences.
Can I Flavor It?
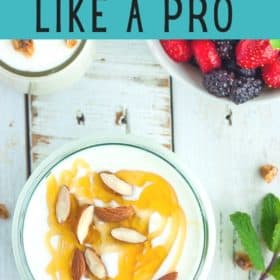
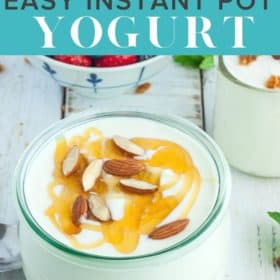
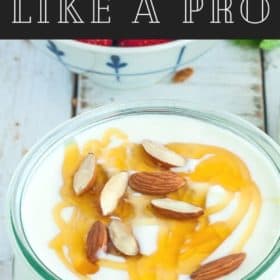
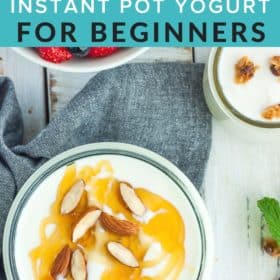
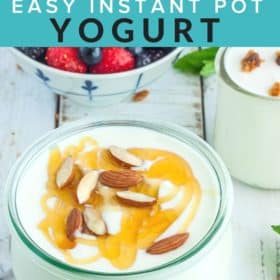
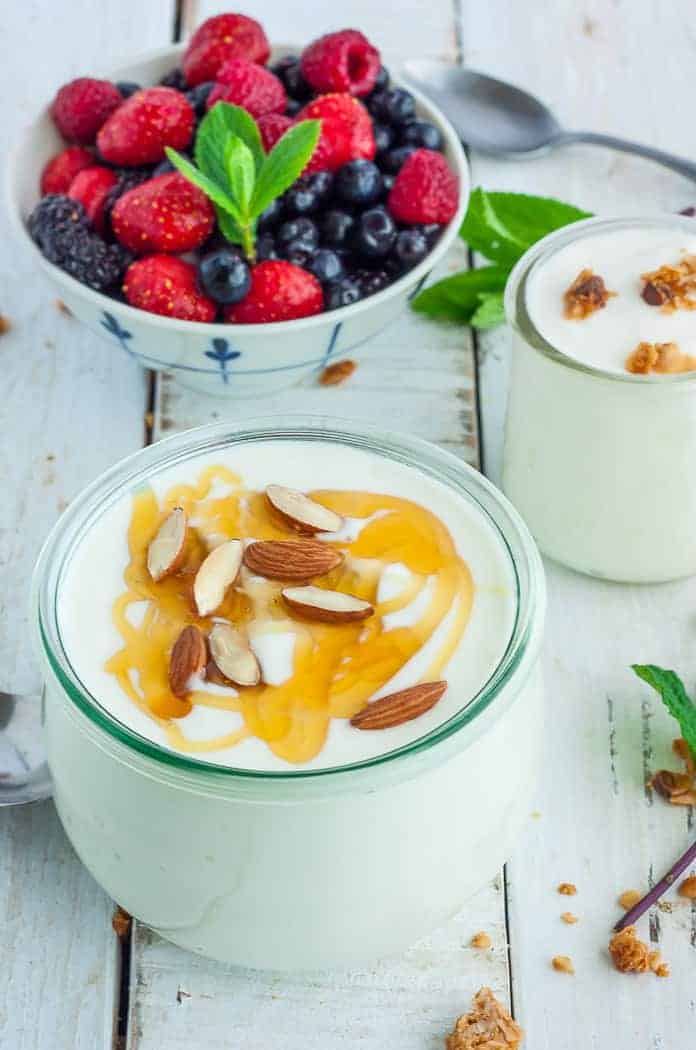
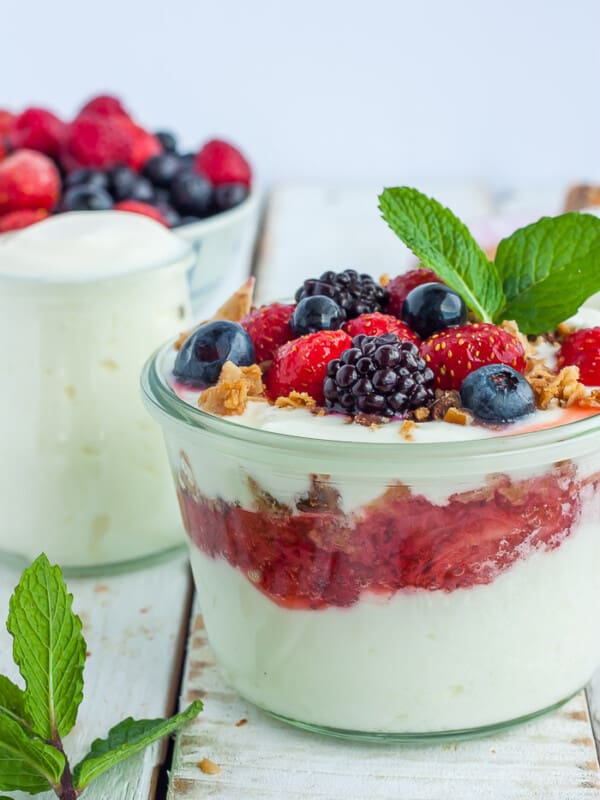
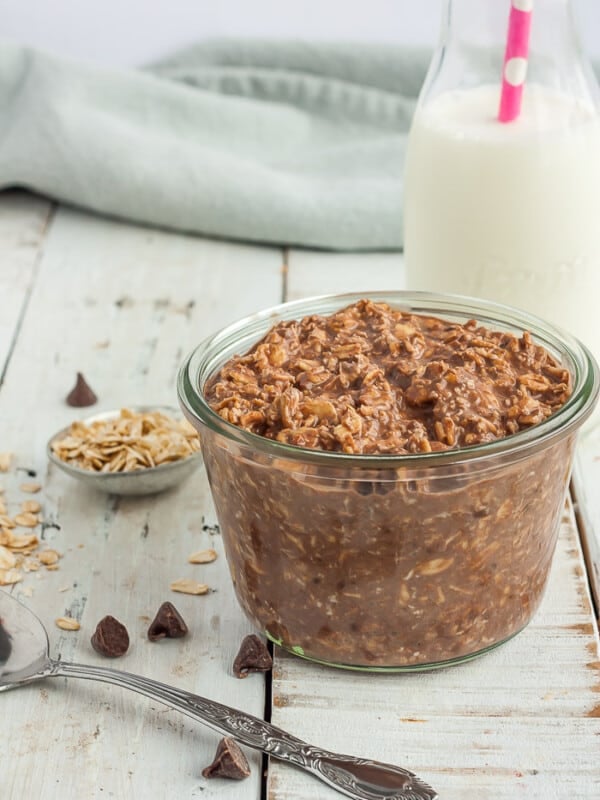
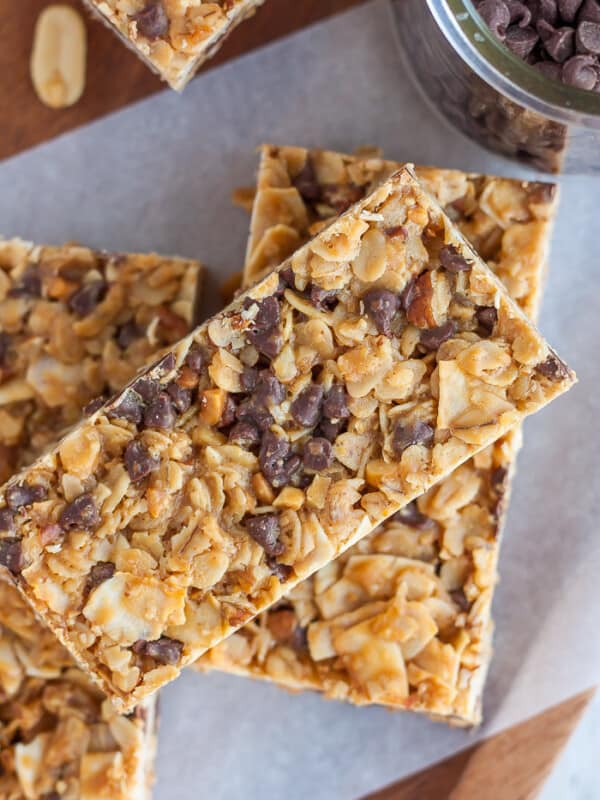
Yes! However, it is best to flavor it after it has finished incubating. Adding chopped fresh fruit (check out this post on how to freeze various fruits), granola (we crumbled up these Peanut Butter Chocolate Chip Granola Bars), jam, Strawberry Puree, or fruit syrups like this Blackberry Syrup.
Interested in making your own jams? Check out these recipes: Strawberry Freezer Jam, Low-Sugar Peach Freezer Jam, Blackberry Freezer Jam, No-Cook Raspberry Jam, or Canning Strawberry Jam.
Can I Double It? Cut it in Half?
Yes, you can halve this recipe or double it (as long as it doesn’t go above the max fill line). The fermentation time remains the same no matter how much milk you’re using.
How to Make Easy Instant pot yogurt – Step by Step
*When you read the instructions below, it is going to seem like a lot. Don’t freak out. It seems like tons of steps, but frankly, it is a lot of “hurry up and wait”. Deep breaths. You got this. And there is also a printable version of this recipe at the bottom of the post.
Pour milk into the Instant Pot.

Place the lid on and set the vent to sealing. Press the “yogurt” button and then “adjust” until the display reads “boil”. Walk away. Go put your feet up. Read a book. Better yet, read some more of my other Instant Pot recipes.

Once the Instant Pot beeps, remove the lid. There will be no need to depressurize first. Stir, and then check the temperature. You want the milk to be between 185-190 degrees. If for some reason your milk isn’t 185-190 degrees F, press the saute button and stir the milk until it reaches the desired temperature.

Remove the inner pot. The milk will now need to be cooled down to 110 degrees F. If you have the time, you can just place it on a heat-proof surface, stirring occasionally. If you need to speed up the process, place it in a large pan (I use a lasagna pan) or a sink along with some cold water. Be extra careful to not get any water into the inner pot.

Once the temperature has reached 110 degrees F, remove 1/2 cup of milk and place it in a small mixing bowl. Add 2 tbsp of plain yogurt (or the amount of powdered yogurt starter as recommended by the manufacturer) and stir well until smooth. I use Fage Total Plain 2 or 5%.
Place the inner pot back into the Instant Pot. Add the yogurt and milk mixture to the Instant Pot and stir well. Pro tip: I like to use my immersion blender to make sure it is REALLY well combined.

Place the lid back on and press the “yogurt” button. Adjust the pressure to “normal”. 8 hours should appear on the display. You can increase the time for a tarter yogurt. Processing it longer will not make the yogurt anything thicker.
Once the machine beeps, 0:00 will show up on the machine. It’s going to start counting up (most Instant Pot recipes count down) so don’t be nervous my little pigeons.


When it is all done, the machine will beep and salute you in your ability to make homemade yogurt!

After it beeps, remove the inner pot and place it on a heat-proof surface. If your goal was to make normal yogurt, transfer the yogurt to containers (mason jars work great) and then to your fridge. Allow to cool.

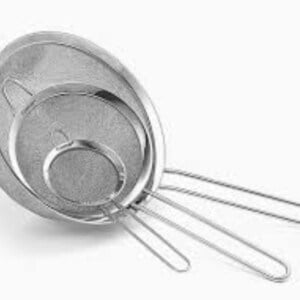
For Greek yogurt, transfer the yogurt to a fine-mesh strainer placed over a bowl, a nut milk bag, or a regular strainer lined with cheesecloth placed over a bowl. Strain for 4-12 hours in the fridge. Discard liquid (whey) or use in cooking such as homemade honey wheat bread.
Pro Tips/Recipe Notes
- Think of your start and end time before making a batch. Give yourself a 90-minute window for the heating and cooling portion steps (you can do it in less time if you force the milk to cool in a pan of water). And then add eight hours on top of that. So estimate 9.5 hours for this whole process.
- If you are using the original pressure cooker lid, remove the ring to prevent odors from transferring to your yogurt. I prefer to use my glass Instant Pot lid, so I can keep an eye on it.
- It will store in the fridge for up to two weeks.
- Use some of your finished batch to culture the next batch. You can freeze your starter if you think it will be longer than 10-14 days before making more.
Instant Pot Yogurt is one of those things that once you learn how to do it, you’ll never unlearn it. It’s super easy, insanely delicious, and pretty makes you a kitchen ninja.

More Great Breakfast Recipes Like This
- Easy Instant Pot Breakfast Recipes
- Oat Milk Pancakes
- Chocolate Peanut Butter Overnight Oats
- Healthy Banana Chocolate Chip Muffins
- Overnight Cinnamon Rolls
- Chocolate Porridge
- Bacon and Egg Rolls
- Healthy Cinnamon Apples
WEIGHT WATCHERS POINTS
One serving has 0 WW Freestyle SmartPoints.
Instant Pot Yogurt

Equipment
Ingredients
- 1/2 gallon milk
- 2 tbsp plain yogurt
Instructions
- Sterilize all cooking utensils and cooking equipment prior to starting.
- Pour milk into the Instant Pot. Place the lid on and set the vent to sealing. Press the "yogurt" button and then "adjust" until the display reads "boil".
- Once the Instant Pot beeps, remove the lid. There will be no need to depressurize first. Stir, and then check the temperature. You want the milk to be between 185-190 degrees.
- Remove the inner pot. The milk will now need to be cooled down to 110 degrees.
- Once the temperature has reached 110 degrees, remove 1/2 cup of milk and place it in a small mixing bowl. Add 2 tbsp of plain yogurt (or the amount of powdered yogurt starter as recommended by the manufacturer) and stir well until smooth.
- Place the inner pot back into the Instant Pot. Add the yogurt and milk mixture to the Instant Pot and stir well.
- Place the lid back on and press the "yogurt" button. Check to make sure the pressure function is set to normal and not low or high. 8 hours should appear on the display.
- Once the time has elapsed, remove the inner pot and place it on a heat-proof surface. If your goal is to make normal yogurt, transfer the inner pot to your fridge and allow to cool.
- For Greek yogurt, transfer the yogurt to a fine-mesh strainer placed over a bowl, a nut milk bag, or a regular strainer lined with cheesecloth placed over a bowl. Allow to strain for 4-12 hours in the fridge.
- Store yogurt in mason jars or other food-safe containers.
Notes
Nutrition
Nutrition information is automatically calculated, so should only be used as an approximation.


Our yogurt turned out great! We strained it for Greek style and it is very smooth, creamy and thick. I will say, I’m not sure I would make my own yogurt all the time….just based on the amount of time it takes, but what a great way to save money when milk is on sale!
I prefer it in the Greek fashion as well. So glad you enjoyed it!
This is now my go-to yogurt recipe. I have found that I only need a couple of tablespoons of yogurt starter for a whole gallon of milk. We both like the Greek yogurt version best with a little homemade pie filling and homemade granola on top.
So glad you like it Sandy. Tell me more about the pie filling topping! Is it apple? berry? I must know.
I am so nervous about making yogurt, I don’t know why? But this doesn’t look that bad. I think I will try it out
I am so nervous about making yogurt, I don\’t know why? But this doesn\’t look that bad. I think I will try it out
What instant pot do you have? There are so many in the market.
They don’t make the one I have in my size anymore. A new model came out recently so my “old” model (purchased last summer) is only available used.
But the one I linked in the post is a slightly smaller version of the one I have and would be a great size for anyone.
Thank you- I really want to try making yogurt and purge some of my kitchen appliances!
The kitchen appliance purge is the beeeeest!
Yes! Milk has been a steal here lately, so we are getting about 2 quarts of thick, Greek yogurt for $2!
Also, I recently learned (and successfully tried) saving the whey to use as starter instead of saving precious yogurt. We just measure out about a cup of whey (but we’ve always used a cup starter to 1 gallon of milk–maybe too much?) and put it in the fridge until the next batch gets made. That’s not long in our house, but as long as it’s completely clear when we go to use it, we haven’t had any issues. If it gets cloudy, we pitch it, suck it up & go buy more yogurt to start if we’re out of homemade.
That is so clever! In all my years of yogurt making, I have never heard of that. I’ll give it a shot.
It must have been some Holy Spirit provocation, because one day, out of the blue, I thought, “I wonder if just the whey would work?” (Probably because I didn’t want to go to the store for one, damn thing.) The Almighty Google said it would be so, and voila. 😉
I don’t know if my yogurt turns out like yours Sarah, but I use my IP to make it. I kind of cut out some steps though! I use UHT whole milk. I put 1/2 litre in each of 2 or 4 clean mayo jars. I heat in the microwave for 2 1/2 mins and check the temperature is right (<44C). If it's right I put the 4 jars on the trivet into the IP and then add 1/2-3/4 tsp live yogurt to each pot and then put the lids on loosely. If I've overlooked washing the IP lid, nothing skanky will condense onto it and drop into the yogurt.
I realise if you are using raw etc milk, it needs to be scalded first. My biggest mistake in my earlier attempts at yogurt making was to add too much starter to each pot.
I love it!!
Ahh, thank you! I have been wanting to try making my yogurt in the instant pot. I do own a yogurt maker thanks to you & follow your instructions for making yogurt & have never had a problem. I use raw milk, would that make any difference in the instant pot recipe? Also, I’ve had my yogurt turn out kinda bumpy like the pic you took & always thought something went wrong….
So, I have had lumpy and smooth yogurt. I find when I add the starter/milk back to the pot if I blend it with my immersion blender, the yogurt will be smooth as silk. If I don’t, lumps. But the lumps taste fine to me, so I’m not always willing to do the extra work. When I strain it to make it Greek yogurt, the lumps disappear.
If you are just starting and don’t have a 1/4 cup of yogurt start, what brand is yogurt should I buy?
Great question! Use a plain, additive-free yogurt as your starter. I use Fage Total Plain 2%. I have updated the post/recipe to reflect this question so thanks so much for asking it.
How would you make this dairy free? Dairy free yogurt in the stores is crazy expensive.
Yes it sure is! I haven’t tried dairy-free yogurt in the IP, but I have had some success with coconut milk yogurt and almond milk in my old yogurt maker. I bought a yogurt starter that works with non-dairy milk and that seemed to be a game changer for it. This is the brand. I have also seen it in Whole Foods I think. https://www.amazon.com/gp/product/B00BGVM0NC?ie=UTF8&tag=thisb02-20&camp=1789&linkCode=xm2&creativeASIN=B00BGVM0NC