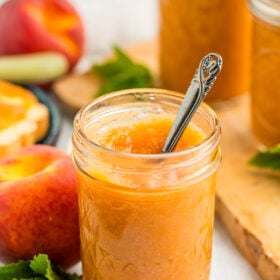
Homemade Peach Jam (Low Sugar)
This homemade peach jam recipe is a delicious and fresh-tasting spread that you're going to love! It's made with significantly less sugar compared to traditional jam recipes, allowing the amazing peach flavor to really shine.
Servings: 4 8 oz jars
Ingredients
- 5 cups peaches, peeled and sliced {to yield 4 cups mashed}
- 1/4 cup bottled lemon juice
- 1 tbsp low-sugar pectin {I use Pomona's}
- 2.5 tsp calcium water {from the pectin box}
- 1 cup sugar
- 1/4 cup bottled lemon juice {do not use fresh}
Instructions
Prep for the canning part
- Prepare water bath canner by filling it with water, and setting it on the stove. Turn the burner to high. Once it reaches a boil, reduce it to simmer. You want to keep the water hot so that everything is ready when the jam is.
- Wash and sanitize your jars. You can fill them with hot water, or place them on a tray in the oven at 170˚F degrees.
- Wash your lids and set aside in clean place.
Making Peach Jam
- Fill a large mixing bowl with ice water. Set aside.
- Use a paring knife and cut the peach around the middle to separate. Remove the pit. Put the halves in a large bowl of water treated with lemon juice (~1/4 cup) or citric acid (1 tbsp).5 cups peaches, peeled and sliced, 1/4 cup bottled lemon juice
- Add one layer of peaches at a time to a pot of boiling water for about 60 seconds.
- Remove using a slotted spoon and place in the ice water for 1 minute.
- Use the slotted spoon to remove the peach halves from the ice bath. Grab one of the peaches and gently peel the skin back.
- Roughly chop or pulse the peeled peaches in a food processor. Measure out 4 cups of the fruit mixture.
- Place chopped peaches in a heavy-bottomed saucepan.
- Stirring often, heat the fruit over medium heat until the juices start to bubble.
- In a small bowl, combine 1/2 tsp calcium powder (comes in the box of pectin) with 1/2 cup cool water.
- In a separate bowl, combine sugar and low-sugar pectin. Set aside.1 cup sugar, 1 tbsp low-sugar pectin
- Add the lemon juice (1/4 cup) and calcium water (2.5 tsp) to the pot with the peaches, stir.1/4 cup bottled lemon juice, 2.5 tsp calcium water
- Add the sugar/pectin mixture, and bring to a rolling boil. Stir constantly for 3 minutes, turning down the burner to medium if the jam starts popping.
- At this point, turn the burner under the canner back up to high and get that water boiling again.
- Remove the jam pot from heat, and stir gently for 3 more minutes. At the end of the 3 minutes, skim any foam that remains.
- Using the funnel and a ladle, add the jam to your prepared jars, leaving 1/4 inch of headspace at the top. Headspace is the amount of room between the top of the food, and the top rim of the jar.
- Using a wet clean rag, wipe the rims of the jars to make sure there isn't any sticky jam on there.
- Place a new clean lid on the jar and then a ring. Tighten the ring to fingertip tight.
- Using canning tongs, add jars to the boiling water, and put the canner lid on. Pro tip: you must have at least 1 inch of water over the tops of the jars for safe canning.
- Process half-pints and pints based on the elevation guide below:*0-1,000 ft – Half-Pints & Pints =5 min *1,001-6,000 ft – Half-Pints & Pints =10 min *6,000 ft+ – Half-Pints & Pints =15 min
- Once the jam has processed for the appropriate amount of time, remove the canner from the burner, and carefully remove the lid of the canner (Pro tip: use oven mitts to take the lid off because the steam is super hot).
- After the 5 minute rest in the canner, use canning tongs to carefully remove the jars, and place them on a thick towel in a place where they can be undisturbed for 12 hours.
- After the jars have rested for about 12 hours, press down in the middle of each lid. If it "gives" at all, the jar didn't seal. Either enjoy it that day, put it in the fridge, or reprocess it.
- Once the jars have sealed and cooled, remove the rings. Label and store sealed jars in a cool (best results are 50-70˚F) dark place for up to 12-18 months.
Notes
- Makes 4, 8 oz jars.
- Jam is best when made in small batches. Doubling can work, but avoid tripling the recipe.
- Will last open for 2-3 weeks in the fridge or 12-18 months sealed and at room temperature.
- Nutrition values are an estimate only
Nutrition
Serving: 1tbsp | Calories: 12kcal | Carbohydrates: 3g | Protein: 0.1g | Fat: 0.04g | Saturated Fat: 0.002g | Polyunsaturated Fat: 0.01g | Monounsaturated Fat: 0.01g | Sodium: 1mg | Potassium: 13mg | Fiber: 0.1g | Sugar: 3g | Vitamin A: 31IU | Vitamin C: 1mg | Calcium: 0.5mg | Iron: 0.03mg