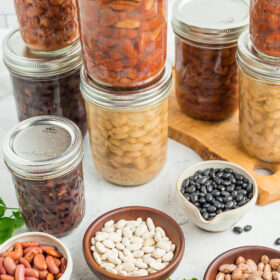
How to Can Dried Beans
Follow this step-by-step tutorial to learn how to can dry beans. Having shelf-stable canned beans on hand means your favorite soups, stews, and side dishes can be ready in a flash.
Servings: 9 pints
Ingredients
- 18 cups COOKED beans {for 9 pints}{~6 cups dried beans}
- water
- 9 tsp table salt {optional}
Instructions
- Cook beans using whichever method you prefer—stovetop, slow cooker, or Instant Pot. Whether or not you soak the beans before cooking is up to you and the method you prefer. Soaking is not required.18 cups COOKED beans
- You do not need to discard the cooking liquid in which you cooked the beans. Keep for filling the jars.
- Wash and clean your jars. Fill with hot water or keep them warm in a clean dishwasher or oven.
- Wash your lids with hot soapy water and place them in a clean bowl.
- Add 3 quarts of water to your pressure canner and put it on a burner set to high. Make sure there is a canning rack in the bottom of the canner.
- Using a slotted spoon and a canning funnel, add the beans to jars and then carefully ladle in the cooking liquid, leaving 1-inch of headspace.
- {optional}: add 1 tsp of salt per quart or 1/2 tsp salt per pint.9 tsp table salt
- Use a long utensil (I prefer a plastic chopstick), to remove all the air bubbles from the jar.
- Clean the rim of the jar very well with a hot damp rag.
- Place a new and clean lid on the jar. Add a ring, and tighten to fingertip tight.
- Using canning tongs, gently place the jars in the canner.
- Lock the lid. Soon, steam will start coming through the vent pipe.
- Allow the steam to pass through for about 10 minutes. Then put the pressure regulator on top.
- Pretty soon, the air vent will pop up.
- In a dial-gauge pressure canner, process pints and quarts based on the elevation guide below (see processing chart in post for additional altitude adjustments):*0-2,000k ft {PSI: 11 lbs of pressure} = Pints 75 min, Quarts 90 min*2,001-4,000k ft {PSI: 12 lbs of pressure} = Pints 75 min, Quarts 90 min*4,001-6,000k ft {PSI 13 lbs of pressure} = Pints 75 min, Quarts 90 min*6,001-8,000k {PSI 14 lbs of pressure} = Pints 75 min, Quarts 90 min
- When the dial gauge reaches the appropriate PSI, reduce the burner temp to medium, and start your timer. The pressure must stay at the PSI or (a little bit) above for the duration of the cooking time.
- When the time is up, remove the canner from the burner and allow it to sit until you hear a distinctive “click” of the air vent dropping. Remove the pressure regulator and carefully remove the lid of the canner (Pro tip: use oven mitts to take the lid off because the steam is super hot).
- Let the jars sit for 5 minutes in the canner and then lift them out with canning tongs.
- Place on a thick clean towel undisturbed for 12 hours.
- After a few hours, to check for sealing, gently press down in the middle of the lid. If the lid has no give, it’s sealed. If you can press the lid in and it pops a bit, your jars are not sealed.
Notes
- Store in a cool dark place for 12-18 months.