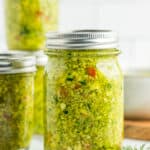
Zucchini Relish {Easy Water Bath Canning Recipe}
A simple and easy recipe for canning homemade zucchini relish. This tangy squash relish recipe is perfect for anyone new to canning. Enjoy it on burgers, hot dogs, or in potato salad.
Servings: 7 pints
Equipment
Ingredients
- 9 pounds zucchini {to yield ~7-8 cups of chopped zucchini}
- 1/2 cup pickling salt
- 2 tsp turmeric
- 4 cups water
- 3 cups white vinegar
- 1 cup apple cider vinegar
- 1.5 cups diced white onion
- 1 tbsp sugar
- 2 tbsp dill seed
- 1/4 cup red pepper {fresh}
Instructions
- Wash zucchini using a vegetable scrub brush.9 pounds zucchini
- Cut the ends of the zucchini off and slice each one into 8 sections.
- Cut any large seeds out of each section. Cut into 1-2 inch chunks.
- In a food processor, pulse the zucchini chunks in batches. Or finely chop by hand.
- Put the chopped zucchini in a bowl, sprinkle with salt and turmeric, and then pour the water over it. Cover, and let stand at room temperature for 2 hours. Pro tip: you'll notice some foaming during this process. That's normal!1/2 cup pickling salt, 2 tsp turmeric , 4 cups water
- After 2 hours, put the salted zucchini in a colander, and rinse thoroughly.
- Let drain and squeeze the zucchini to release excess water. Yield of chopped and strained zucchini will be 4-5 cups.
- In a food processor, dice the onion and pepper (or dice by hand). Add to a heavy-bottomed saucepan.1.5 cups diced white onion, 1/4 cup red pepper
- Add the drained zucchini, sugar, dill seed to the onion/peppers.1 tbsp sugar, 2 tbsp dill seed
- Pour both vinegars over everything, and bring to a boil for 1 minute. Stir constantly.3 cups white vinegar, 1 cup apple cider vinegar
- Reduce the temperature to low, and simmer for 10 minutes, stirring occasionally.
Canning Zucchini Relish
- Prepare water bath canner by filling it with water, so that there will be at least 1 inch of water over the tops of the jars.
- Wash and clean your jars. Fill with hot water or keep them warm in a clean dishwasher or oven.
- Wash your lids and set aside in clean place.
- Place a lid on the canner and set it on the stove with the burner set to high.
- Ladle the hot relish into your jars. Top with the hot brine (excess liquid from the saucepan). Leave 1/4 inch of headspace (the amount of space between the top of the food in the jar and the top of the jar).
- Using a wet clean rag, wipe the rim to make sure there isn't any residue on there.
- Place a clean lid on the jar and then a ring. Tighten the ring to fingertip tight.
- Using canning tongs, add jars to the boiling water, and put the canner lid on. Pro tip: you must have at least 1 inch of water over the tops of the jars for safe canning.
- Process pints and half-pints based on the elevation guide below. Pro tip: the water must return to a boil in the canner before you can start the timer.*0-1,000 ft = 10 minutes*1,001-6,000 ft = 15 minutes*6,000 ft+ = 20 minutes
- Once the relish has processed for the appropriate amount of time, remove the canner from the burner, and carefully remove the lid of the canner (Pro tip: use oven mitts to take the lid off because the steam is super hot).
- Remove the jars using canning tongs and place them on towels on the counter undisturbed for 12-24 hours.
- After everything has cooled, check the seal by pushing down on the middle of the lid. If it doesn't give way, it's sealed. If the lid bows a little bit, put that in the fridge and use it within 3 weeks.
- Wait one week after canning before enjoying the relish. It will give the flavors time to meld.
- Label the sealed jars, and store in a cool dark place for up to a year.
Notes
Adapted from Ball Blue Book of Preserving
- Turmeric is mainly used for color and a bit of flavor. It is optional to add.
- Makes about 7 pints or 14 half-pints.
- If you would prefer to use fresh dill for this recipe, substitute the dill seed with 8 heads of fresh dill. Add them to the jars before ladling in the hot relish.
- Upon opening, store the jar in the fridge for up to four weeks.
- Label and store sealed jars in a cool (best results are 50-70˚F) dark place for up to 12-18 months.
Nutrition
Serving: 1tbsp | Calories: 3kcal | Carbohydrates: 0g | Protein: 0g | Fat: 0g | Saturated Fat: 0g | Cholesterol: 0mg | Sodium: 60mg | Potassium: 24mg | Fiber: 0g | Sugar: 0g | Vitamin A: 15IU | Vitamin C: 0.8mg | Calcium: 4mg | Iron: 0.1mg