As an Amazon Associate, I earn from qualifying purchases.

This complete Canning Supplies and Preserving Equipment List will help you get you started off on the right foot with home canning. This guide will walk you through the essential canning supplies, tools, and products needed to get started.

I’ve never hidden the fact that I don’t really like canning. But I keep doing it so it must be worth it, right?
Canning is an affordable way to preserve excess garden produce or great deals you get at the grocery store or farmer’s market. There are few things more beautiful than staring at a shelf full of home-canned goods that you worked really hard to put up.
As with any new task/hobby, there is some gear involved. Many items are likely in your house already and/or can be found used for dirt cheap prices.
This post is organized into “must-haves” and “good to have”. My suggestion is to start with the must-haves, see if you actually want to continue to can, and then slowly work on acquiring the other items as you can.
Get it? As you can…
Where to Buy Canning Supplies
Thrift stores, big box stores, garage sales, hardware stores, and Amazon all have canning supplies for decent prices. If you know of anyone who used to can but no longer is able to or grew out of it, they are an amazing source of affordable supplies.
Pro tip: look for products free of rust, chips, cracks, and obvious damage.
Must-Have Canning Supplies
A canner! This is a bit of a no-brainer because you can’t process any jars without the canner. There are two main types of canners:
Water Bath Canner (WBC)
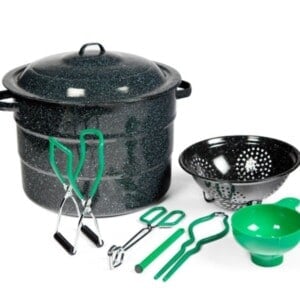
A water bath canner is a perfect canner for beginners. This is usually an enameled pot that comes with a rack inside to hold the jars (more on this in a minute) and a lid. They’re very affordable brand new but I always see them at my local thrift shops and garage sales.

You can only use a water bath canner for high acid foods like jam (related: Low-Sugar Strawberry Jam), fruits (related: Preserving Peaches), and pickled veggies (Related: Dill Pickle Relish). The pot needs to be tall enough to cover the tops of your jars with boiling water by two inches.
Use what you have at home: If you already have a very tall stockpot, you can repurpose it as a canner. Chances are it won’t be wide enough to can more than a few jars at a time, but in a pinch, it will work. You’ll need to use a canning rack; read more about that below.
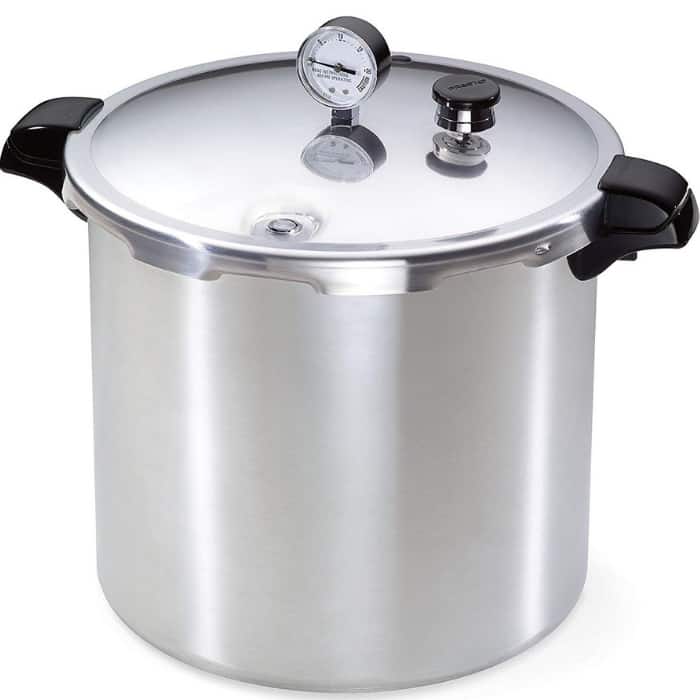
Pressure Canner
A pressure canner gives you more flexibility on what you’re able to can and preserve. Meat, non-pickled vegetables (related: How to Can Green Beans, Canning Carrots, and Canning Pumpkin, must be processed in a pressure canner. Additionally, it can make the process faster compared with a WBC for some high-acid foods (related: Canning Stewed Tomatoes and How to Can Tomatoes).
Pressure canners have a steeper learning curve than a water bath canner. I used a very basic WBC for three years before I felt ready to upgrade to a pressure canner.
You can use a pressure canner as a water bath canner by removing the steam gauge so it is possible for it to do double duty. I have a Presto 23-quart pressure canner and am very happy with it!
Pro tip: contact your local extension office for pressure testing once a year. Not sure what an extension office is? If your state has an agricultural-based college, chances are they have extension offices sprinkled around the state. Our extension office charges $5 to test your canner.
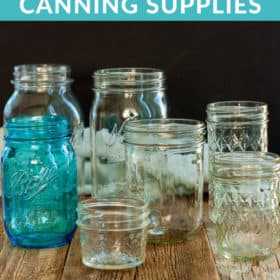
Jars
No brainer on this one, jars are an essential part of canning supplies. But you can’t just use any jars; they must be canning safe. Don’t use jars leftover from storebought pasta sauce, mayo, etc. Popular and trusted brands are Kerr, Ball, and Mason. And the good news is they’re available almost everywhere!
Where to Buy Canning Jars
Grocery stores, big box stores, hardware stores, Amazon, and even Target carry canning jars. Expect to pay $8-12 for a dozen, but keep in mind that jars are infinitely reusable. New jars come with rings and lids. The pandemic last year really made jars hard to find for a time, but I’m seeing them in my stores fairly consistently now.
Pro tip: if buying new, keep the box the jars come in. They’re great for keeping jars steady and safe(r) on storage shelves.
There are sooooooo many sizes of jars available for almost anything you want to preserve.

4 oz jars: these are great for gifting jams or chutneys. I used them to freeze baby food when my kiddos were younger. They’re also the perfect size for freezing small portions of Sugar-Free Pizza Sauce, homemade pesto, or Whole30 BBQ Sauce.
8 oz jars: these are standard jam jars (related: Low-Sugar Strawberry Jam), sauces (related: Canning Apple Butter), and are perfect for syrups (related: Blackberry Syrup). You can also use these 8 oz containers for freezer jam (related: No-Cook Raspberry Freezer Jam, Blackberry Freezer Jam, and this Strawberry Freezer Jam Recipe).
Pint jars (16 oz): pint jars are perfect for pickles and for recipes equivalent to a standard-size 14-16 oz can at the grocery store (related: Canning Pumpkin). They’re also perfect for making Refrigerator Dilly Beans which must be stored in the fridge and aren’t safe to can. Have a garden? Try freezing peas and storing them in pint jars to replace 2 cups of canned peas in a recipe.
Pro tip: these are perfect for freezing single-serve meals or soups (related: Whole30 Beef Stew and Instant Pot Chicken Pot Pie) for quick grab-and-go meals.
Pint and-a-half jar: these 24 oz jars are great for taller veggies like carrots or asparagus.
Quart jars (32 oz): these big ol’ jars are perfect for foods that are easiest canned in large quantities (related: Canning Potatoes and Canning Peaches). Pro tip: the wide-mouth version are awesome for freezing two to three servings of soup at a time.
Half Gallon (64 oz): Giant jars that are so awesome for dry storage but not recommended for actual canning. Canners are too shallow to safely allow you to can in these big jars. But if you want to stock up on pantry essentials or store homemade dried apples, these jars are perfect for those tasks.
The mouths of jars come in two sizes – regular mouth and wide mouth.

Regular mouth – 4 oz, 8 oz, and pint and a half automatically come in regular mouth. Pints and quarts can be purchased in regular or wide mouth.
You can tell a regular mouth jar from their wide mouth friends because the opening is smaller (duh) but also because the neck narrows and it looks like the jar almost has little shoulders. Look back up at the labeled jar photo to see this. I’ll wait right here.
Those little shoulders are wonderful for keeping foods firmly in place that might float up during processing. Green beans or peaches and pears (related: Canning Pears) are good examples of foods that float up in their jars while in the canner. That being said, I prefer wide mouth for peaches. More on that later.
I love using regular mouth jars for anything that will be “pourable” (related: Canning Tomato Soup) or is saucy (related: Canning Applesauce)
Regular mouth jars are more affordable than wide mouth and their replacement lids and rings are also $.75-1.00 cheaper compared with wide mouth.
Pro tip: if you freeze foods in jars, you should not use regular mouth jars in the pint or quart size. They don’t allow enough room for liquid expansion and could lead to jars breaking.
Wide mouth jars, as their name implies have a big opening and they’re perfect for food that can get messy when trying to “force” into a jar like when you’re Canning Peaches.
Wide mouth are also easier to clean and are perfect for freezing pre-cooked soups. You’ll need to leave one inch of headspace (the space between the top of the food and the top of the jar) to allow for the contents to expand when they freeze.
It’s best to have a mix of both wide and regular mouth jars and pick the best jar for the individual project.
Lids & Rings

Like jars, lids and rings come in both wide and regular mouth and you need to make sure you match up the jar to the correct ring/lid. Regular mouth lids and rings are more affordable than wide mouth.
You must use a brand new lid on every jar that goes into your canner. You cannot safely reuse lids. I will use old lids for pantry storage, when I freeze food in jars, and when I store food in mason jars in the fridge.
Rings can be used over and over and most people remove the rings after the jars have cooled out of the canner and before they store them. Removing the rings can help you identify any rust or potential spoilage.
This also allows you to reduce the number of rings you have to keep on hand. Rings need to be tossed when any rust develops.
You can purchase boxes of just lids or lids and rings. Once you have a solid supply of rings on hand, it is much more affordable to purchase a box of lids without rings for your canning needs.
Tattler makes reusable canning lids in both wide and regular mouth. Unlike metal lids, these are safe to reuse. I have used these in the past and although it was probably user error, I had 10% more spoilage (i.e., a jar didn’t seal or unsealed while it was stored) with reusable lids.
Canning Rack
The canning rack is an essential part of your canning supplies because it keeps your jars off of the bottom of the canner during processing. Jars that are processed sitting on the bottom of the canner are more prone to cracking.
Most water bath canners come with a wire rack but you can also purchase one separately if needed.
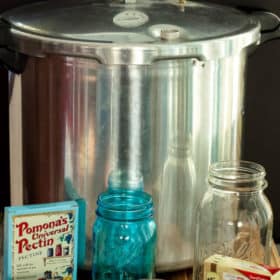
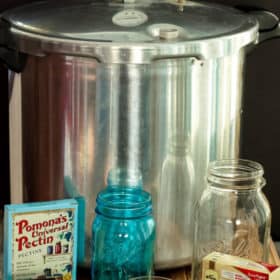
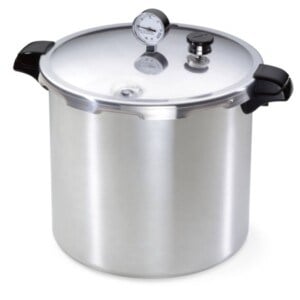
Pressure canners come with a metal insert that sits on the bottom of the canner to keep the jars off of the bottom. You can see it propped up inside my canner below.

Use what you have at home: some people will use a linen or cotton towel at the bottom of their canners. This makes me leery but use your best judgment. I have also seen people zip-tie canning rings together to create a DIY canning rack.
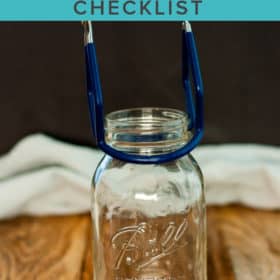
Jar Lifter
As the name implies, this awesome tool will help you lift jars in and out of boiling water. If you purchase a canning supplies kit, you’ll want to make sure it comes with a jar lifter.

Don’t make the mistake I did when I first started and use these backward! I thought they were so slippery and hard to navigate. Then my husband pointed out the silicone non-stick part was probably the side that made contact with the jars. Whatever.
Use what you have at home: some canners wrap rubber bands around the ends of kitchen tongs to create what we in my family call “gription”. If you plan to can often, spend the $5 and get the real jar lifter, but if you’re just testing the water with canning, tongs will work.
Bubble Popper
After you fill your jars with food, you’ll need to make sure any bubbles that were created have been popped. This is especially important with foods you can that have a “cavity” like peaches, pears, or apricots. Air bubbles can get trapped and interfere with the safe sealing process.
They do sell bubble poppers as part of canning supplies tool kits but if yours doesn’t come with it, I would not spend money to purchase one separately. I use a plastic chopstick for all of my bubble popping.

Funnel
This handy little tool may not make it on everyone’s “essential list” but it sure is on mine! Funnels allow you to cleanly fill jars without a ton of sloppage (<—that’s a word) and mess. You have to wipe down the rims of jars before adding lids, but imagine what a hot mess that would be if you had peach syrup all over the outside of the jars. No thank you!
My initial canning kit came with a plastic funnel, but I upgraded years ago to this stainless steel one and am so pleased I did.
Lots and lots of clean towels
You’ll need clean kitchen washcloths for wiping down the rims of the jars after filling. But having hand towels and bath/beach towels around can be super helpful.
I use hand towels for the 45,189 times I wash my hands while canning, and triple-layer bath/beach towels on the counter where I put the hot jars when they come out of the canner.
Jars come out of the canner incredibly hot and take a good four to five hours to fully cool. Protect your countertops and tables by making a thick barrier between them and the jars.
Timer
Canning processing times are very precise and when you’re in the thick of things it is hard to keep track of what is cooking/processing and for how long. I simply use the timer on my oven and have used the one on my phone in a pinch. No need to purchase something separate just for canning.
Trusted and Tested Recipes
The Ball Blue Book Guide to Preserving is considered by most to be the canning bible. As canning guidelines have changed, this book has been updated multiple times. If you come across an older edition at a yard sale or thrift shop, pass it by and get a new edition.
When I first started canning, I checked this book out at the library and made copies of a few recipes I wanted to try. You can also read the National Center for Home Food Preservation which is full of totally free and printable recipes.
Once you feel comfortable with the process of processing (<—–canning joke!) you may want to invest in additional cookbooks. A few of my favorites:
- Food in Jars – great and unique small batch recipes
- Put Em Up! – creative recipes for things you’ll actually want to eat.
- Complete Book of Home Preserving – soooo many ideas
Comfy Pair of Shoes
Obviously, don’t go out and purchase anything new, but it will save your back if you wear comfy shoes during canning sessions. I have a gel mat in my kitchen that I like to stand on, but I still wear athletic shoes during marathon canning.
Nice to Have Canning Supplies (Non-Essential)
Lid Lifter
Many canning kits will include a jar lifter – a pencil-sized stick with a magnet on it. It used to be that you would simmer your lids in hot water to sterilize them. Then you would use the lid lifter to safely get them out of the water and onto the jar.
Recommendations have changed and it has been determined that you no longer need to pre-warm lids (read more about it here). With this change, the jar lifter is no longer needed. If your kit came with one and you want to use it, go for it. But don’t go out and purchase one just to have it.
Bowls
Soooooooo many bowls! I have loads of stainless steel nesting bowls that I have acquired over the years from thrift stores, family members, and garage sales. Some canning projects won’t require more than one bowl, but others will have you rinsing, straining, and mashing in multiple bowls.
Get a few different sizes to fit your needs. I also love this giant 8 cup Pyrex and use it daily for all kinds of cooking tasks. I love to use it when making Low-Sugar Strawberry Jam because it makes measuring the fruit a no-brainer and makes mashed fruit pourable.
Heavy-Bottomed Pots
I use my cast iron enameled dutch oven when making jam, canning pears and peaches, Canning Apple Pie Filling, and for parboiling apples when making applesauce. It is a workhorse and is constantly on my stove during canning season.
If you have a stockpot that you love, it will get a good workout.
Slow Cooker
I use my slow cooker to keep the sauce warm when Canning Applesauce, and for Garden Fresh Crockpot Spaghetti Sauce (this one is one to freeze in your wide-mouth quart jars as the recipe has not been tested for canning).
When you’re preparing the food for canning, you won’t want to fill the jars until you have enough food to fill a canner’s worth (typically six to seven jars at a time). You have to keep the food warm to maintain safety, and that is where the slow cooker comes in.
I add my applesauce from each turn through the food mill (more about that in a second) to the slow cooker and keep it on low until I have enough to fill six or seven-quart jars.
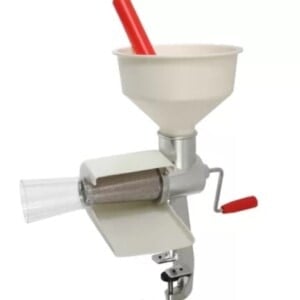
Food Mill
If you plan to make applesauce or tomato sauce, a food mill will be your best friend! They have stainless steel mills that fit over a mixing bowl, but I swear I must be an idiot because I can never get these to work for me.
Instead, I use this Victorio food strainer:

It’s pretty amazing and makes quick work of saucing apples and tomatoes. If you plan to do large batch canning, a heavy-duty food strainer will greatly reduce the cursing that comes out of your kitchen. Maybe? No promises.
Apple Peeler/Corer
An alternative to the food mill, you can use this to peel and core an apple in about 20 seconds. It makes uniform slices in the apple so you will have to cook it down in order for it to become a “true” applesauce.

I use it for making Dried Apples and when I make my annual apple pie at Thanksgiving. It also makes quick work of Cinnamon Apples.
I see these EVERY time I go to thrift stores, so look around and snag one for $5.
Large Strainer/Colander
There is a lot of rinsing and draining when canning fruits and veggies, and a solid stainless steel strainer will come in very handy. Much of the food being put into the strainer will be hot, so I don’t recommend using a plastic colander.
Pro tip: no matter what size strainer you choose, make sure you have a bowl large enough (remember we talked about those a bit earlier?) that you can rest it in.
Stainless Steel Ladle
Scooping up all the sauce, jam, and syrup can get messy if you don’t have a great ladle. Chances are you already have one, assuming you like soup (you DO like soup don’t you?!).
Use what you have at home: if you don’t have a ladle, a large coffee mug would work well. Just make sure you put it on a clean plate in-between using it. Sanitation at all steps my friends!
Fine Mesh Strainer
I use my fine mesh strainer when making Strawberry Syrup and Blackberry Syrup and making Chicken Bone Broth. You can also use it in lieu of a jelly bag when making jam and jelly (confession: I don’t make jelly and I never deseed my jam).
And let’s be truthful, I use it a ton when making homemade Creamy Mint Chocolate Chip Ice Cream. Ice cream is my reward for spending a few hours canning.
Jelly Bag
As I mentioned, I don’t make jelly, but if that is your jam (<—-see what I did there?) a stand-up jelly bag makes the process much faster.

Ingredients
There are some common ingredients to many canning recipes.
Sugar/Honey/Sweetener
Most fruit recipes call for some form of sugar. I greatly reduce the sugar in most jams and canned fruit recipes I make, but many require at least something.
Pectin
If you’re looking to make jam, you’ll probably need to use pectin at some point. My preferred pectin is made by Pomona’s. It “gels” (the magical point of time when it goes from fruit to jam) with low to no sugar.
Most pectins in the store require a metric butt-ton of sugar to create jam. You’ll use less Pomona’s than conventional brands so each box will make multiple batches of jam.
If you’re looking to make freezer jam (related: Strawberry Freezer Jam Recipe), I like Ball Freezer Pectin.

Vinegar
You’ll use white or apple cider vinegar in all pickling recipes and some tomato-based products.
Lemon Juice
Any recipe that calls for lemon juice will note that it must be bottled lemon juice. Fresh lemon juice can’t be counted on to have a consistent acidity level, and thus commercial lemon juice is required for safe canning practices.
Canning Salt
You must use canning salt during canning and pickling. Conventional table salt has additives in it that will (may) turn your canned products cloudy.
And that my friends is it; the complete list of must-have and good to have canning supplies! There are some other products I didn’t talk about (a jar opener, headspace measurer, pretty labels) that I don’t think are remotely necessary.
My best advice to you is to read the recipe 15,000 times before you get started to make sure you have all the ingredients, understand the process, and know what to do and when.
My second best advice is to find an experienced canner to help you the first few times you process anything. It helps so much to feel confident about the process and learn the little hacks that can save you time and money.
If you have any questions, I’m just an email away!


After reading JP’s comment below, I was reminded of also when I was a little girl my Grandmother in FL would can Bread and Butter Pickles and Sweet Pickles. My younger brother would take a potato chip, put a bread and butter pickle on top, then add another potato chip on top and make pickle ‘n chip sandwiches. We would eat almost a whole can of potato chips, they got their potato chips in old big cans, and a whole jar of pickles. So, so good. Oh, to be young again. I could never eat like we did back then!!! But I might just go buy a small jar of bread ‘n butter pickles and a bag of potato chips to bring me back to that great taste again.
That sounds delicious!!
I remember when I was a little girl we had canned fruit and jams but there was about a 1/4”-1/2” wax layer on top of the food under the metal cap. Is this how they used to can food? Is this not done anymore? I remember my Grandmom and Great Aunts in Iowa always having homemade jams. They had plum, blackberry, blueberry, raspberry, apple, raspberry, strawberry, and pear trees and bushes. It was always great!!! I remember going in my Great Aunt’s back yard with my brothers and cousin and eating from the bushes all the great fruit. I was like in a candy store.
BTW, I keep clicking on the “Save my name, etc.” checkbox below but I always have to put in my name and email. What am I doing wrong?
Hi Pat, using wax for jams has been considered unsafe for quite awhile now. Some people still use this method, but it’s definitely not recommended.
I’m not sure why it is not saving your information, I’m sorry.
I am saving this email, pinning the blog post, and bookmarking the page! Not only does this post provide ALL the helpful tips for canning but it is essentially a glossary of your canning recipes.
I aim to please my dear! 🙂
As a canner I do appreciate the work you put into this post. I’ve been canning for several years and am pretty confident however I always like reading about it to refresh my memory and see if there are things I can do to improve. I’ve ‘spread the love’ to several friends as well as my sister (who have shown her friends) and we get together to make jam or other items we want to try. One time we accidentally make enough pickles to last us 2 years! Lost of pickle eating going on in my house.
Anywho, just thought you’d like to know we do appreciate this lost form of art and all your research.
JP, I learn so much every year I can. It’s definitely a life-long learning kind of thing. It was a reader who pointed out the rules for sanitizing lids had changed!
That sounds like a ton of pickles! When I’ve been trying to eat through our pickle stash, I found adding them to salads was a really fun way to use them up. I love pickled asparagus on salad so actual pickles worked too in a pinch.