As an Amazon Associate, I earn from qualifying purchases.
A step by step tutorial on canning diced tomatoes at home. Perfect for new and experienced canners looking to try something new.
Here are some truths:
-I hate canning. It hurts my back, it’s exhausting, it’s time-consuming (it always takes at least 90 minutes longer than I assume), and sweaty.
-My husband is unobservant and has always assumed I love canning because I do it all the time. Weirdo. I do laundry and clean the bathrooms all the time too, but I wouldn’t call those things hobbies.
-It is almost always the best way to preserve excess food from your garden/you’ve urban harvested around the neighborhood.
-As far as I can tell, Troy and Jack don’t plan to stop eating anytime soon. Canning is also the cheapest way to preserve the garden bounty/gleamed fruit I find. This month I’ve canned 35 half-pints, 19 pints, and 11 quarts of various things, and have spent a total of $10 on produce. Everything else came from my garden or my urban harvesting.
-As much as I hate canning, I love the security and convenience of the output. There are few things that compare to walking down to your basement in January, to grab a jar of “fresh” peaches to eat.
–Canning is like childbirth – it sucks while you’re going through it, but the product is worth all the trouble.
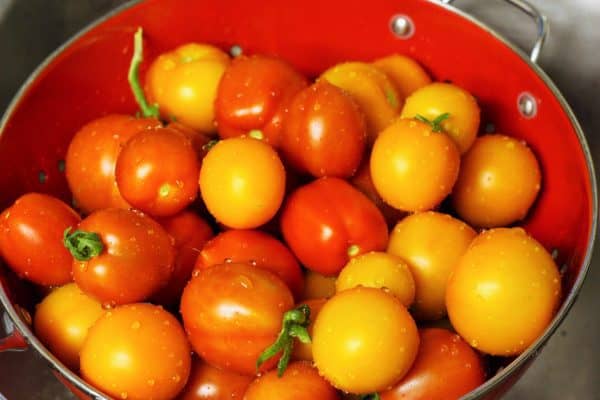
One of the first things I started canning many years ago were diced tomatoes (also known as crushed tomatoes in some parts of the country/world}. These are perfect additions to soups, stews, and other dishes.
Diced tomatoes are also an easy thing for new canners to tackle because you only need two things – tomatoes and an acid. Well jars, rings, and lids too, but you get the point. Canning diced tomatoes is something anyone can learn to do with a bit of patience.
Head’s up, I was canning these at 10 pm the other night, so don’t expect magic when you see the photos. I was tired, the light was awful, and I was busy watching/listening to The Godfather Part II on my laptop.
1) Start by washing your tomatoes.
 4) Place the tomatoes in the water for about 30-60 seconds; until you see the skins slipping off.
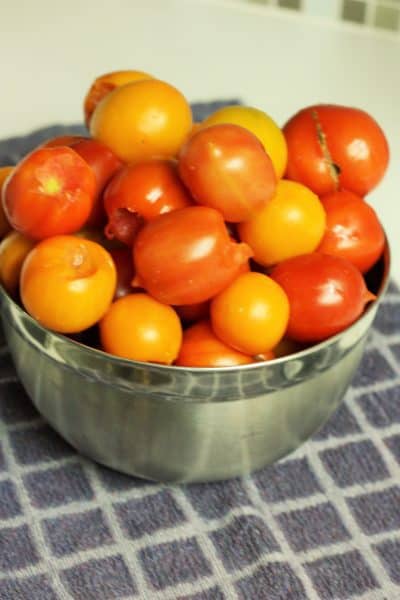
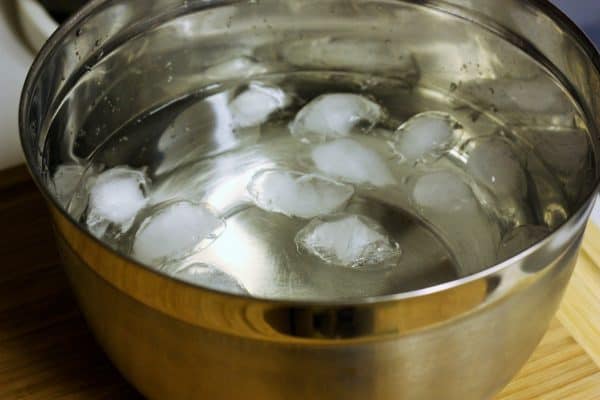
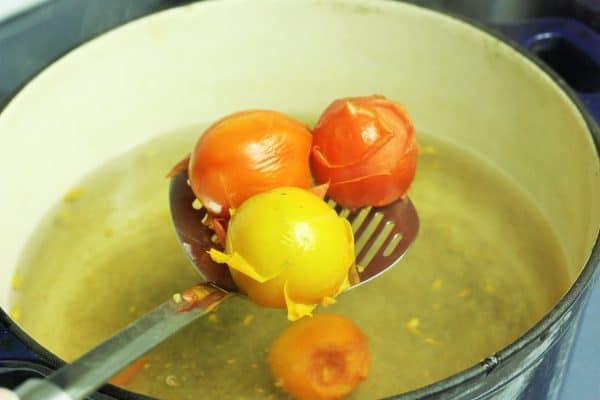
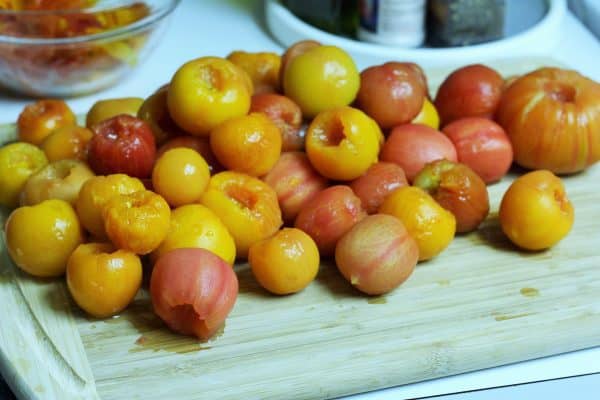
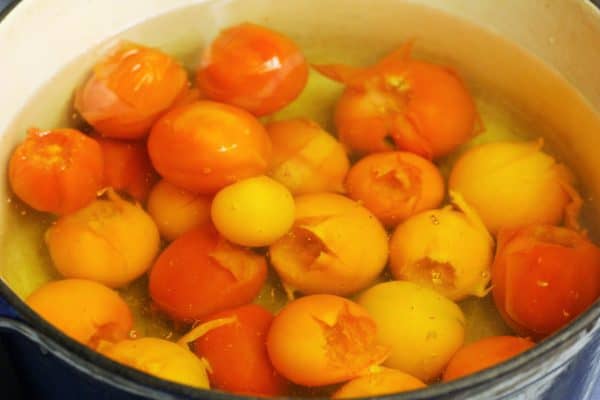 5) Remove the tomatoes from the boiling water, and put them in the ice water. The skin should easily slip off afterward.
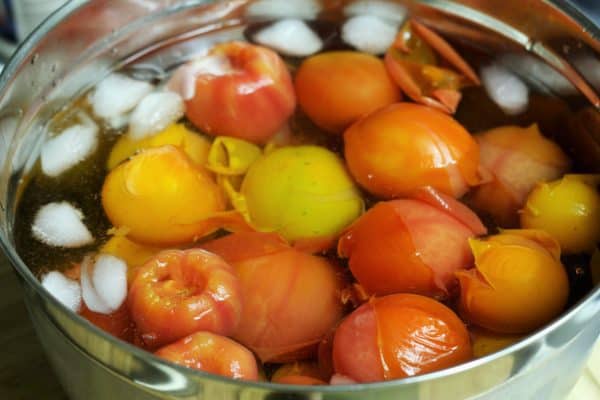
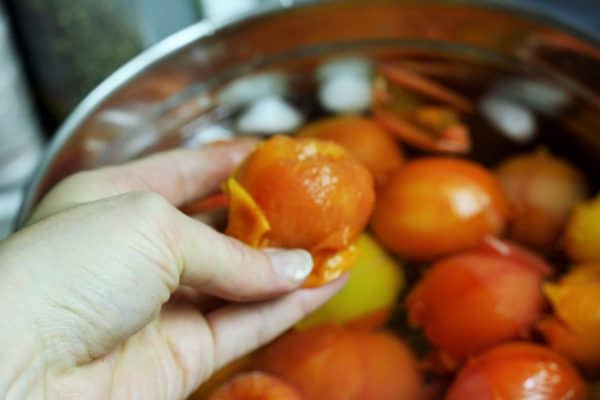
 6) Give the tomatoes a quick chop with a knife, and set aside.
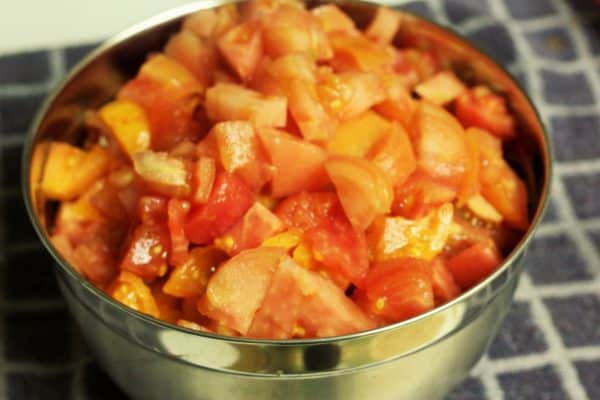
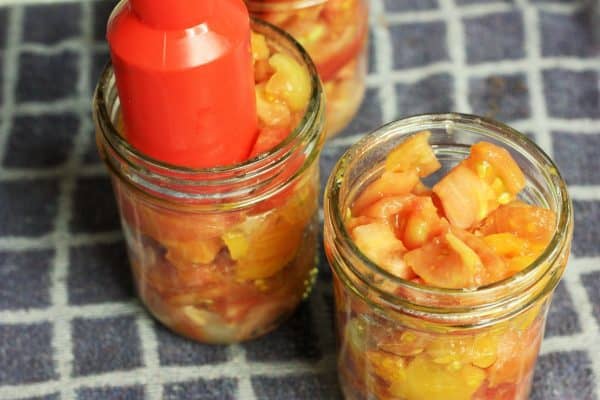
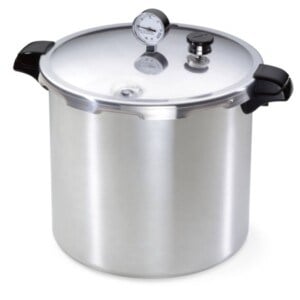
 9) Process. Processing times will vary depending on your canning method. These take a long time (85 minutes) in a boiling water canner, but only 25 minutes in my pressure canner. Always use a trusted guide for canning times. I am not a trusted guide.
If you’re new to the whole canning world, the library is a great source of canning books. Just make sure that the book you check out is new. If purchasing, most canners I know consider this the canning bible. I’ve been really enjoying the recipes from this book as well.
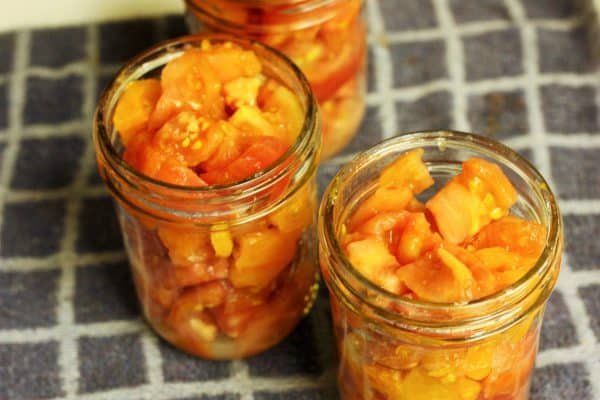
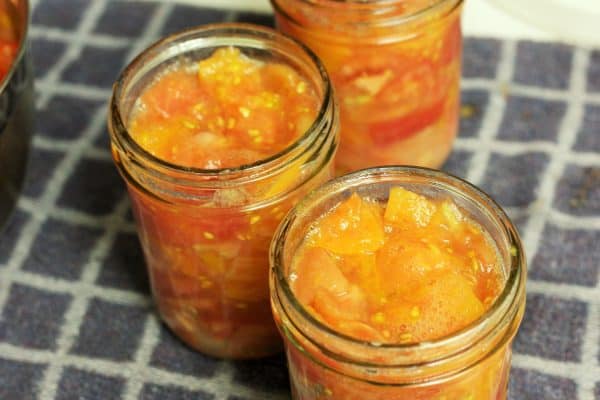
After removing the jars from the canner put on a towel on the counter and let cool completely – about 12-24 hours. Tomatoes are made up of a ton of water, so you’ll see a bunch of “tomato pee” in the jars. That’s fine. The tomatoes usually sink down in the jar after they’ve cooled for a whole day.
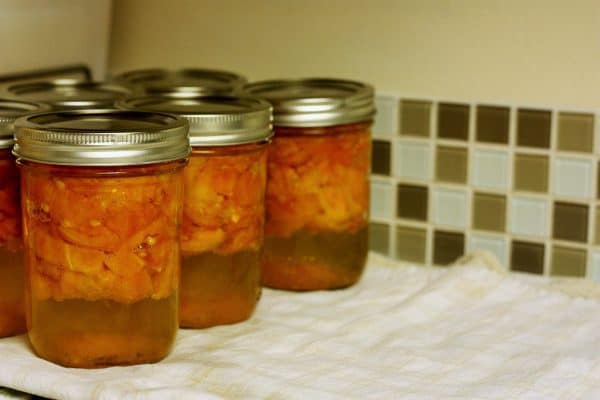
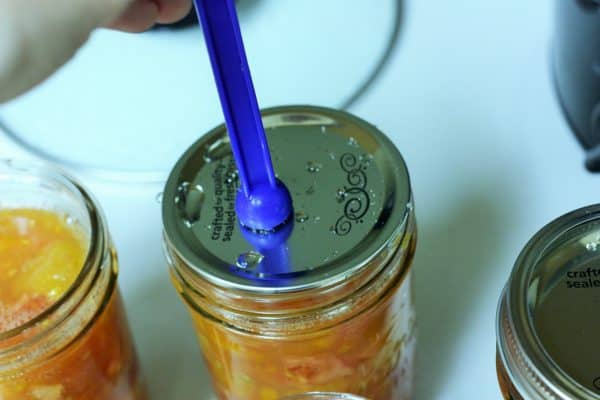
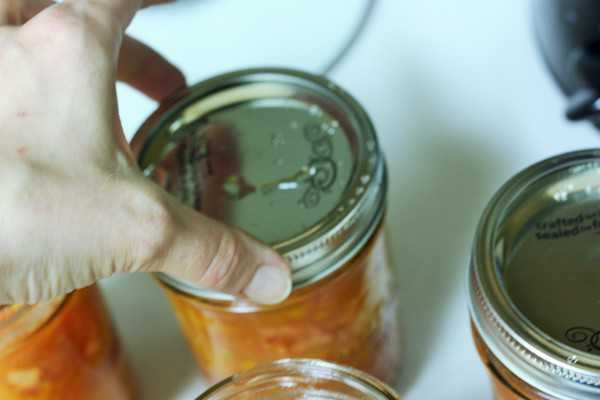
Check the seal (push down on the lid. If it doesn’t move, it is sealed. If it moves, put that jar in the fridge and eat in the next few days), tighten the rings (if you store with rings), and store in a cool and dark place for up to 1 year.
Some dark and rainy afternoon (hey, it gets dark at 4:15 here in the winter) next February, these will be the perfect addition to arroz con pollo for a nice and warm dinner for my family. With a fire in our fireplace, and warm good food in our bellies, I’ll probably say something dumb like “canning isn’t that bad”.
Oh, how soon we forget.
Psst. Psst! Want to learn more about canning tomatoes? Check out these posts on canning stewed tomatoes and canning whole tomatoes.


I just read your blog, very interesting. I was looking for an alternative recipe for diced tomatoes when I came across your blog. I have done salsa for years, and have done speggetti sauce for about 3. Last year I found a canning recipe for diced tomatoes that you freeze, it had peppers,onions and garlic in it, so I basically followed my salsa recipe, omitted the hot, and added the seasonings I thought would taste good for the diced toms, ( I use distilled white vinegar)
It was wonderful both ways,I froze some and water boiled the rest. I tighten my lids when I process my jars, and I never loosen them. No one in my family has gotten sick or died because my jars didn’t seal or lost their seal. My salsa tastes as great 2 years after I can it as it did the day I canned it. Many friends and family look forward to my salsa and speggetti sauce every year. And my hubby loved the diced tomatoes for his many different chilis, bean dishes and soups.
Now I’m worried after all these years that the processing has been done wrong with the whole tightening and loosening of the rings….we’re all going to die!
Oh and for green tomatoes… There is a great recipe out there for Texas hot green tomatoes that is wonderful…. Adjust it to your taste, I cut the sugar it calls for in half, it’s still plenty sweet
hi, I’m just trying to can diced tomatoes. I would like to add onions and green peppers and mayb a bit of garlic. Is this doable? And if so please tell me how to do it. I have a ton of tomatoes and i dont want to waste them. Thanks
You MUST follow a tried and true recipe when it comes to adding other ingredients, especially garlic. I’d check the Ball Blue Book to see if they had a flavored diced tomato recipe. Otherwise, I would not chance it.
Hello, you mentioned canning half pints, were they of tomatoes? If so, do you process those small half pints for the same amount of time as pints and quarts, 85 mins? I want to can in small half pint jars but I can only ever find processing times for pints and quarts lol.
Hmmm, not sure if I said half pints; I think I just meant pints. I follow the directions that come with my canner, and typically pints are processed about 5-15 minutes less than a quarter. I couldn’t see myself needing quarts of diced tomatoes.
In the 4th point under “Here are some truths” you said “This month I’ve canned 35 half pints, 19 pints, and 11 quarts of various things, and have spent a total of $10 on produce.” I was just wondering if those 35 half pints were of tomatoes? If so, how long did you process them for?
Half pints are always for jam and relish. They’re the tiny little 8 oz jam jars. The smallest jars I use for tomatoes are pints.
Thanks for letting me know I can do this without Lemon Juice I am very allergic to lemons so that would not be good! Then my question is do you have to use any other liquid in the jars? Thanks!
No, the tomatoes will release a ton of liquid (I call it tomato pee) during the canning process.
Was wondering if you can do this without a cancer?
Any particular type of tomato?
I’ve used a mixture of all kind of tomatoes, and haven’t had issues.
I read your blog all the time, and happened upon this post this afternoon as I embarked on my maiden canning journey. I’ve always frozen stuff, cuz I just thought it was easier. But today I canned 2 quarts and 4 pints of marina sauce, 6 pints of salsa, and 2 quarts + 4 pints of tomatoes. All went well, and that wasn’t SO bad. Albeit, I do not want to spend all my evenings and weekends doing it!! I’m going to can another 25lbs of tomatoes next weekend though … that will make my pantry shelves (and my freezer room) very happy! Thanks for the tips! 🙂
Gotta love your honesty about canning! That I can definitely appreciate!
Tomato Pee!!!! You are a hilarious nut!!! I love you!
I’ve been doing a TON of canning…I love it! LOVE LOVE LOVE!
I’ve been making a lot of salsa, and instead of blanching the tomatoes (so much hate) I have been pulling out the stems and freezing them on cookie sheets. Then when I pull them out, I can run water over them and the skins slip right off. It seems to work much easier than blanching…if you have the freezer space for temporary storage! 🙂
Why thank you!
Are they softish green, or a hard green? If they’re hard, they’ll never ripen, but you can make fried green tomatoes or green tomato chutney. If they’re somewhat soft, they may ripen.
Last year I pulled all my plants in October, and then put tomatoes in paper bags (my kitchen was COVERED in these bags for a few weeks) and waited for them to ripen. Every day, I’d go through the bags (time consuming and annoying) and pull out any tomatoes that were ripening. If I had time that night, I’d do something with the ripe tomatoes (tomato soup was my default because it is the easiest) and can them that night.
I lost a bunch to rot (it’s so weird that as they ripened a lot of romas would develop blossom end rot), but I probably saved at least 45-60% of my green tomatoes this way. And we’re just about to eat the very last quart of tomato soup tonight!
Of course, now I see that was commented on before… 😀
Anyway. I am so madly in love with your blog. 🙂
Any thoughts on green tomatoes? I have a metric crap ton, and I’m pretty sure it’s going to freeze before they all ripen…
I’ve got a lot of soft ones and some hard ones. We probably have a few more weeks before we get a hard freeze, but I’d be so sad to see all those beautiful tomatoes go to waste!
🙂 I’d love to see your tomato soup recipe. My family goes through anything tomato based like crazy. I’m hoping to do some tomato sauce (depends on how hard it is, I’m pretty lazy) or spaghetti sauce. 🙂
You can totally salvage some of them! Soup and sauce aren’t hard, it’s just much much easier if you have a food mill or an immersion blender. Without either of those things, it’s going to take longer and be more challenging.
Do you think if you use this method of freezing instead of blanching, you could use it to keep ripe tomatoes from rotting while you wait for more to ripen? Or would the frozen tomatoes become too mushy if left frozen for awhiel? My biggest hurdle is not having quite enough ripe tomatoes all at once.
😀 Lucky me, I have an immersion blender and a food mill!! I’m so ready to go…
@SaraD–none of the ones I have in the freezer have gotten mushy yet, but I just used them to make salsa, so I’m not sure how they’d be otherwise. 🙂
@MSLisa…did you have correct head space on tomatoes?
I think that was the case. I did wipe the lids and canned for the exact amount of time
I am still grieving over my grandmother’s canned tomatoes. She and the neighboring farm ladies would come over (she had two stoves in her garage and it was all set up for canning industrial style) and the canning would begin. I spent most of my Summer picking tomatoes (and other produce), snapping beans and shelling peas. When her mother-in-law passed and the ladies’ started aging the canning stopped….. I was in my late teens and how was I going to make my famous Spaghetti Sauce with out Nani’s canned tomatoes???!!! I had to learn and adjust my cooking to use store bought. Long story long, I so long for canned goods. I had a tomato/salsa garden going years ago but I live in the burbs and my neighbor’s bamboo took over my garden plot. RRrrr, that is a whole different story.
What a great story you have!
Except the neighbor’s bamboo. I vote you cut it down and use the stalks as tomato cages for next year.
I’d try agricultural vinegar (higher acidity than home use) and hope to kill that bamboo. Hard to do. And I’d slide some sheet metal into the ground on the property line to prevent any more invasion. That stuff is rampant.
My tomato jar seals failed….so I froze the tomatoes! It was a bummer, but I will have to just try again. My pickes sealed so I am not sure what happened
Every single seal? That seems strange. I occasionally get 1 not sealing, but a whole batch seems bizarre.
Did you wipe the rims first? Was there enough water in the canner? Did you try a new kid of lid?
If that ever happens again, you can actually reprocess with new lids.
My Mother, Aunt Gertie, and Grandmother always placed newly-canned jars upside-down which they said increased the probability of successful sealing. What little canning I’ve done, I’ve done the same and never lost a jar.
This year, I canned some pickles in half gallon jars (COOLEST JARS EVER!!!!) and I flipped them upside down. The water juuuuust came to the top, so I figured turning them over would help, and they all sealed up. 🙂
I think I have only ever had one thing that didn’t seal, and that was a jar of apple pie filling that I filled up a little too full. 🙂 That’s ok though, it’s just as good on icecream…nom.
I do most of my canning at night as I don’t like interruptions.
About your phrase “tighten the rings” I totally take exception. You can remove
the rings but never tighten or adjust the rings once jar is out of canner.
I’ve never heard about not tightening the rings after processing. I’ve maybe had 1 jar go bad a year (maybe), so I can’t think that what I’m doing it harming the safety of the product.
I still don’t think you should promote tightening the rings. Just because you never had a seal go bad doesn’t mean it is correct. Sorry, but I have been canning for 40+ years now and have taught others to can. I know of what I speak. Since you are not aware, maybe buy a good basic book as the BALL BLUE BOOK OF CANNING as a start. If people are going to take you at your word you need to be responsible.
I don’t really see any reason for me to follow this anymore…just randomly came across the blog, so “bye”
Oh goodness gracious Elizabeth, you seem to be a person who needs more hugs in their life.
My original comment to you was inviting you to share your knowledge and experience and not brushing you off. But then you missed that opportunity, so we’re at an impass.
As a newcomer to your blog and a complete outsider looking in on this conversation, I’d like to comment. I’m not an expert on canning by any stretch of the imagination. But from what I’ve read and researched, the reason it’s suggested to not leave the rings tight on the jar is so that if somehow the seal goes bad, it won’t re-seal because there’s a tight ring on the jar. If that were to happen, the food would be bad and you might not realize it because it still seems sealed.
What I’ve started doing is to loosen the rings, but still leave them on the jar. That way I’m not stuck storing a ton of random rings, but there’s not enough pressure on the lid to allow it to re-seal if it were to come loose somehow.
I hope that helps.
No, I’m fine with hugs. I was interested to see your reply and if you would admit that you did do a little research, but I see not, going with the flip comment instead.
Love the easy tutorial!! I do LOVE having the “fresh” produce, but yeah…canning isn’t easy. Loved your comparison to childbirth. Ü
Have you considered freezing some? Maybe with your quantities, that wouldn’t be such a great idea, but I blanched & peeled several romas, then froze them in a quart size bag. (I actually froze them separately on a cookie sheet first, but now that I think about it, that probably wasn’t necessary since it equates to about one big can per bag, and I shouldn’t need to split them up further…)
Yep, I have frozen in the past, but I prefer a mix of frozen and canned just in case the power goes out or something.
Do you know that you don’t have to blanch and peel them before freezing? When you go to thaw them out, the skins will slip right off!
When you freeze then thaw, the skins slip right off, just like in the photo above. My heart and feet hurt for you thinking of all the blanching you did!!
When we lived in Los Angeles I didn’t have a pressure canner and I don’t think I canned any tomato products too often. My go-to was freezing them whole (FWIW, the freezing them on a cookie sheet first is what I did too) and then putting them in a dish on the counter to thaw out when needed. The skin comes right off. They mush up, so you won’t be eating them “fresh”, but they’re perfection for for stews, soups, and other things you’re going to cook up!
Holy Crap! When you freeze the skins fall off!? I can’t believe I spent so many hours in my kitchen last year… Such wasted time. I know better for this year – Thanks!
Wow your blog is an inspiration. I have braved the world of canning this year and have put up 16 pints of pickles and four quarts of tomatoes. I can’t believe all the canning that you do (And work btw….I work too and can understand the challenge!)
Do you think you supply most of your veggies and fruits this way?
Thanks MSLisa! I definitely started small with canning (I’ve been doing it almost 7 ish years), and am just now in a place where I’m doing what I’d consider a lot.
I would say I supply most of our winter fruits with canning (we didn’t run out of applesauce until May), but not the veggies. So far I’ve mainly pickled veggies which don’t really hold up well as a side dish to dinner. We have a fall/winter garden that I put in (kinda late) that I’m hoping will supply us with spinach and at least lettuce. I’m probably way too late with the brussels sprouts and cabbage to get anything until spring.
DUDE, that was a lot of work. I am exhausted for you! And so impressed with your reader/canners.
It’s all for you baby. For whenever you come visit.
Thank you SO MUCH for this easy to understand tutorial! I just bought a ton (or slightly less) of local tomatoes yesterday to can, since I didn’t have a garden this year. This will be my first time doing canning and this post just made me feel so much better about getting started. Others made it seem so much more daunting – the pics here are great for a visual learner like me.
“Always use a trusted guide for canning times. I am not a trusted guide.” <—-Love this! Ha!
Melinda, good luck! It’s a hard thing to do at first because you need 6 arms, and 3 people helping, but eventually you’ll get your groove and it becomes easier!
I’ll be canning more tomatoes this weekend, so shoot me an email if you run in to trouble and need a hand.
I’ve been meaning to drop in and say, “Hi! I just love your blog. Can we be friends?” for quite some time. I have been a blog-voyeur and took your advice to make to make vanilla and lotion bars last fall. Huzzah! Awesome! Reading your blog has given me the spark to create my own. It’s not ready yet, hopefully before the end of the year, work- and home-life willing. Thanks!
Monica, thanks so much for the comment and for being a reader! I’m stoked that I’ve given you a few ideas to try at home!