As an Amazon Associate, I earn from qualifying purchases.
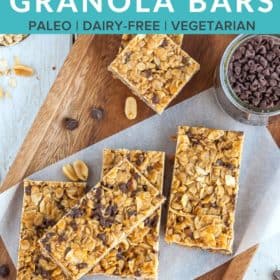
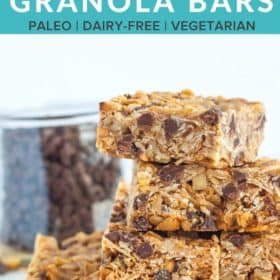
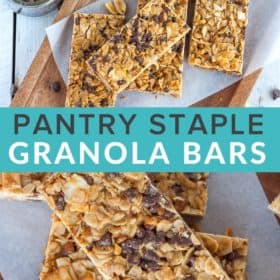
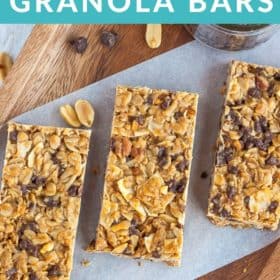
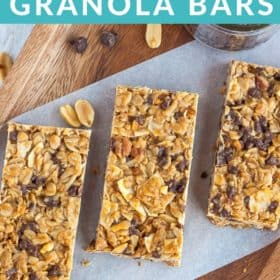
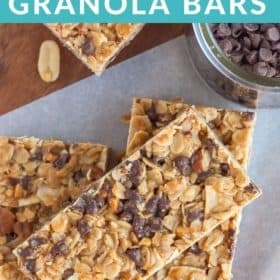
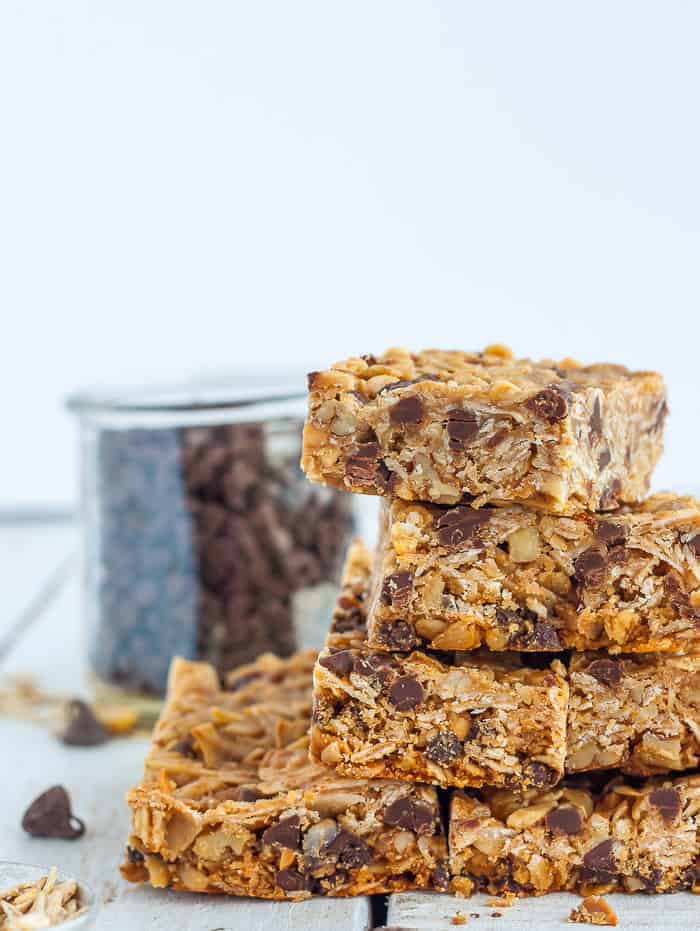
Peanut Butter Chocolate Chip Granola Bars are a delicious and easy treat made in your own kitchen. Bypass the overpriced packaged bars at the store and make your own with just a few simple pantry ingredients!

The problem with so many homemade granola bar recipes is that they are advertised as no-bake. Which is great from a time standpoint, but sucktastic in keeping them together and preventing epic meltdowns when they fall apart in your kiddo’s hands.
Don’t worry, you got this. I’m going to teach you the secrets to delicious homemade granola bars that a) stick together b) are easy to make and c) taste like unicorn tears are the main ingredient.
Quick head’s up: if you’re looking for an oat-free version of this kind of bar, check out my Trail Mix Bars! They are truly a no-bake snack bar.
How do I get my homemade granola bars to stick together?
The real secret to keeping granola bars from turning into oat dandruff is twofold. One, make sure you have the right ratio of “wet” to “dry ingredients”. Two, press the mixture together to compact everything. It’s really that easy.
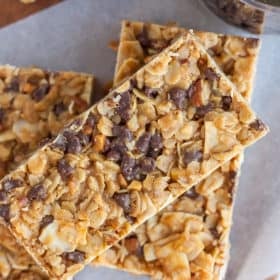
Here’s How to Make Peanut Butter Chocolate Chip Granola Bars:
*You’ll find a detailed and printable version of this recipe at the bottom of the post.
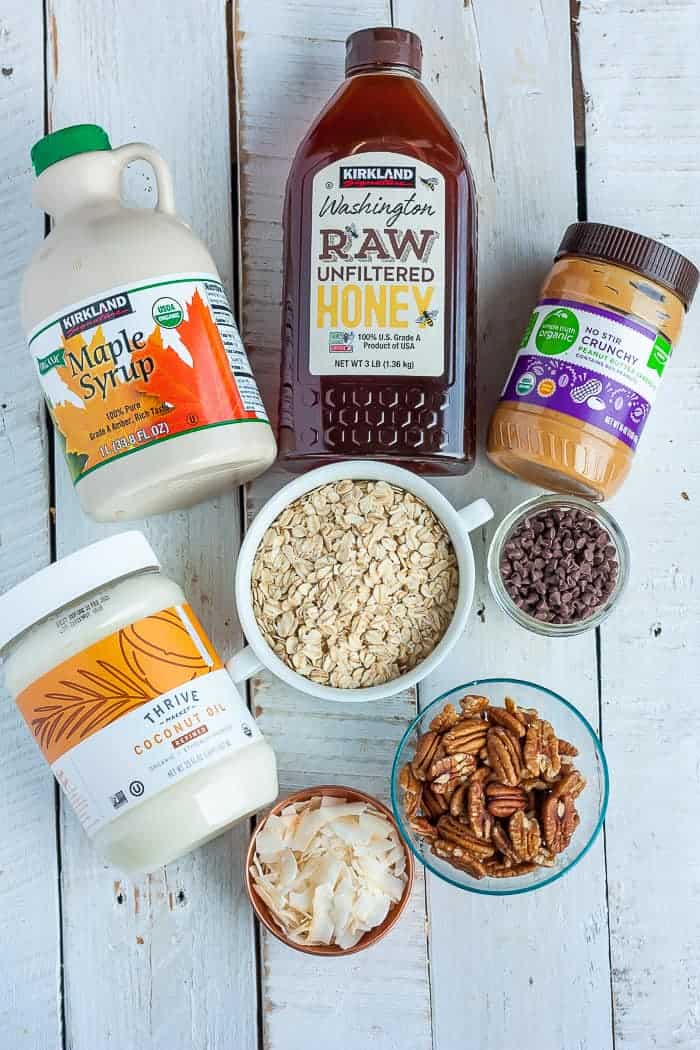
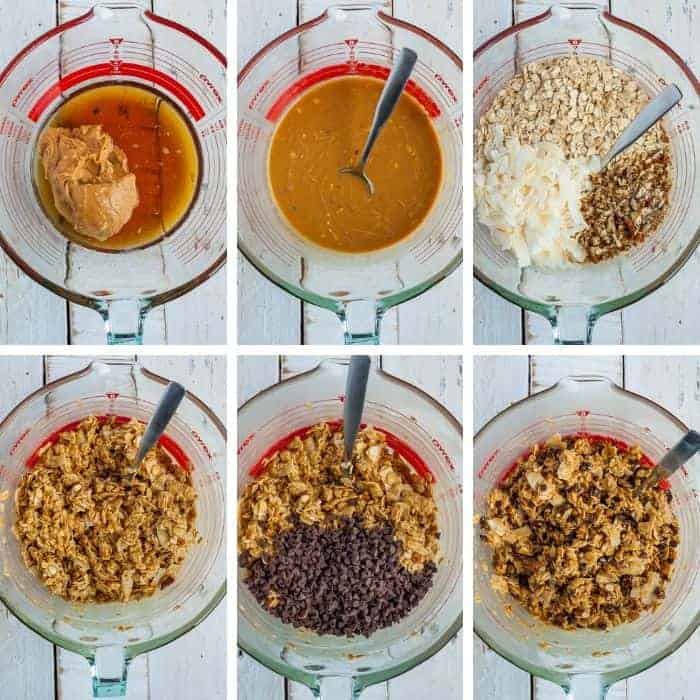
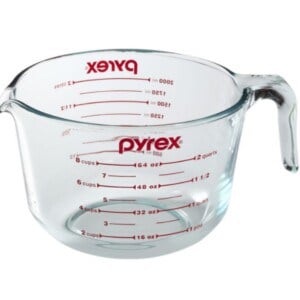
Combine your liquids in a microwave-safe bowl (I love this giant measuring cup), and heat for 30 seconds in the microwave. Stir to combine. Pro tip: if you’re using raw honey, add it to the coconut oil, maple syrup, and peanut butter after you have microwaved it.
Add in your dry ingredients, excluding chocolate chips (if using) and mix to combine. Let it cool for 10 minutes and then add the chocolate chips.
Lay parchment with some overhang in your baking pan, and pour the mixture in. Lay a piece of parchment over the top and with your hands, smooooosh everything down to compact it. Pro tip: after using your hands, use a heavy dish or bowl with a flat surface to pact everything down even more.
Then you’re going to bake it for 15- 20 minutes and allow it to fully cool before you cut your bars.
If you want to turn the mixture into granola, follow the baking instructions in this Paleo Muesli recipe.
Pro Tips/Recipe Notes:
- For a truly no-bake granola bar, follow the recipe notes on packing the mixture into the pan. You’ll need to refrigerate them for 2-4 hours before cutting into bars. They will need to be stored in the fridge to keep their shape.
- Need vegan substitutions? Use all maple syrup or brown rice syrup in lieu of honey.
- Can’t use coconut oil? Try another mild-tasting oil like walnut or avocado. Olive oil would work, but I would avoid virgin or extra-virgin since the olive taste is stronger.
- You can use creamy or crunchy peanut butter in this recipe.
- Aim for no-sugar-added peanut/nut butter.
- Save any crumbs to top Cold Start Instant Pot Yogurt or Traditional Instant Pot Yogurt.
Variations on Homemade Granola Bars
- Use dried fruit and/or more nuts instead of chocolate chips.
- A reader named Susie told me she used Nutella instead of peanut butter. OMG, yum!
- Try adding chia, hemp, flax, sunflower, or pumpkin seeds to the mix.
- Use your favorite nut butter like Cinnamon Almond Butter, in place of the peanut butter if desired. You may need to add a pinch more coconut oil if your preferred nut butter doesn’t have the same consistency as peanut butter.
- Use soy nut or sunflower seed butter if you have peanut or tree nut intolerances.
Peanut Butter Chocolate Chip Granola Bars
Ingredients
- 1 cup natural peanut butter
- 1/3 cup honey
- 1/4 cup pure maple syrup
- 1/2 cup coconut oil {melted}
- 2 cups old-fashioned oats
- 1 cup coconut flakes, shredded and unsweetened
- 1 cup chopped pecans or nuts of choice
- 2/3 cup mini chocolate chips
Instructions
- Preheat your oven to 325 degrees.
- In a large microwave-proof container, melt the coconut oil until it yields 1/2 cup liquid. Add the peanut butter, honey, and maple syrup, and microwave for another 30 seconds. Stir to combine.
- Add the oatmeal, pecans, and coconut flakes. Stir to combine. Cool for 10 minutes. Add the chocolate chips, and stir.
- Lightly grease a 9×13 glass pan and then add a sheet of parchment paper. Allow for some parchment to hang over the sides of the pan.
- Press the mixture in using the back of a large metal spoon. {Sometimes I will even lay another piece of parchment over the top and then use a heavy cast iron skillet or another baking pan to press and compact it down further.}
- Bake for 15 minutes. Remove from the oven and bring to room temperature. Then refrigerate for at least four hours.
- Cut into small squares or bars.
Notes
Nutrition
Nutrition information is automatically calculated, so should only be used as an approximation.


Love these bars! They are absolutely delicious and so easy to make! They were all gone on the first day!I will be making them again soon!
Carol, I’m so thrilled you liked them so much! Thank you, thank you, thank you for taking the time to leave a comment! 🙂
My mother in law loves these! As does the whole family! Thanks!
So glad to hear. 🙂
I finally made some! I made the following substitutions:
Quinoa flakes (instead of oats)
Sunflower/pumpkin/flax/chia seeds (instead of coconut flakes)
Nutzo nut butter (no peanut butter)
Next time I may add more quinoa flakes and more seeds. And I’m excited to try them with raisin and dried apples!
It’s super dense and yummy! I need to cut back on the honey and syrup next time (I may have used too much). Thanks for the recipe!
I love the additions/substitutions, Tina!!
If you do leave out some of the liquid sweeteners, you may need to increase the coconut oil a tiny bit.
These should be classified as dessert! So good! I made these so I’d have a quick breakfast because I’m not really a breakfast kind of girl. Instead I’m using them as an afternoon treat for making it to 3 o’clock. I will definitely make these again but I might cut back on either the honey or maple syrup to make them less sweet and play around with the add-ins. Raisins would be yummy, or cranberries and almonds instead of chocolate and pecans. The sky’s the limit! Thanks for sharing
If you reduce the honey or maple syrup, just watch the moisture content. You might need to add a bit more oil or PB to keep them sticking together!
I don’t have oats right now, but I do have quinoa flakes. Gonna give it a try and see how it turns out!
Let me know how it turns out!
I have printed SO many of your recipes. You are right up my alley. 🙂
I have so many jars of just regular peanut butter. Would that be OK in this recipe? How about the maple syrup? Any reason, besides that it’s healthier, to use pure? I’d just like to use what I have on hand. Thank you!
Awww, thanks Angela! Use whatever you have on hand. It’s super customizable!