As an Amazon Associate, I earn from qualifying purchases.

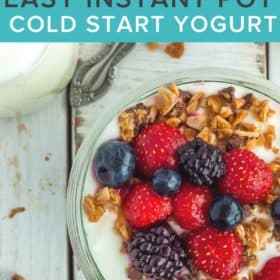
A super easy recipe for Cold Start Instant Pot Yogurt, you’re going to love how delicious and simple this is to make at home. Making your own no-boil yogurt allows you to control the ingredients and sugar content.

Have you always wanted to learn how to make homemade yogurt but were too scared to even start? That ends today! This recipe is literally “pour milk, stir, push buttons, walk away”. Get ready. You’re about to be impressed with your own awesomeness.
What is Cold Start Instant Pot Yogurt?
It’s the absolute easiest way to make yogurt at home in your Instant Pot. With a traditional Instant Pot yogurt making method, you heat the milk, then cool it to a certain temperature, and then add your starter (yogurt cultures) and “cook” it for 8 hours.
With the no-boil method, you simply add everything to your pressure cooker, push the yogurt button, and wait 8 hours. There is no babysitting of the milk temperature, and you still get amazing yogurt. It’s so creamy we use it in place of mayo in tons of recipes, including this Greek Yogurt Egg Salad, Chicken Salad With Dill, and Instant Pot Potato Salad.
What Kind of Milk Do I Need?
In order to make cold start yogurt, you must use ultra-pasteurized milk. Pasteurized milk or raw milk will not work using this method. If you’re using a different kind of milk, you’ll need to boil it prior to fermentation for safety. You can find those directions in this Easy Instant Pot Yogurt Recipe.
There is a popular brand of milk that is ultra-pasteurized AND ultra-filtered, but their farming practices don’t align with the values of this blog. It is also more expensive than the organic milk I can find on sale. I will say I have used four various brands of ultra-pasteurized organic milk (including lactose-free) and the results have been wonderful every time. There is no need to stick to a specific brand to get great results.
For the thickest and creamiest yogurt, use ultra-pasteurized whole milk. In the United States, whole milk contains 3.25% milk fat. You can use 2%, 1%, or even low-fat, but the texture will not be as creamy.
You can naturally thicken your finished product by straining it through a mesh strainer lined with a thin clean towel, or use something like this which is made for straining yogurt.
What Can I Use as a Starter?
You can use yogurt from the store as long as it contains live active cultures. Look for Lactobacillus bulgaricus and Streptococcus thermophilus. I use plain Fage (2 or 5%). You can also use powdered yogurt starter, following the directions from the individual manufacturers.
How Long Does It Stay in the Instant Pot?
Eight hours seems to be the sweet spot for fermenting the yogurt. If you prefer a tarter taste, increase the time to nine hours. Fermenting it longer will not produce a thicker yogurt.
Can I Sweeten No-Boil Yogurt?
Yes! You can sweeten it by adding sweetened and condensed milk or liquid coffee creamer (must also be ultra-pasteurized) to the milk before you start the fermenting process. You can also sweeten it after the fact by drizzling maple syrup or honey over your individual serving.
My kids took a few batches to adapt to the flavor, so I did sweeten it in the beginning. With each batch, I reduce any sweetener a bit to get them used to it. Pro parenting tip: if your kids are very brand loyal, put some yogurt in an old clean container of their favorite brand.
Can I Flavor It?
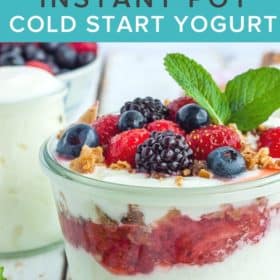
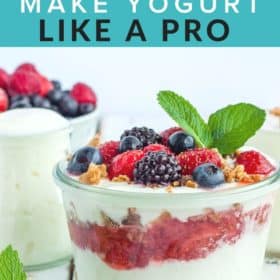
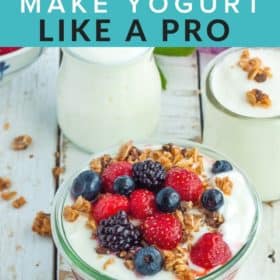
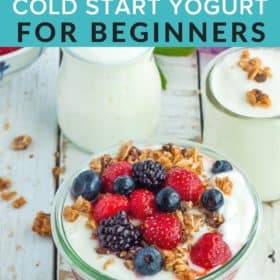
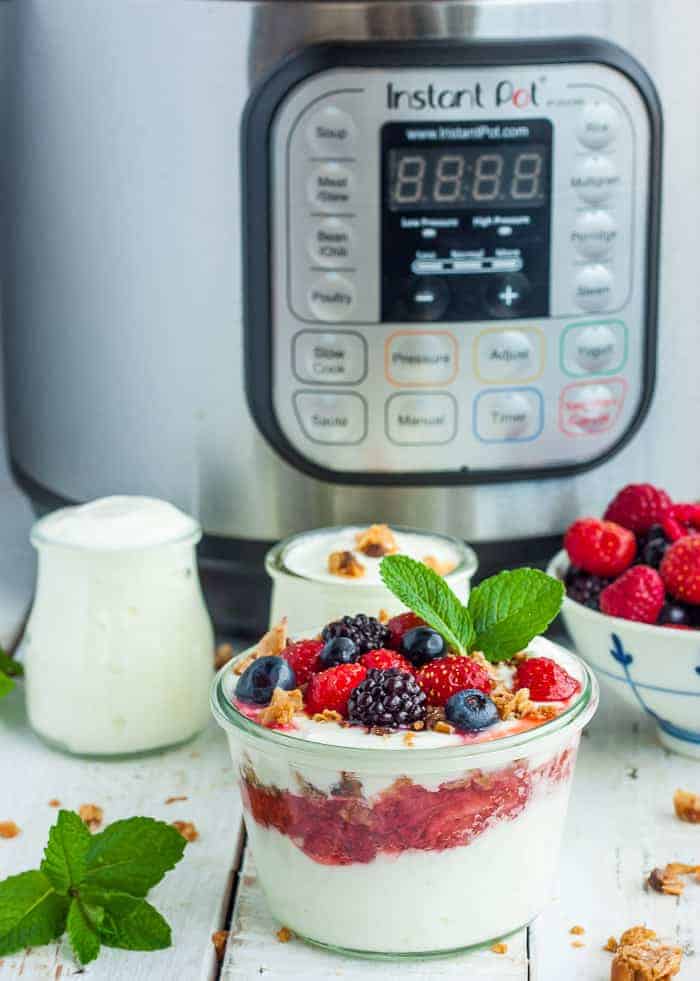
Yes! However, it is best to flavor it after it has finished incubating. Adding chopped fresh fruit, granola (we crumbled up these Peanut Butter Chocolate Chip Granola Bars), jam, Sugared Strawberries, Strawberry Puree, or fruit syrups like this Strawberry Syrup Peach Syrup, Peach Compote, or Blackberry Syrup.
Interested in making your own jams? Check out these recipes: Strawberry Freezer Jam, Low-Sugar Peach Freezer Jam, Blackberry Freezer Jam, No-Cook Raspberry Jam, or Canning Strawberry Jam.
Can I Double It? Cut it in Half?
Yes, you can halve this recipe or double it (as long as it doesn’t go above the max fill line). The fermenting time remains the same no matter how much milk you’re using.
Pro Tips/Recipe Notes
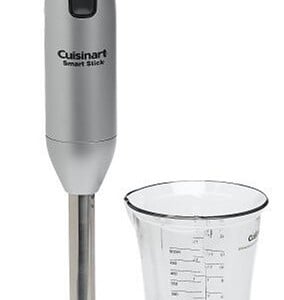
- To get the texture extremely smooth, blend the milk + starter in the Instant Pot with an immersion blender.
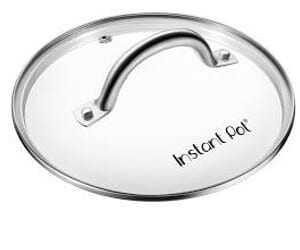
- If you are using the original pressure cooker lid, remove the ring to prevent odors from transferring to your yogurt. I prefer to use my glass lid, so I can keep an eye on it.
- It will store in the fridge for up to two weeks.
- Use some of your finished batch to culture the next batch. You can freeze it if you think it will be longer than 10-14 days before making more.
Cold Start Instant Pot Yogurt

Equipment
Ingredients
- 64 oz ultra-pasteurized milk
- 2 tbsp plain yogurt {with active live cultures}
Instructions
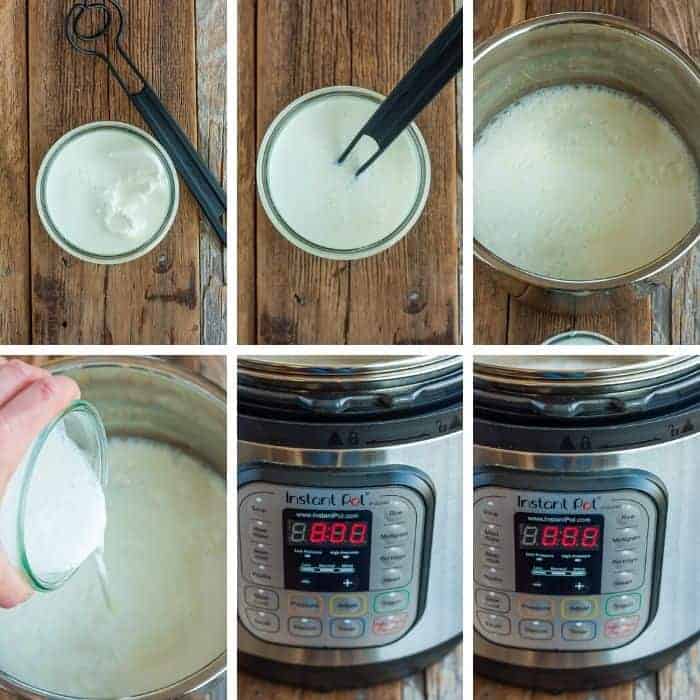
- In a small bowl combine 1 cup of milk and 2 tbsp of yogurt. Whisk very well until completely smooth.
- Add the yogurt mixture and the rest of the milk to the insert of the Instant Pot. If adding creamer or sweetened condensed milk, do so now.
- Use a glass Instant Pot lid, or the pressure cooker lid (ring removed) set to "venting".
- Press yogurt>normal pressure>8 hours. The time will start to count up (most Instant Pot recipes count down).
- When it has finished fermenting, remove the insert from the Instant Pot and place covered in the fridge for 6-8 hours.
- For true Greek-style yogurt, strain through a wire mesh strainer lined with a clean thin cloth for 2-8 hours in the fridge.
Notes
Nutrition
Nutrition information is automatically calculated, so should only be used as an approximation.


How will the Instant Pot do pressure cooking if you don’t use the pressure cooking lid with the ring? I’m curious as to how it works as a pressure cooker if you use the glass lid. Or is this just cooking and not pressure cooking. But then you said to put it to venting for the pressure cooking, I think. I’m just confused. Thanks. Oh, also, can I use Oat Milk? Why does the milk have to be ultra pasteurized? I’m trying to eat as healthy as I can so trying not to have cholesterol and other concerns in food.
Hi Pat, you are not pressure cooking the yogurt. Think of the Instant Pot as a warmer in this situation; it simply keeps the milk/yogurt at a consistent temp.
If you don’t have a glass lid then you would use the normal lid with the vent to venting to prevent it from getting any pressure in it.
You cannot use oatmilk for this version of Instant Pot yogurt. It has to be Ultra-pasteurized for the cold start process; otherwise you need to heat it and then cool it to a certain temperature before adding the culture.
After my first batch of using this method I am hooked! I used Fairlife whole milk the first time but also prefer to use organic, grass-fed milk. I tried it with Organic Valley ultra-pasteurized grass-fed organic 2% milk (didn’t have whole) and 2 Tbsp starter from my last batch of yogurt and it was way soupier and yielded double the amount of whey after straining. Tips on what went wrong? Have you used Organic Valley UP milk with success? Don’t want to keep wasting it!
Hi Ashley, I have not used Organic Valley before. I wonder if using the 2% contributed to the soupy(ier) consistency.
I do know that Fairlife is also ultra-filtered and readers have I talked to say that their yogurt comes out as thick as sour cream right from the Instant Pot.
Made this, will make again. I made 3 quarts and strained it down to just shy of 2 quarts. Since half the time I can only find UP milk anyway this is way faster than going through the whole boil~cool~inoculate~incubate process. Thanks Sarah!
Awesome so glad it was a hit for you!
I know you’re a baker Lindsay, did you use the whey for bread?
Actually, I just tried a new recipe today using the whey. So far I’m pretty happy with it, I think it’ll be a good soft sandwich bread.
That’s awesome! I’ve seen whey lemonade and I’m just not sure I can get on board with that.
How can I use the whey in the bread. Sounds interesting
Hi Susan, I have not tried it myself, but I assume she is using in in-place of other liquid when proofing the yeast. For me, it would be an experiment in how much is too much. My normal bread recipe calls for 2 cups of warm water or milk. I would probably start with 1.5 cups of warm water (what I normally use) and 1/2 cup of whey. And then evaluate the results.
I tried this yesterday w the unused quart of 2% milk (made yogurt the regular, boil way with the 1st quart of milk from this half gallon) and yogurt starter powder (previous yogurt was gone). It did not set up at all. Followed dirs exactly. Any ideas as to why it didn’t take?
Hi Sherry, did you use ultra-pasteurized milk? If the milk is not specifically labeled as “ultra-pasteurized” then it is not the correct milk for this recipe. “Regular” pasteurized milk must follow the traditional boil/cool/innoculate method for making yogurt.
If you still have the milk container, feel free to email me a photo of it to [email protected] and I’ll help you troubleshoot it.
Yes, it was ultra-pasturized. I’m going to try again with a new carton of ultra-pasturized whole milk (diff company) and the same starter powder and see how it goes. I usually just make a quart at a time (instead of a half gal) because our consumption isn’t super fast, but that shouldn’t affect things rt?
Nope, it shouldn’t impact it.
Are you following the steps for the powder starter? I know every brand is a little different.
I was wondering if the yogurt is transferred to jars before a cooling rest period would effect the set of the yogurt?
Nope, that should be fine and something I have done myself!
If you plan to filter it at all, I wouldn’t move it to jars until you’ve done that. If not filtering, you’ll notice liquid in the jars after a day or so. That is called whey and is normal. You don’t see much of it in storebought yogurt because of stabilizers and thickeners they add.
Against advice I made this yogurt using regular2% pasteurized milk as that’s what I had on hand. It was very runny even after the cooling period in the fridge, so I strained it, which was a bit of a nuisance but resulted in a most delicious very creamy yogurt. I don’t know if there’s a safety issue here but I’ll probably consume it in the next 4-5 days. Any thoughts?
I think you’ll be fine to eat it within a week. If you don’t think you’ll get thru it by then, you can freeze it. It will be a bit grainy upon defrosting, but still yummy!
You know I’m gonna be that reader… can I do this with dairy-free milk and yogurt?
Haha, I knew you would! I have not tested it. Wholefully.com has a great coconut milk yogurt tutorial that I would use in a heartbeat.
I’ve just set this yogurt going in my instant pot. I’m excited to see how it compares to my favourite store bought plain 2.5 % yogurt which I used for the starter. This could be the end of waiting for that yogurt to go on sale!