As an Amazon Associate, I earn from qualifying purchases.
Follow this step-by-step tutorial to learn how simple Canning Potatoes can be. Having canned potatoes on hand means your favorite soups, stews, side dishes, and roasts can be ready in a flash.

Imagine a life where you can crack open a jar of home-canned potatoes and suddenly, 50% of your dinner is prepped and ready to go.
Stop dreaming. That time is now.
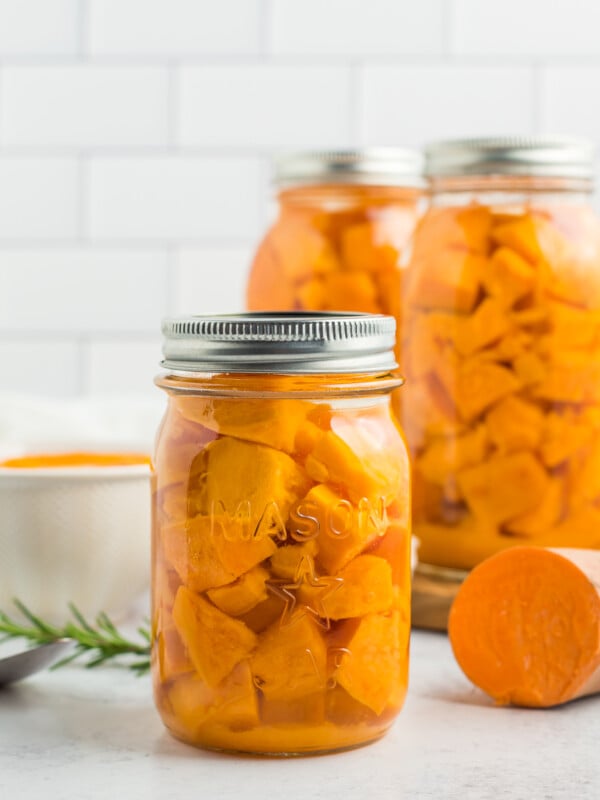
While this post is specific to white or baby potatoes, if you’re looking for a tutorial on canning sweet potatoes, check out our post on how to can sweet potatoes.
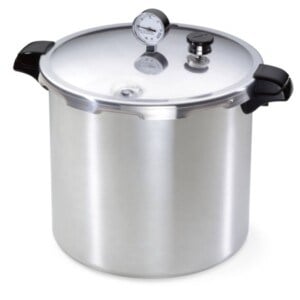
And before we get too far into this tutorial, I have to reinforce this point: you cannot safely can potatoes in a water bath canner.
HOW TO Pressure CAN Potatoes
*I’ll walk you through it here with some photos and tips, and you’ll also find a printable recipe card at the bottom of the post with exact measurements, etc. You can also click “jump to recipe” to skip down.
Canning Prep
Wash and clean your jars. It is no longer necessary to sterilize jars before canning (hurray!) but you should make sure they are preheated enough to not crack when placed in hot water.
You can put them in a clean dishwasher and run them through a quick wash cycle, or place them in a large pan with some water in a low-heat oven (my lowest temp is 170˚F degrees) until you need them. I’ve even just put hot tap water in them before and left them on the counter.
Wash your lids with hot soapy water. Rinse and place them in a clean bowl for now.
Preparing Potatoes for Canning
You’ll want potatoes that are waxy and great for boiling. In most cases, red potatoes work best.
Rinse and scrub your potatoes. Peel, and rinse again. Yes, you do have to peel potatoes in order to can them. Sorry!
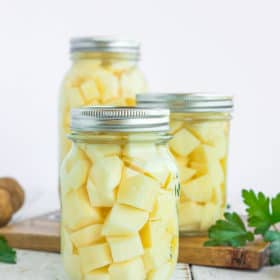
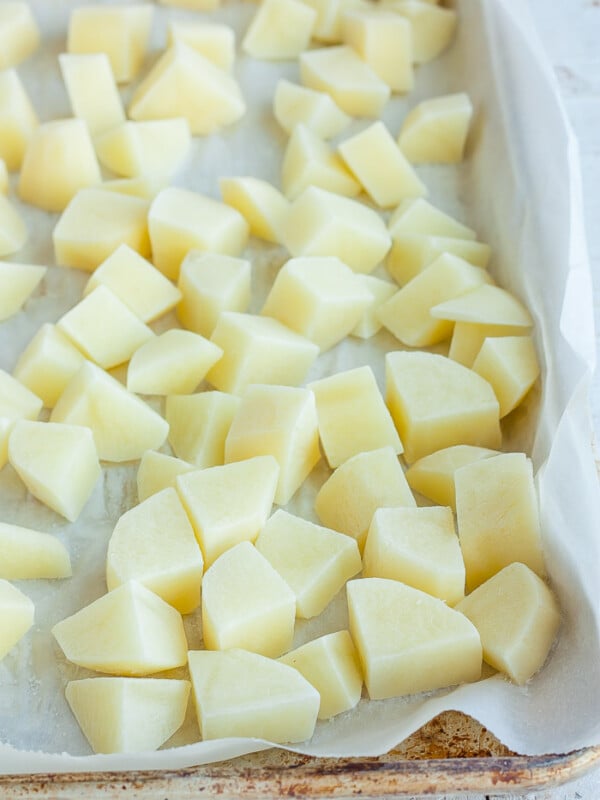
For canning diced potatoes – cut peeled potatoes into 1/2-inch cubes and rinse. Cook in boiling water for 2 minutes and drain.
For canning whole (baby) potatoes – choose small potatoes that are 1-2 inches in diameter. Cook peeled potatoes in boiling water for 10 minutes and drain.
Add 3 quarts of water to your pressure canner and put it on a burner set to high. Make sure there is a canning rack in the bottom of the canner. Fill a medium to large saucepan with clean water and bring to a boil.
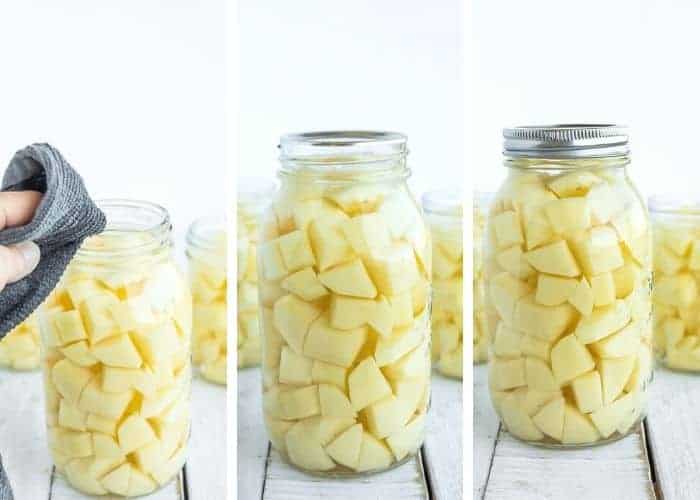
Add the hot potatoes to the jars. Pro tip: wiggle the jar often as you add them to allow them to settle and make room for more. You can also gently tap the jar on the counter as you fill them.
Using a canning funnel, carefully and slowly add the clean boiling water (do not use the same water you used to cook the potatoes), leaving 1 inch of headspace. Headspace is the distance between the top of the food and the top of the jar.
Using a long utensil (I prefer a plastic chopstick), remove all the air bubbles from the jar.

Clean the rim of the jar very well with a hot damp rag. Any food debris left on the rim may impact the seal of the lid in the canner.
Place a clean lid on the jar. Add a ring, and tighten them to fingertip tight.
How to Pressure Can Potatoes
Using canning tongs, gently place the jars in the canner. Lock the lid. Soon, steam will start coming through the vent pipe (I call it the steam chimney). Allow the steam to pass through for about 10 minutes. Then put the pressure regulator (I call it the chimney cap) on top.
Pretty soon, the air vent will pop up. That is a sign that you’re starting to build pressure inside the canner (get excited. This is happening!).

Processing times will vary based on altitude. See the chart below.
Pressure Canning White Potatoes in a Dial-Gauge Pressure Canner
| Canner Pressure (PSI) at Altitudes of | ||||||
| Style of Pack | Jar Size | Processing Time | 0-2,000 ft | 2,001-4,000 ft | 4,001-6,000 ft | 6,001-8,000 ft |
| Hot | Pints | 35 min | 11 lbs | 12 lbs | 13 lbs | 14 lbs |
| Quarts | 40 min | 11 lbs | 12 lbs | 13 lbs | 14 lbs | |
| *Source: National Center For Home Food Preservation | ||||||
Processing Time for White Potatoes in a Weighted-Gauge Pressure Canner
| Canner Pressure (PSI) at Altitudes of: | ||||
| Style of Pack | Jar Size | Processing Time | 0-1,000 ft | Above 1,001 ft |
| Hot | Pints | 35 min | 10 lb | 15 lb |
| Quarts | 40 min | 10 lb | 15 lb | |
| *Source: National Center For Home Food Preservation | ||||
When the dial gauge reaches the appropriate PSI, reduce the burner temp to medium, and start your timer. The pressure must stay at the PSI or (a little bit) above for the duration of the cooking time. You’ll likely need to adjust the temp on the burner a few times depending on your stove.
When the time is up, remove the canner from the burner and allow it to sit until you hear a distinctive “click” of the air vent dropping. Remove the pressure regulator and carefully remove the lid of the canner. (Pro tip: I always use oven mitts when I take the lid off because the steam is super hot).
Let the jars sit for 5 minutes in the canner and then carefully lift them out with canning tongs. Pro tip: allowing the jars to sit in the canner with the lid off can help reduce the siphoning of liquid in your jars. Siphoning is when liquid seeps out from under the lids and reduces the overall amount of liquid in the jar.

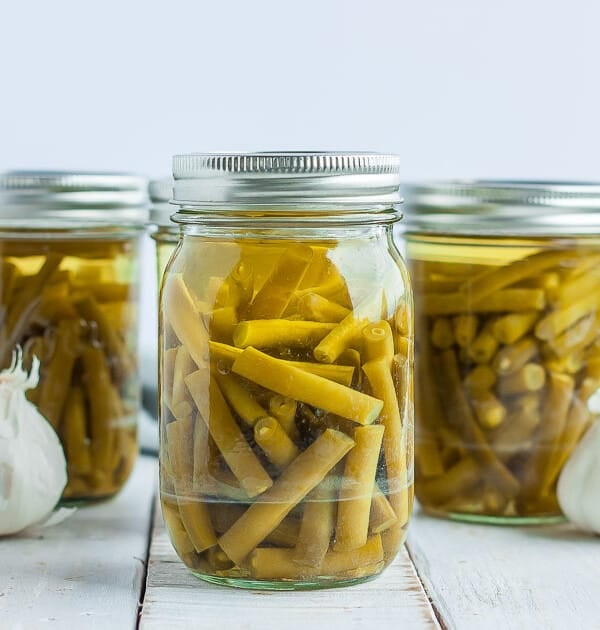
Place hot jars on a towel where they can sit undisturbed for 12 hours.
After a few hours, to check for sealing, gently press down in the middle of the lid. If the lid has no give, it’s sealed. If you can press the lid in and it pops a bit, your jars are not sealed.
HELP! WHY ARE MY JARS LEAKING WATER?
If you find that water has leaked out after they have sealed, you have experienced a common canning issue called siphoning. It happens to the best of us!
Siphoning is typically caused by not allowing the jars to rest in the canner after they have finished processing. In the directions, you’ll see that I recommend you remove the canner from the burner, remove the lid, and let it sit for 5 minutes.
This is important as it allows the jars time to rest before being allowed to cool on the counter. Doing this process will significantly cut down on siphoning.
IF YOU HAVE SIPHONING IN YOUR JARS, FOLLOW THESE STEPS:
- Check – are the lids still sealed?
- Look – have you lost less than half of the amount of liquid in the jar?
- Examine – do the potatoes look fresh with bright colors?
If the answer to the above three steps is “yes!”, then they are safe to eat. If you lost quite a bit of liquid, the uncovered potatoes will turn color more quickly. Plan to eat those jars first.
Pro Tips/Recipes Notes
- As you prep your potatoes, add them to a large bowl of ice water to keep them from browning. You can also use a bit of ascorbic acid in the water, but I don’t find that it has been necessary.
- You can add salt to each jar prior to canning it. Use pickling salt and add 1/2 tsp per pint or 1 tsp per quart. Personally, I find the unsalted version easier to use in recipes because it allows me to control the overall sodium.
- Pressure canners can often leave white lines on lids and rings. It’s totally normal and safe. To prevent this, add 1/3 cup of white vinegar to the canner with the 3 quarts of water before processing.

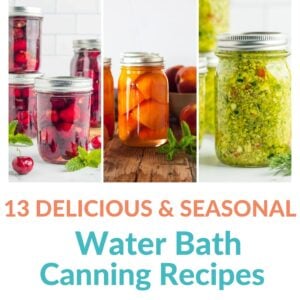
Get my Canning e-book!
It’s 51 pages of every helpful tip and trick you could want as a brand new canner, AND it includes 13 ad-free canning recipes that are designed to take you from novice to pro.
How To Can Potatoes
Ingredients
- 20 lbs potatoes {red or waxy potatoes suitable for boiling}
- 7 tsp canning salt {optional}
- 12 cups water + more for the canner
Instructions
Canning Prep
- Wash and clean your jars. Fill with hot water or keep them warm in a clean dishwasher or oven.
- Wash your lids with hot soapy water. Rinse and place them in a clean bowl.
Potato Prep
- Rinse and scrub your potatoes. Peel and rinse again.20 lbs potatoes
- For canning diced potatoes – cut into 1/2 inch cubes and rinse. Cook in boiling water for 2 minutes and drain.
- For canning whole (baby) potatoes – choose potatoes that are 1-2 inches in diameter. Cook in boiling water for 10 minutes and drain.
- Add 3 quarts of water to your pressure canner and put it on a burner set to high. Make sure there is a canning rack in the bottom of the canner.Fill a medium to large saucepan with clean water and bring to a boil.
- Add the potatoes to the jars. (optional) Add 1/2 tsp canning salt to each pint or 1 tsp to each quart.7 tsp canning salt
- Using a canning funnel, carefully and slowly add clean boiling water (do not use the same water you used to cook the potatoes), leaving 1-inch of headspace.12 cups water
- Using a long utensil (I prefer a plastic chopstick), remove all the air bubbles from the jar.
- Clean the rim of the jar very well with a hot damp rag.
- Place a clean lid on the jar. Add a ring, and tighten to fingertip tight.
Pressure Canning Potatoes
- Using canning tongs, gently place the jars in the canner. Lock the lid. Soon, steam will start coming through the vent pipe.
- Allow the steam to pass through for about 10 minutes. Then put the pressure regulator on top.
- Pretty soon, the air vent will pop up.
- In a dial-gauge pressure canner, process pints and quarts based on the elevation guide below (see processing chart in post for additional altitude adjustments):*0-2,000f ft {PSI: 11 lbs of pressure} = Pints 35 min, Quarts 40 min*2,001-4,000k ft {PSI: 12 lbs of pressure} = Pints 35 min, Quarts 40 min*4,001-6,000k ft {PSI 13 lbs of pressure} = Pints 35 min, Quarts 40 min*6,001-8,000k {PSI 14 lbs of pressure} = Pints 35 min, Quarts 40 min
- When the dial gauge reaches the appropriate PSI, reduce the burner temp to medium, and start your timer. The pressure must stay at the PSI or (a little bit) above for the duration of the cooking time.
- When the time is up, remove the canner from the burner and allow it to sit until you hear a distinctive “click” of the air vent dropping. Remove the pressure regulator and carefully remove the lid of the canner (Pro tip: use oven mitts to take the lid off because the steam is super hot).
- Let the jars sit for 5 minutes in the canner and then lift them out with canning tongs.
- Place on a thick clean towel undisturbed for 12 hours.
- After a few hours, to check for sealing, gently press down in the middle of the lid. If the lid has no give, it’s sealed. If you can press the lid in and it pops a bit, your jars are not sealed.
Notes
- Store in a cool dark place for 12-18 months.
- For seven quarts, you’ll need about 20 pounds. For nine pints, you’ll need 13 pounds. A US bushel is 50 pounds and will net you 18-22 quarts.
Nutrition
Nutrition information is automatically calculated, so should only be used as an approximation.


Thanks so much Sarah. I will purchase the book Thanks again
Enjoy, Nancy!
Do you have a book and will you share the name. I am a beginner thanks I was trying to find one so many I looked on Amazon to see if I could find one you wrote . Your instructions were very gód for me to understand. I think my canner will arrive tomorrow. Thak8 so much for your time and expertise.
Hi Nancy, I do have a book (you can find it by clicking this link) but it isn’t about canning. It’s about meal prep and freezing ingredients for meal prep.
If you run into any issues with canning, feel free to reach out to me!
I’m doing my taters now, using your tips. Warning, 20 lbs did 7 quarts and 8 pints. With almost 5 lbs leftover. Chopped small for hashbrowns.
Also I have been referring to my Bernardin book as your process times don’t match with there’s for altitude. So I used your tips and their method. Hopefully they turn out well.
I have been pressure canning for 13 years. So I am aware of the process. I appreciate the tips.
Hi Dee, what year is the publication date on that book? The sources I use are a university extension that is pretty deep into canning education. I just double-checked and their times were reviewed in 2018. Would be interesting to see the differences in the times/publication date.
I am confused, I put the canner on the stove to high and boil the water. Is there a certain amount to put in? Once it is boiling do I use that water to put in jars? And how much water to put in the canner for the jars? Is it the same water that was boiling, did I add to it, did I replace it? And once that is all answered, I put the lid on the canner while boiling the water with the jars in and leave it on high? It’s on high with lid on and no weight, does it get to pressure then lower the heat and add the weight ?
Sorry if it’s a dumb question.
Hi Uncle, the answers to all of your questions are actually in the printable recipe card in the post. I’m going to copy and paste them below, so it might look a bit jumbled. Bear with me on this!
Q: Is there a certain amount to put in?
A: (step 6 in the recipe card): Add 3 quarts of water to your pressure canner and put it on a burner set to high. Make sure there is a canning rack in the bottom of the canner.
Q: Once it is boiling do I use that water to put in jars?
A: (step 8 in the recipe card): Using a canning funnel, carefully and slowly add clean boiling water (do not use the same water you used to cook the potatoes), leaving 1-inch of headspace. (note: in this instance you can use a separate pot of clean water, an electric kettle, etc.)
Q: And once that is all answered, I put the lid on the canner while boiling the water with the jars in and leave it on high? It’s on high with lid on and no weight, does it get to pressure then lower the heat and add the weight ?
A: (these are answered in multiple parts of the recipe card so I’m going to copy and paste them all below for clarity):
(step 12 in the recipe card): Using canning tongs, gently place the jars in the canner. Lock the lid. Soon, steam will start coming through the vent pipe.
(step 13 in the recipe card): Allow the steam to pass through for about 10 minutes. Then put the pressure regulator on top. (the pressure regulator is essentially what you’re calling the weight)
(step 16 in the recipe card): When the dial gauge reaches the appropriate PSI, reduce the burner temp to medium, and start your timer. The pressure must stay at the PSI or (a little bit) above for the duration of the cooking time.
I hope that clarifies it a bit. If not, please feel free to email me directly at [email protected]. Maybe send me a photo of your canner and I can be more specific to your exact model.
I’m just learning how to can different vege,s. Thank you.
So glad that I can help, Carolyn!
All of mine siphoned. Are they still usable? I did seven quarts and followed the recipe to the word except I didn’t understand removing the lid in the canned at the end. If you remove the lid won’t it break the seal? Do you mean just remove the rings and leave the lid on?
Hi Sunny, you need to remove the lid of the canner – not the jars.
How much liquid is left in the jars? If it is easier to send photos, you can email me at [email protected] or if you’re on Instagram send me a DM at @sustainablecooks.
Recipe is good, I never peel my potatoes for any recipe. I prefer the diced potatoes to the sliced and dice them to 1/2″ cubes. I have utilized my insta-pot for canning small batches (mine fits 4 small mouth pint jars with a round wire rack under them). Reason I use the instapot, is that I dont feel like getting out my 23 qt canner for 1-4 pint jars when doing small batches. I do not wait till i get a lot, I can things as they need canning. E.g. I butcher 2 stewing hens, it only fills 1 jar per bird so I do it in insta-pot, same as beets , potatoes, carrots, etc. Works well for me!
Sustainable Cook’s note: the methods listed in this comment are deemed unsafe by canning experts. I do not recommend doing any of these things. My job is to teach safe and tested canning methods and you will find those listed above in my post.
If I were to water boil for sealing–instead of the pressure cooker
How long on a steady boil do I need to boil the potatoes for
Not a big fan on using pressure cooker
Thank you
You cannot safely water bath can potatoes. You must use a pressure canner.
Can u can russet potatoes?
You can, but they’re not ideal. I’ll copy and paste the info from the post addressing this:
WHAT POTATOES ARE BEST FOR CANNING?
You’ll want potatoes that are waxy and great for boiling. In most cases, red potatoes work best. Russets and Yukon golds are better left for baked potatoes, Instant Pot Potato Salad, or making mashed potatoes (like Boursin Mashed Potatoes, Wasabi Mashed Potatoes, Instant Pot Mashed Potatoes, and Fluffy Mashed Potatoes).
Why do you have to parboil the potatoes when it’s only potatoes but not when in beef stew? Second can we add chicken stock or broth to potatoes in stead of water?
Hi Aileen, I have never canned beef stew before, so I’m honestly not sure. I’m assuming because beef stew would be fully cooked before being canned.
And yes, you can add stock instead of water. Chicken stock only needs to be canned at 11 lbs of pressure for 25 minutes, so it would process even longer with the potatoes, therefore making it safe.
I have tried canning potatoes several times using red potatoes, but the liquid is always so cloudy. I realize this is the starch but yours look so clear and delicious. I am picky about how my canned goods look, and I am wondering if you have any idea why this happens to me. I am a very experience canner. I usually can between 500 nd 600 quarts per year. BTW National Center for Home food Preservation is my canning bible. Thank you.
I LOVE NCHFP!! They are definitely my go-to whenever people have questions about elevation processing adjustment.
Do you follow the steps of rinsing and switching out the water for clean water every step of the way? That seems to get rid of most of the starch for me.
In “The All New Ball Book of Canning and Preserving”, there are several recipes canning uncooked potatoes with seasoning and hot broth. That would not be that different from using water and salt. I peel mine and leave them soaking in cool water until it is time to fill the jars. It works very well and the potatoes taste great. I pressure can them per the approved time and pressure guidelines and size of jars used.
Do you have a publish date for that book so I can look into it?
I had a New Ball Book of Canning that was well over 20 years old. For safety purposes, I only educate my readers on processes that are 1-3 years old to make sure I’m giving them the most current safe practices.
I just ordered the New Ball Book of Canning from Amazon. It says the publication date is May 31, 2016. Going to try to can potatoes for the first time here soon!
You’ll do great! Just remember, pressure canner only!
Hi
Could I can sliced potatoes? Peeled and everything.
Thanks!
Melody
Melody, yes you can but they may get mushy given the time needed to safely can them.
Just getting into canning the extras from our garden.
It’s a fantastic way to preserve the bounty!
Potatoes can be raw-packed canned as long as they are kept in cold water up until the point of packing to prevent browning. Also, skins do not need to be removed, especially on red skin potatoes. The end result will be cloudy liquid, but it is harmless. Simply drain and cook potatoes to your liking. I have done both many times with a lot of success and with guidance from the Ball Blue Book of Canning.
Hi Amber, what is the publish date on the Ball Book of Canning that you are using? Every single current source I have read does not list raw pack or leaving the peels on. My Ball book was published in 2006 and specifically says to peel and hot pack. The National Center for Home Food Preservation also requires peeling and a hot pack process.
I do know that canning methods/best practices often change so it would be worth a look at which edition are you are using.
can I use my instapot in place of a pressure canning pot?
Unfortunately no. It is not large enough and not safe for canning.
I do have a tutorial for how to freeze potatoes if you don’t have a pressure cooker: https://www.sustainablecooks.com/can-you-freeze-potatoes/