As an Amazon Associate, I earn from qualifying purchases.


This easy Butternut Squash Chili is a delicious and hearty meal that the whole family will love. This tasty chili recipe has Instant Pot, stovetop, and meatless options.

Today, with this incredible butternut squash chili, we’re kicking canned soup to the curb and making home cooking cool again.
If you’re looking for chicken chili, you’ll love our easy Instant Pot chicken chili. If you need a bean-free version, Instant Pot turkey chili is the way to go.
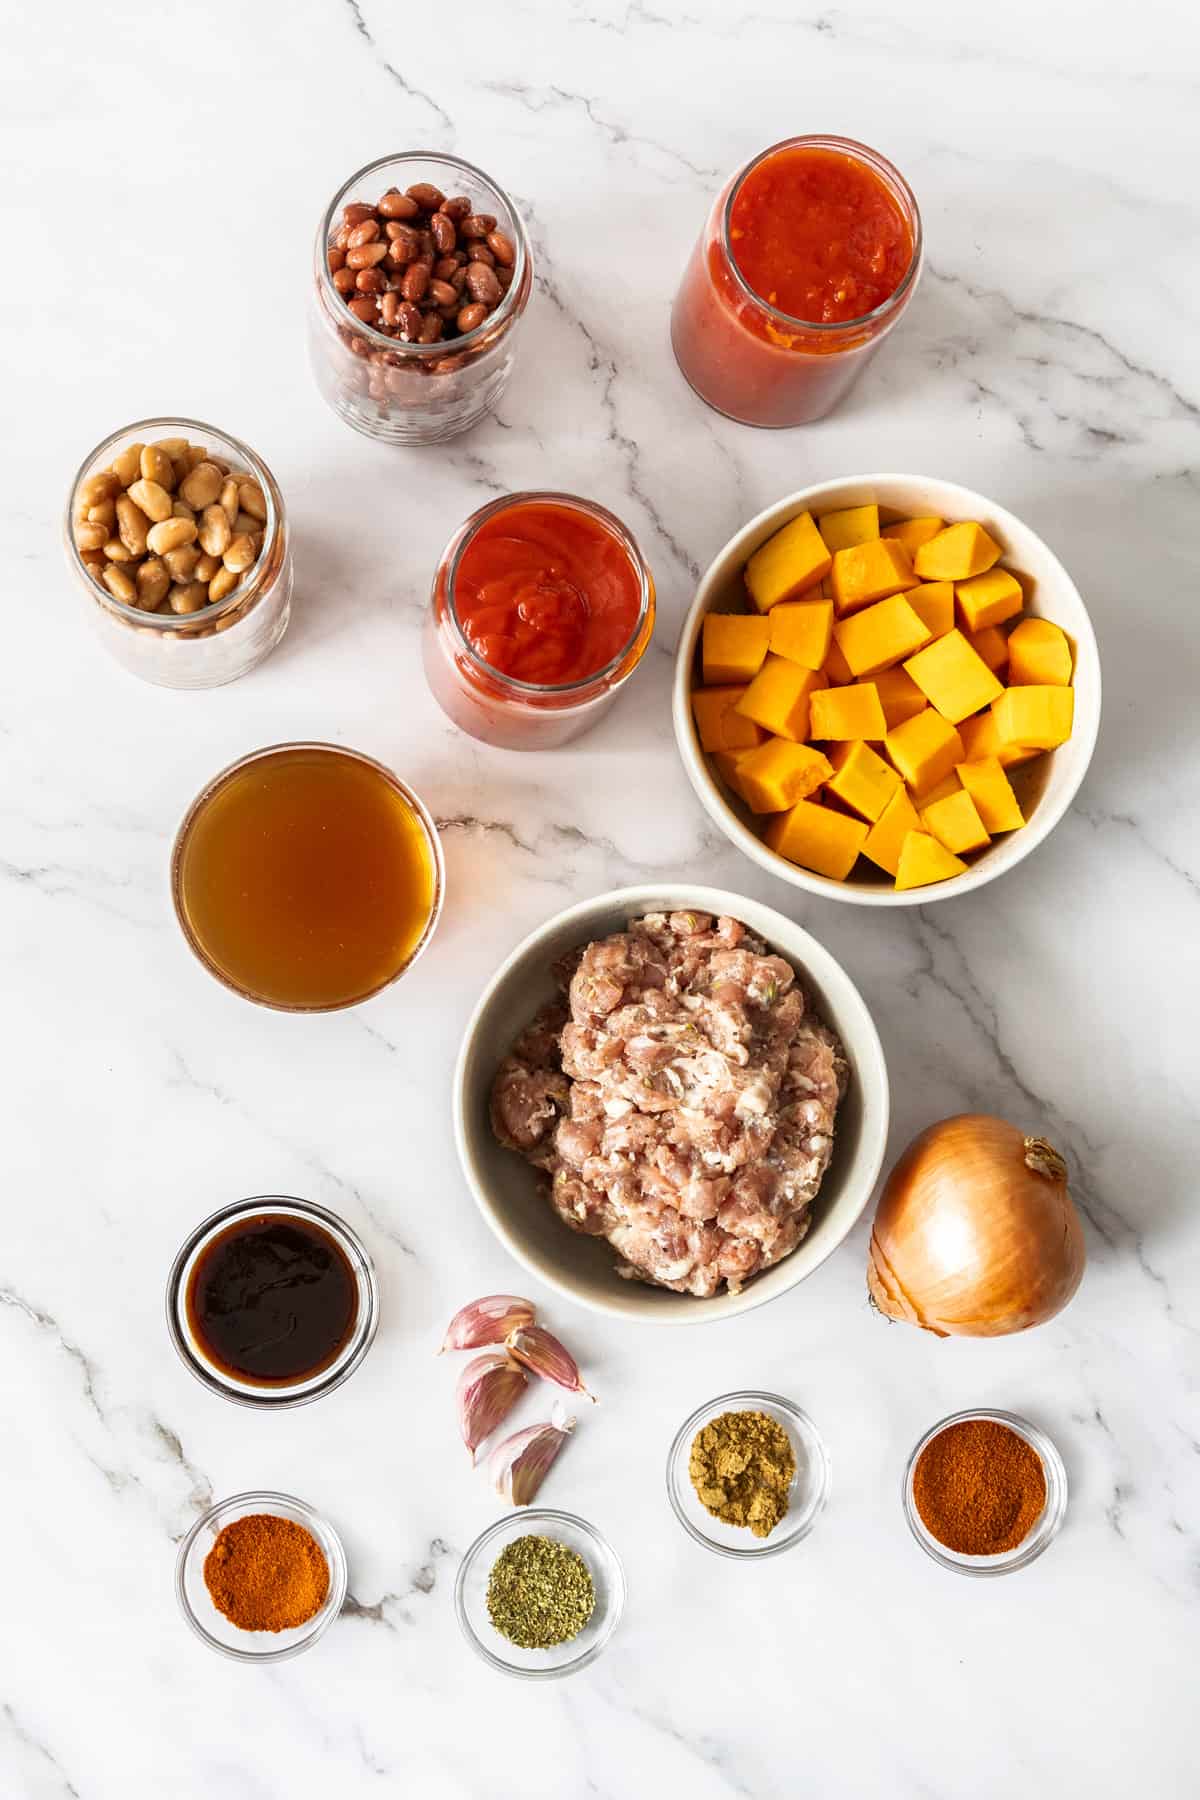
Ingredients
WHAT KIND OF BUTTERNUT SQUASH CAN I USE IN Chili?
You can buy butternut squash “pre-cubed” or whole.
I prefer using frozen butternut squash cubes in this chili, because it’s affordable, fast, and easy. You do not need to defrost the squash before adding it to the chili.
How to Make Butternut Squash Chili
*I’ll walk you through it here with some photos and tips, and you’ll also find a printable recipe card at the bottom of the post with exact measurements, etc. You can also click “jump to recipe” to skip down.
This will cover the Instant Pot method, but you’ll also find stovetop options in the printable recipe card.
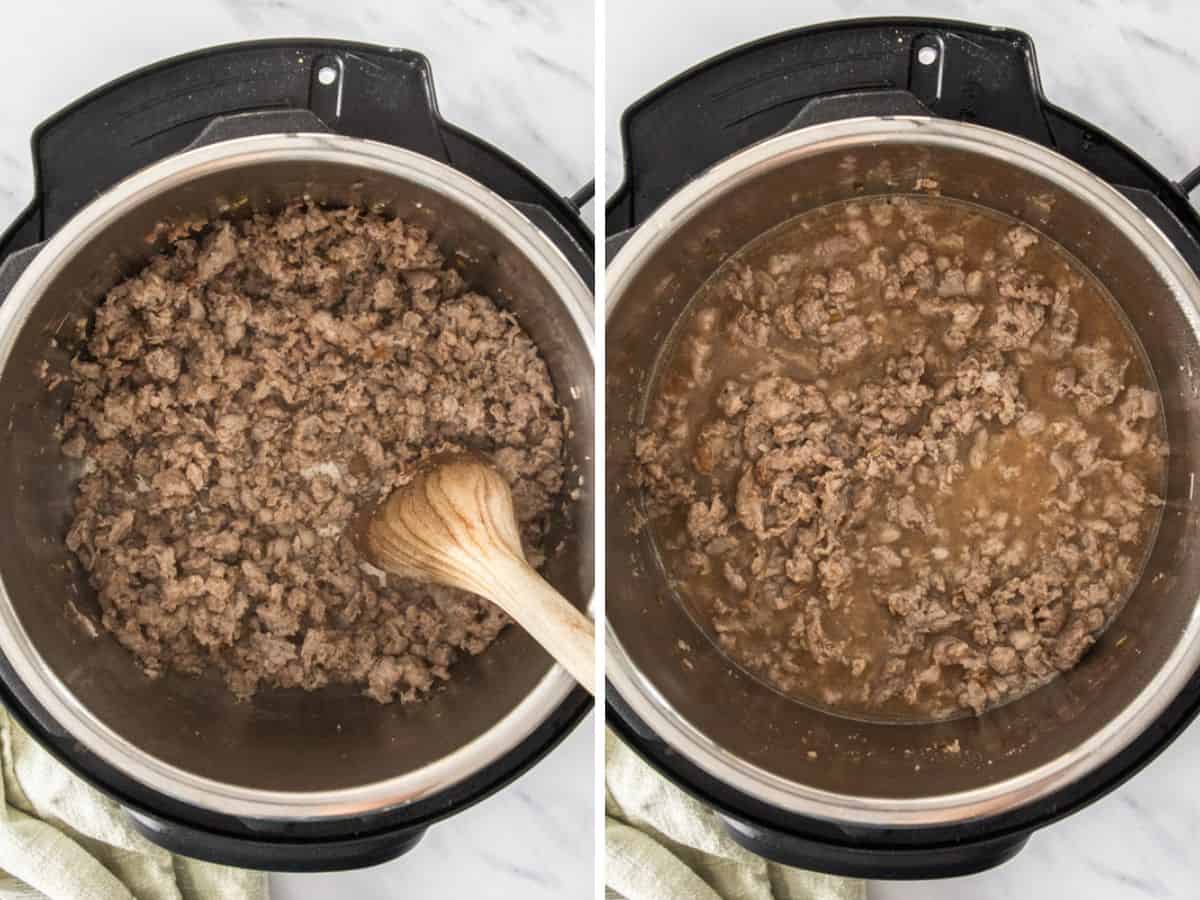
Press “saute” on the Instant Pot and allow it to heat up. Add the ground sausage to the insert of the Instant Pot, and cook until browned {~5 minutes}. Drain any grease
Add the beef broth and use a wooden spoon to deglaze (scrape) any browned sausage off the bottom of the Instant Pot insert. Food stuck to the bottom of an Instant Pot may prevent it from coming to pressure or it may give you a burn notice.
Next up, add the rest of the ingredients: butternut squash, onions, garlic, canned tomatoes, spices, and beans.
Lock the lid into place and set the steam release handle (valve on top) to “Sealing”. Then press Manual>High Pressure>8 minutes.
When the chili has finished cooking, the Instant Pot will beep and switch to ”keep warm”. Allow it to sit with the lid on for 10 minutes and then do a manual release with the nozzle set to venting.
Carefully open the lid and give everything a stir. If you’re happy with the consistency, serve it as is and go live your best life.
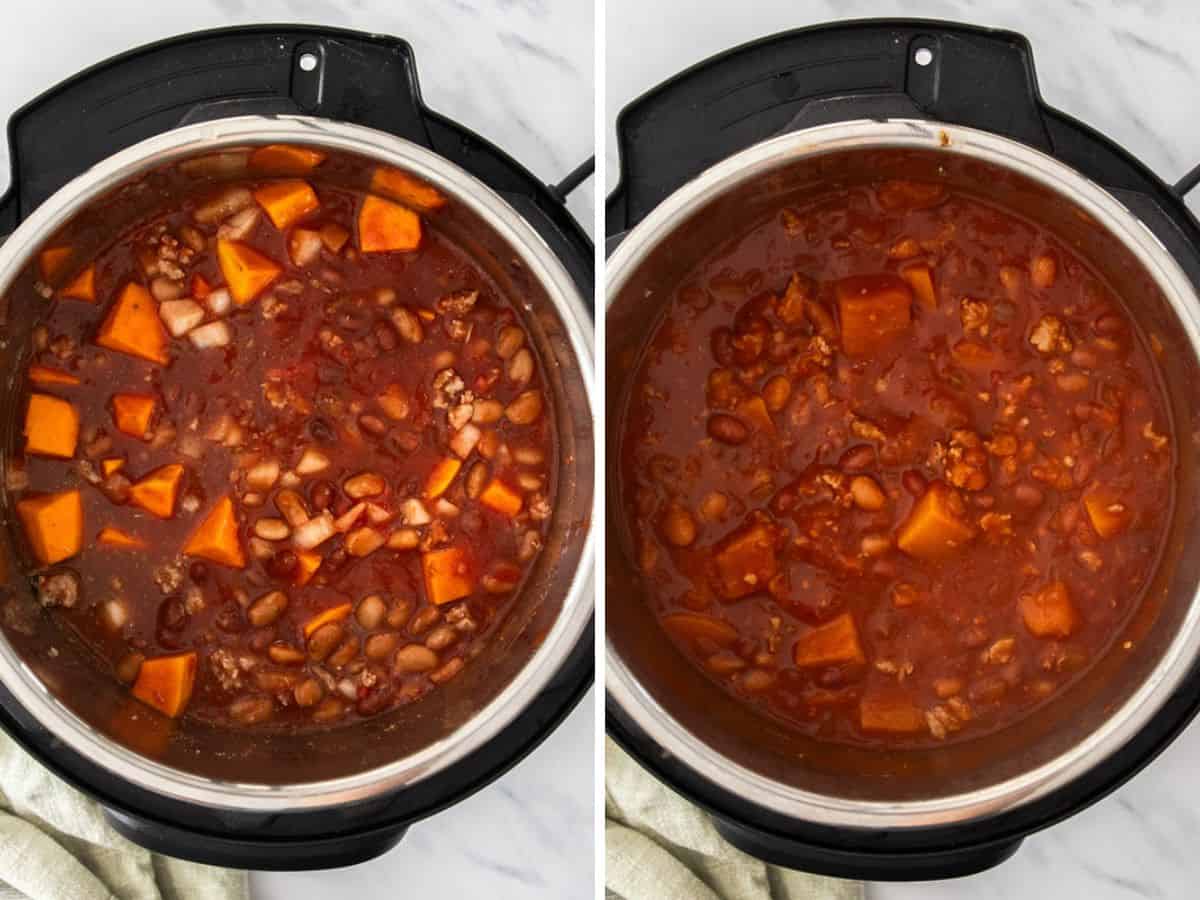
I love to thicken it up a bit, which requires an easy (but) fast extra step. Start by combining 3 tbsp of cornstarch and 1/4 cup of broth from the instant pot in a small bowl. Whisk it really well and add it back to the chili in the Instant Pot.
Press “saute” again on the Instant Pot and cook the chili with the cornstarch slurry for 3-5 minutes, or until thickened.
Variations
Feel free to make this chili plant-based by replacing the sausage with additional beans, or vegan sausage crumbles. You can also use vegetable broth instead of beef broth.
If you prefer a thicker chili, you can: 1) thicken the finished chili with a cornstarch slurry (see recipe card for details) 2) use an immersion blender to puree a bit of the chili after it has cooked or 3) add 4 oz of softened cream cheese (so good).
If you’re cooking for people with milder tastebuds, you can start by adding less chili powder than recommended. Taste the chili once it has finished cooking, and add more chili powder, a pinch at a time until it is perfect for you.
Make your prep even easier by learning how to freeze garlic and how to freeze onions.
Use any leftover squash to make air fryer butternut squash. And in a pinch, you can use frozen pumpkin instead of butternut squash.
Pro Tips/Recipes Notes
- Once the meat is about halfway cooked, I use a meat masher or pastry cutter to dice it up into really small pieces.
- Sub in stewed tomatoes for diced if you have any. Related: Canning Stewed Tomatoes
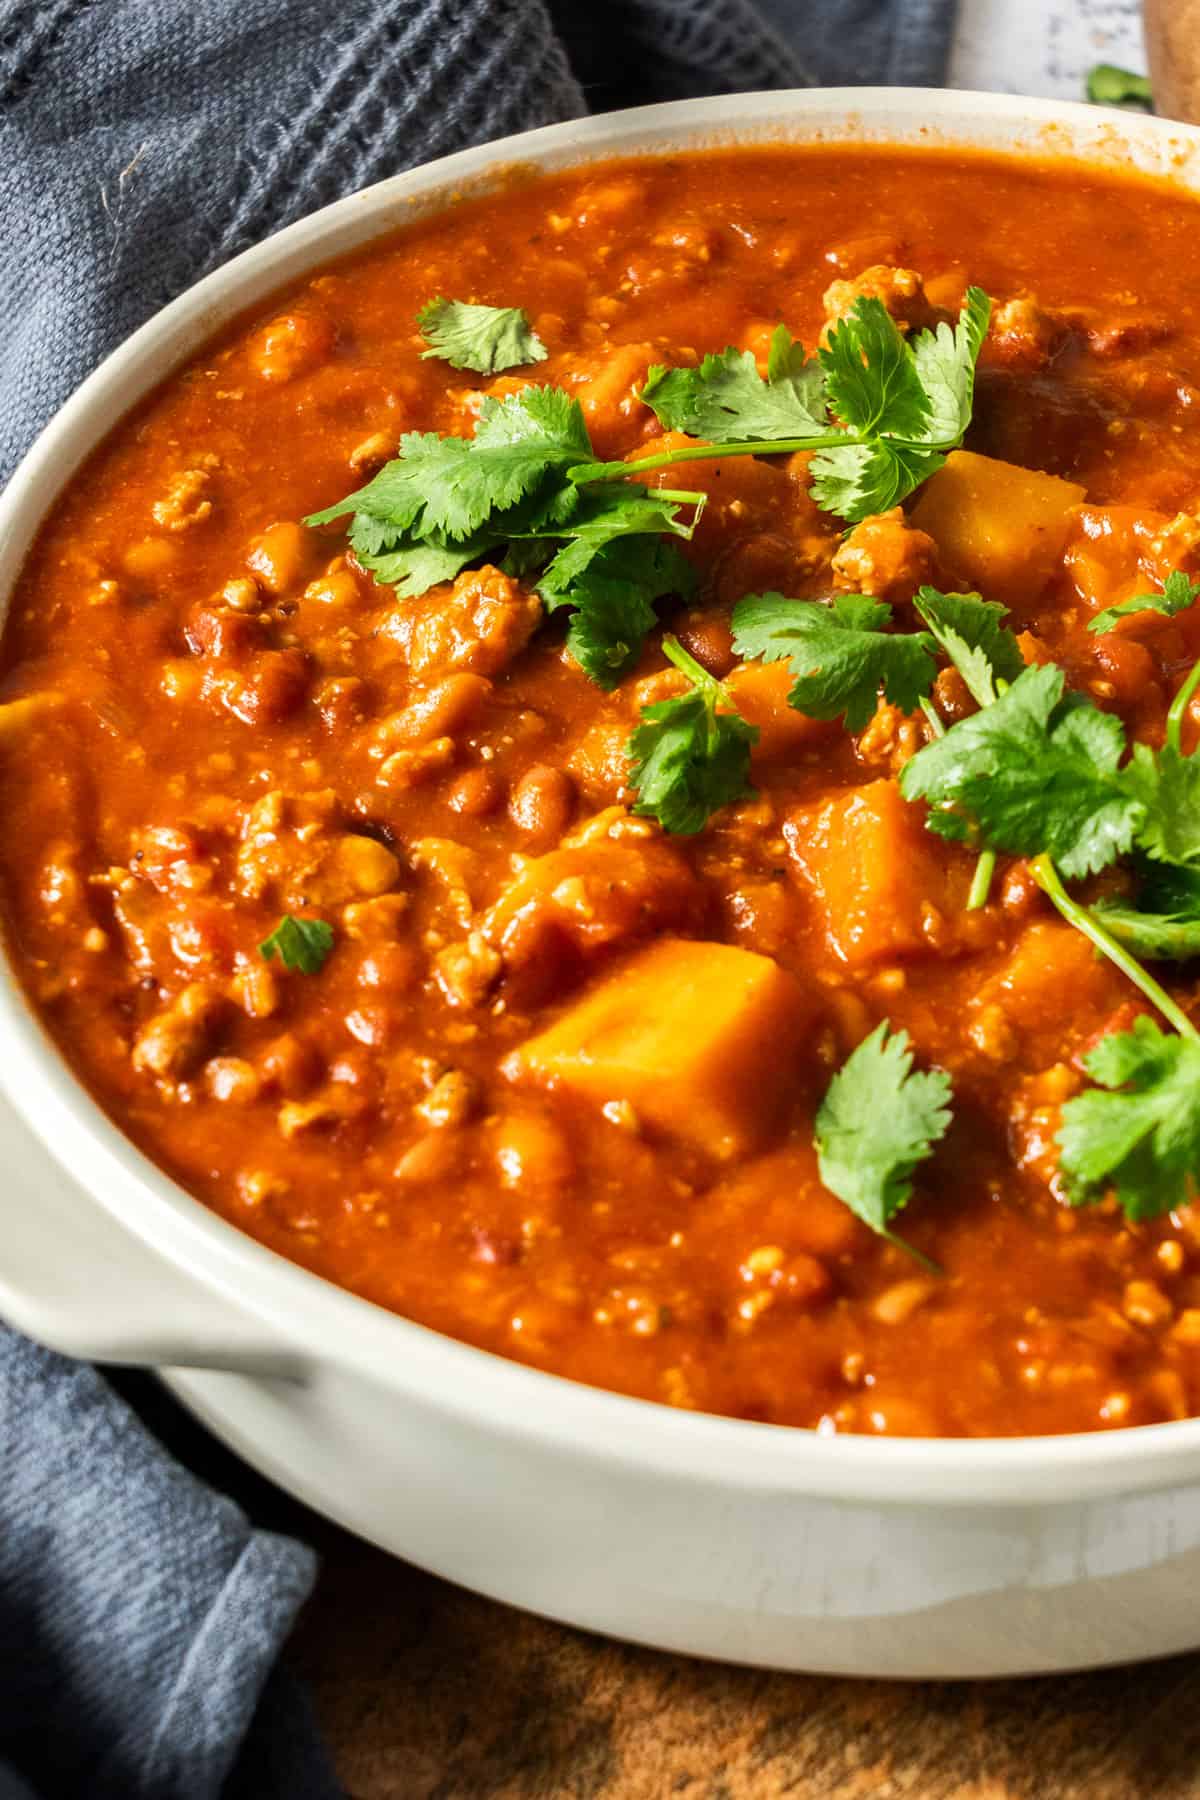
Butternut Squash Chili

Ingredients
- 1 lb ground sausage {or ground beef, chicken, or turkey}
- 1.5 cups beef broth
- 2 1/4 cups butternut squash {~10 oz}
- 1 cup onion {diced}
- 4 cloves garlic {minced or pressed}
- 1 can tomato sauce {14 oz}
- 1 can diced tomatoes, including juices {14 oz}
- 1 tbsp chili powder {less for milder chili}
- 1 tsp smoked paprika
- 1/2 tsp oregano
- 1 tsp cumin
- 2 tbsp prepared BBQ sauce
- 1 can pinto beans {15 oz can, drained}
- 1 can kidney beans {15 oz can, drained}
- salt & pepper to taste
Instructions
Instant Pot Instructions
- Press "Saute" on the Instant Pot and allow it to get hot.
- Add the ground sausage and cook until browned {~5 minutes}. Drain any grease.1 lb ground sausage
- Add beef broth and use a wooden spoon to deglaze (scrape) any browned sausage off the bottom of the Instant Pot insert.1.5 cups beef broth
- Add the rest of the ingredients. Stir 1-2 times.1 cup onion, 4 cloves garlic, 1 can tomato sauce, 1 can diced tomatoes, including juices, 1 tbsp chili powder, 1 tsp smoked paprika, 1/2 tsp oregano, 1 tsp cumin, 2 tbsp prepared BBQ sauce, 1 can pinto beans, 1 can kidney beans, 2 1/4 cups butternut squash
- Lock the lid into place and set the steam release handle (valve on top) to “Sealing”. Press Manual>High Pressure>8 minutes.
- When the chili has finished cooking, the Instant Pot will beep and switch to ”keep warm". Allow it to sit with the lid on for 10 minutes and then do a manual release with the nozzle set to venting.
- {OPTIONAL} To thicken: combine 3 tbsp of cornstarch and 1/4 cup of broth from the instant pot in a small bowl (this creates a “slurry”). Whisk really well and stir into the chili. Press "saute" on the Instant Pot and allow it cook for 3-5 minutes, stirring often.
- Add salt and pepper to taste. Top with shredded cheese, green onions, sour cream, Greek yogurt, or any of your favorite chili toppings.salt & pepper to taste
Notes
Stovetop Instructions
-
In a heavy-bottomed pan (like a dutch oven), brown the meat.
-
Use a slotted spoon and transfer it to a bowl. Drain all but 1 tbsp of any fat that remains.
-
Add the diced onion in the pan and stirring often, cook them down until soft; about 8 minutes.
-
Add the garlic, and cook for an additional minute.
-
Add the rest of the ingredients, excluding the beans, and cook for 20 minutes. Mash up the butternut squash in the pot and let it thicken the chili. Some chunks remaining are totally fine!
-
Add the beans, and continue to cook for another 15 minutes.
Nutrition
Nutrition information is automatically calculated, so should only be used as an approximation.


An awesome recipe! We had a calamity/cold day, and so I was at home and I planned to make chili. I cooked some pinto beans in the Instapot and then got busy with other things. By the time I looked up, it was 5pm, and I needed to make something quickly so I checked Sustainable Cooks for a recipe. Luckily had some frozen butternut squash cubes and just used the broth from the beans, a small can of diced tomatoes with chilis and a jar of canned tomatoes and added the spices (including powdered onion and garlic). No need for meat for us vegetarians.
The best part-I used the immersion blender to mix it all up and then added extra pinto beans and corn at the end so no one knew there was squash in it :). Served it with rice to my son’s to make it thicker and my daughter loved it with cornbread.
Thanks!
Sarah, I’m honored to have helped keep you all full and cozy during this wacky weather! I love the edits you made to personalize the recipe to fit your tastes/needs/available ingredients.
Forgot to add my stars!
I made your wonderful Butternut Squash Chili twice over the last week and a half . . . because Mr. Picky Pants (my husband of 40 years) who hates almost everything, especially anything squash, requested it. I cannot even believe it. Of course, I had to use a bean other than kidney because . . . Mr. PP. But everything else was the same . . . a first! He really liked the addition of the BBQ sauce . . . said that the final dish was the best combination of chili and BBQ beans! And he ate all of his squash and did not request that I leave it out. This is a solid win and a definite repeater in our household.
Loving the name Mr. PP. So glad I could make him and therefore, YOU happy with this meal.
WOW! This chili has incredible flavour. It’s hearty and so comforting. We all loved it. Thank you
Butternut squash is pretty magical! So glad you enjoyed it.
Hi, I’m 73 year old man and never had butternut squash. I had a lb. of pork sausage so I gave the recipe a try. I cooked the squash in the IP and the rest of the recipe in a large skillet. It turned out delicious. Thank You!
Dominick, I love that you tried something new and that you enjoyed it so much! Thanks for taking the time to leave a review.
How can I make this recipe in a slow cooker?
I would add everything to the crockpot and cook on low for 6 hours. The meat would need to be cooked on the stovetop, and you might need to increase the broth a bit. Instant Pots require less liquid than crockpots, so keep an eye on the liquid level.
I made the recipe in the slow cooker according to your suggestions, there was no need to add any additional liquid, the chili was excellent! My entire family enjoyed it, thank you
Winner winner, happy dinner! So glad it was a hit, Staci.
I made this recipe but made it vegetarian and didn’t add any soy ground beef to it and it was ABSOLUTELY delicious! Will keep this in my weekly rotation. Would you happen to know if this will freeze well? I have a huge butternut squash that I’d love to use before it goes bad!
So glad you enjoyed in Mia!!
I have frozen it before and it does great. I do encourage you to let it defrost in the fridge overnight. I’ve found when I try to reheat it directly from frozen, the beans break up while I am stirring.
I have been making this chili since the recipe posted and it continues to be a family favorite! I love that it’s forgiving if I don’t have 100% of the right ingredients or the correct amount. I haven’t made it in the IP yet but the stovetop version is simple and comes together quickly! This also reheats exceptionally well so I can make it in advance if I need to.
Awww, so glad it’s been a hit for the family for so long.
Not made it in the Instant Pot yet? Get on that, my friend!
Butternut squash anything, please! Another alternative to ground beef is Gardein The Ultimate Beefless Ground. There are other brands of veggie crumbles out there, too, if you can’t find the Gardein brand, but no one will be able to tell that it’s not actual beef. Believe me, I’ve tested it 😉
Thank you for always having the best recipes, tips, and of course, humor!
I don’t mind ground beef, but I do like to stretch it! I wonder the price of Gardein? Probably cheaper to do the lentils + beef. Maybe?
If you had told me 3 years ago I would be loving butternut squash, I’d like you’re crazy! But I find that I like it with spicy things and garlic. YUM
Your suggestions always come at the right time. Just got back from holiday to find there a is butternut squash festering in the cellar. Should have put it in the fridge.
Daughter wants bacon and I only have a masssive pack in the freezer, so was reminded that I can defrost, give some to her and cook the rest in the oven.
Perfect!! Glad I could help! 🙂
packed full of flavor!
So good!