As an Amazon Associate, I earn from qualifying purchases.
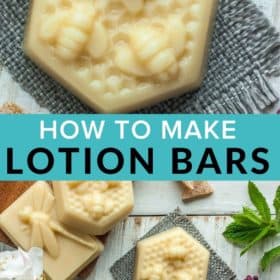
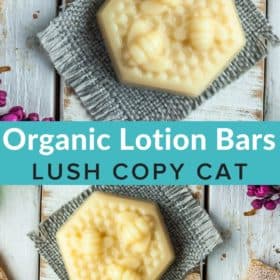

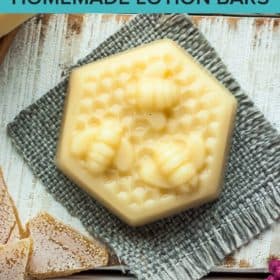
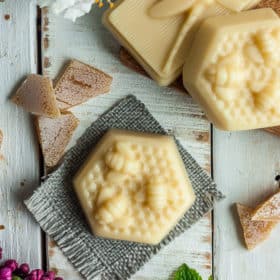
This three-ingredient Lotion Bar Recipe makes incredible and moisturizing DIY lotion bars. They are so easy to make and can be prepared in only 10 minutes!

These homemade lotion bars will make you feel like you’re at a fancy spa. But instead of spending tons of money, you can make them in your own kitchen in about 10-15 minutes.
What Are Hard Lotion Bars?
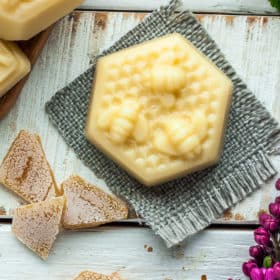
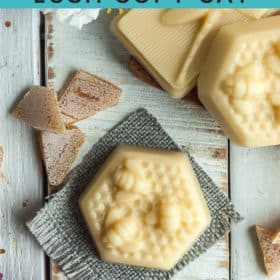
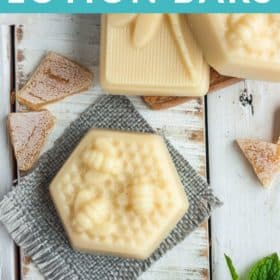
Ohhh, my friend, you haven’t lived until you have used a hard lotion bar. It looks like a bar of soap but contains ingredients that are moisturizing to your skin.
It is not soap so you wouldn’t bring it into the shower or bath, but you can put it on right after showering.
How Do You Use a Hard Lotion Bar?
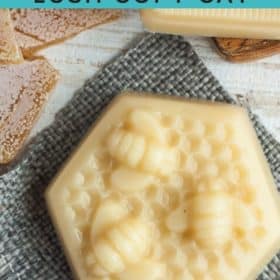
The best part is how easy they are to use and store! You simply rub the lotion bar on your skin until the heat from your skin warms the bar up and releases the moisturizer.
How Do You Store Them?
Anything air-tight will work. Old mint tins, squat mason jars, or even a ziploc bag will work.
Coconut oil is liquid at 76˚F or above, so keep them out of direct sunlight and in a cool dry place for best results. You can also gift it to someone in a pretty homemade DIY fabric gift bag.
How Long Do Lotion Bars Last?
If stored properly (see above) they should last for five-plus years. The lotion bar may develop a harder coating from the wax but they are still perfectly safe to use.
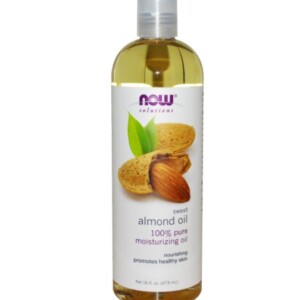
Helpful Lotion Bar Recipe Supply List
- Coconut oil
- Double-boiler
- Sweet Almond Oil
- Cosmetics-grade beeswax
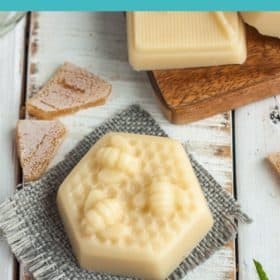
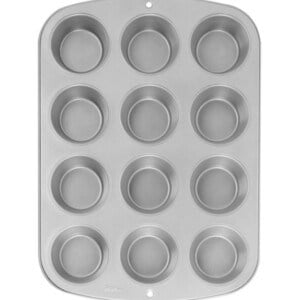
- Silicone baking mold
- Or a cutesy soap mold like thisor this.
- An old spoon that you can dedicate to just use with beeswax
Many of these same ingredients and supplies can be used in our homemade chapstick recipe and natural homemade deodorant.

How to Make This Lotion Bar Recipe – Step by Step
- Place 2 cups of water in a medium-sized pan fitted with a double boiler. Place beeswax in the double boiler and allow it to fully melt.
- Add the coconut oil and sweet almond oil, and stir gently until the coconut oil is melted.
- Using an oven mitt, remove the double boiler from the pan and wipe the water off of the bottom of the boiler. Pour the melted mixture into your molds, and allow it to set for a few hours, or overnight.
Pro Tips/Recipe Notes
- Having a double-boiled dedicated to just wax crafts means you don’t have to spend a ton of time cleaning it in-between recipes. You could also use a mason jar in a pot of simmering water.
- Vegans can use carnauba wax in lieu of beeswax.
- If you have a coconut allergy you can sub in shea butter.
- If you have a nut allergy you can sub in olive or avocado oil for the sweet almond.
- Using an empty deodorant tube makes it super easy to apply this lotion bar recipe and makes it kid-friendly for them to apply themselves.
Variations
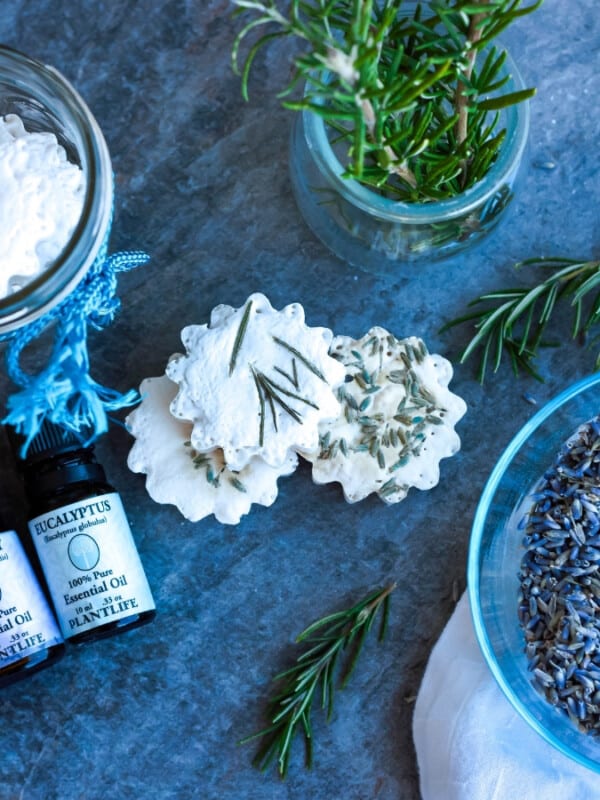
Want a scented lotion bar? Add 10-15 drops of your favorite essential oils in step 2 with the sweet almond oil. Please note, I don’t sell essential oils or anything but I do use them myself around the house.
- Lavender is a calming scent that many people love.
- Bergamot is great for when you want to chill out.
- A mixture of peppermint and eucalyptus smells clean and can be very energizing.
- You could even add a sleepy blend of oils (this is the one I use) for a night-time lotion bar recipe.
These bars smell so lovely even without essential oils, and they work amazingly well. They have become one of my most requested handmade holiday gifts from friends and family.

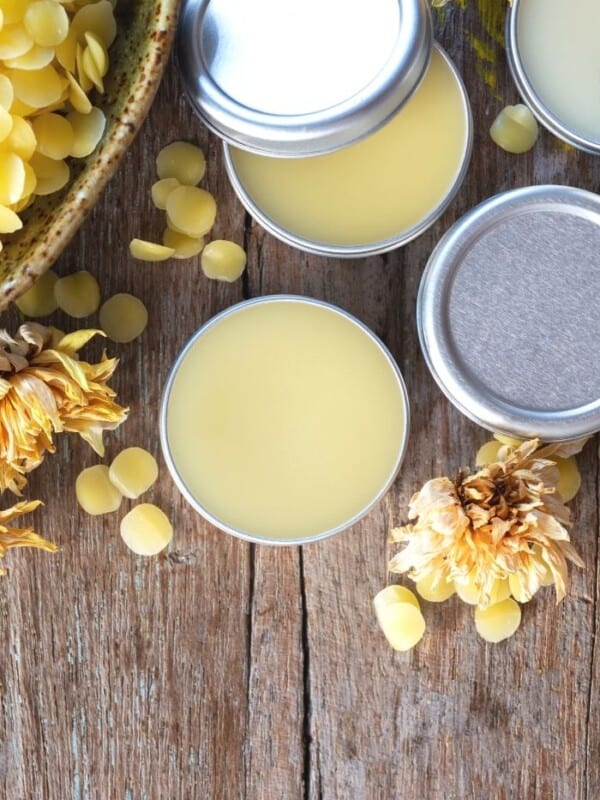
Lotion Bar Recipe {Homemade Hard Lotion Bar}
Ingredients
- 1 part beeswax (melted)
- 1 part sweet almond oil
- 1 part coconut oil (melted)
Instructions
- Note: by "equal parts" for the ingredients, it would mean you use the same measurements of all the ingredients. Let's say you want to use 1/3 cup of beeswax, you'd then want to use 1/3 cup of the almond oil and 1/3 cup the coconut oil. This allows you to use scale the recipe up to your preferred amount for your molds.
- Place 2 cups of water in a medium-sized pan fitted with a double boiler. Place beeswax in the double boiler and allow it to fully melt.1 part beeswax (melted)
- Add the coconut oil and sweet almond oil, and stir gently (with a spoon dedicated solely to beeswax crafts) until the coconut oil is melted.1 part sweet almond oil, 1 part coconut oil (melted)
- Using an oven mitt, remove the double boiler from the pan and wipe the water off of the bottom of the boiler.
- Pour the melted mixture into your molds, and allow to set for a few hours, or overnight.
Notes
- Vegans can use carnauba wax in lieu of beeswax.
- If you have a coconut allergy you can sub in shea butter.
- Using an empty deodorant tube makes it super easy to apply this lotion bar recipe and makes it kid-friendly for them to apply themselves.


Is the Almond Oil in solid or liquid form? Thanks! Love your blog!
jane
Liquid!
Oh I am going to have to try this!!!!! I was thinking as I read all the comments that empty glue sticks, especially the bigger ones would be a great container for on the go!
Funny! Actually, I only have about 3,826 hours worth of dishes every week! (Again, I’m guesstimating!)
Hi I was wondering where you normally buy the bees wax and if the stuff for making candles would be o.k. for this
Thank you
We love a local bee shop in this neck of the woods, and I get it there. If you click on the “beeswax” up in my original post, there is a hyperlink that will take you to Amazon to buy stuff I’ve used in the past.
For full disclosure, I’m an Amazon Affiliate which means I earn a small percentage if you order through this site. I only recommend things that I myself use.
couldn’t wait to try these! we just harvested our first honey from our bees, so I got to use some of our beeswax! I had some great olive oil from a ranch about 5 miles from my place and a local store brand organic coconut oil. I put in a couple of drops tea tree oil and a little bit of calendula oil. did a small batch in a coffee cup placed in a small saucepan of water because i didn’t want to scape wax out of mt dbl boiler. i’ll just use that same cup each time. getting lazy in my old age. thanks for sharing, love these!
How cool that you get to use wax from your own bees!!!
I’ve tried olive oil in another batch of these, and it works great, but does make the bars a little bit more oily.
So I came across your blog today via pintrest (the vick shower discs) and I am utterly in love! You just crack me up and I love all the neat things you do! I am so glad I found you!! Lol. Ok, creepy stalker talk over!
Creepy stalkers are my favorite! ;-D Glad you found me, and I hope you stick around!
So perfect ! I’m going, if you permit me, to translate your receipe, and share it with the french public ! Of course I will give your link and talk about you… let me know if you agree… MJ
That would be fine! Thanks
I’ve seen them wrapped in waxed paper ( cut with pinking shears) and then in a metal tin in stores. I’m so glad I know how to make these now, Thanks for sharing!
That sounds lovely!
Just made a batch of these and poured them into sea creature shaped cookie cutters for my sister-in-law’s baby shower. I made them as the favor gifts for those who attend. Turned out so darn cute!! I used avacado oil because it was on sale (cheap). And, to give me better control over pouring, I poured the mix into a glass measuring cup. Microwaved the near empty cup to make sure I was able to make use of ALL the mix. Seemed to work great.
Those sound super cute! I hope everyone liked them as favors.
Oh, and I almost forgot, a good container for lotion bars is a metal tin. This is how I see them sold most often.
try ab altoids tin!
can u micro wave this ?
I haven’t, but go ahead and try it! Maybe with just a small amount of ingredients first.
Specifically states on the beeswax I bought NOT to put in microwave. Check the package.
Ok. Dumb question. How do you store these between uses? I obviously can’t just throw one of these lovely little bars into my purse unless it’s in something.
I bought a pack of tiny Ziploc bags from Joanns (fabric store), and use that to keep these in my purse. They were also great for wrapping them for Christmas presents, and I used them to give away lavender and smoked salt for the holidays.
They’re the little bags that you would think of when you think of “drug dealer Ziplocs”. HA!
Sorry if this is a silly question, but how are these lotion if they are hard? Do they melt as you rub them on your skin? Xx
As you warm them up by rubbing them between your hands, they’ll give off a little bit of the lotion. You can then rub that in to your hands.
In recent batches, I’ve added a bit of olive oil a well and that makes it easier to spread, but it also makes it a bit greasier and it takes longer to absorb.
I did this and mine came out with a nasty sour smell to them, how can I fix that? Could I add a few drops of vanilla extract or a scented oil. And once they are melted and hardened up can they be remelted? Thanks for your help.
A sour smell? I have no idea why that would happen unless you were maybe using funky oil? Yes, they can be remelted.
I’m completely stumped! I’ve made multiple batches of these, and mine just smell like warm beeswax. Was your beeswax local, or from a hobby type store (like Michaels, etc.)? I wonder if something was either up with your beeswax or if the almond oil had gone funky. Coconut oil probably isn’t the culprit.
Yeah it is a foul sour type smell, I used almond oil, organic coconut oil because that’s all they had and yellow beeswax equal parts of each, I didn’t think that they would smell because nothing that I used really had a smell but there it was…..I am going to pick up some scented aromatherapy oil and add that and see how it turns out I will let you know if it smells better or gets worse….Thanks for your help.
You totally need a pinterest page! I’ve pinned a few of your things, you have a great blog!!!! I can’t wait to make these and the lip balm for Christmas gifts!
I have one that I started about a month ago.
Here you go: https://pinterest.com/frugalbychoice/
I was wondering about using eucalyptus oil and/or vitamin E oil with the beeswax? I also could only find sweet almond oil, will it be the same?
I used grapefruit essential oil and vitamin E for my last batch and it did great.
I think the sweet almond oil should be fine!
I was wondering about tea tree oil or eucalyptus oil also (to help heal eczema and/or ward off insects!). Any thoughts (just a few drops maybe????)?
I just saw this, and it’s great, but I’m allergic to coconut, so what would be a good alternative to the coconut oil?
Coconut oil is hard until about 76 degrees, so that plus the beeswax gives these bars their hardness. You could try another oil (olive, etc.), coco butter, or maybe shea butter, but I don’t know if they will be as hard.
I used beeswax, Coco butter & sweet almond oil in my lotion bars, last year (what I had on hand) and they turned out perfectly!
Sweet almond cocoa butter, she’s butter
Do you know how long of a shelf life these may have???
I’m still using mine that I have leftover from Christmas, so at least 7.5 months!
If I am finding them too ‘tacky’ and not absorbing into the skin, what did I do wrong? Thank you for any advice!
My guess would be a bit too much oil. These things are so forgiving, so throw them back in the double broiler, and add a bit more beeswax to “dry” them out.
Opposite- too much wax, add more of the solid coconut oil (the carrier oil, or almond oil will be too greasy)
I do my lotions in mason jars in a pot w/water ( waterline below the top of jar obviously, usually 1/2 way up). I use the same pot to do lotions & stuff but if its too hard to clean out of the mason jar, heat it back up to a liquid, if not pitch the jar and u r done. Works great for me. I can alot so we always have jars around…
Smart!!!
i think you could also use a dedicated “crock pot” to melt everything together. They sell the little ones for under $10. These are super cute cant wait to try them.