As an Amazon Associate, I earn from qualifying purchases.
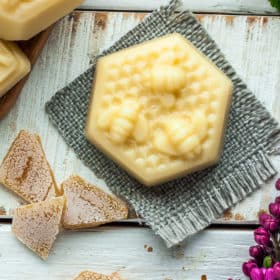
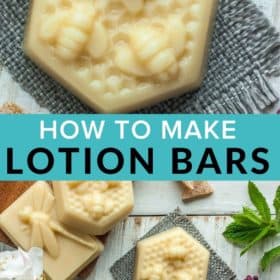
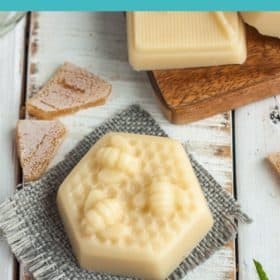
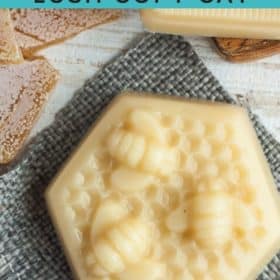
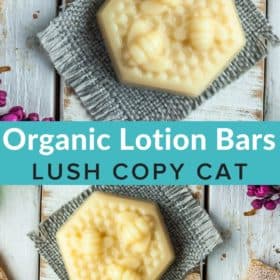

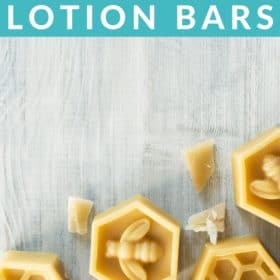
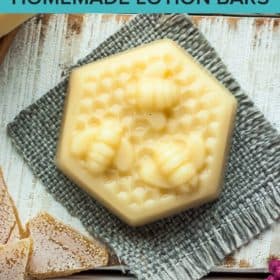
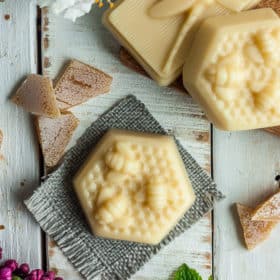
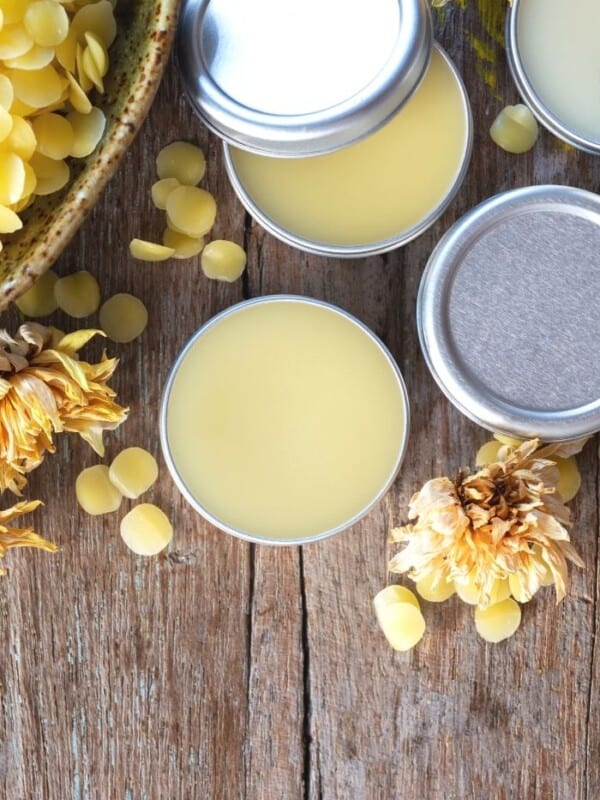
This three-ingredient Lotion Bar Recipe makes incredible and moisturizing DIY lotion bars. They are so easy to make and can be prepared in only 10 minutes!

These homemade lotion bars will make you feel like you’re at a fancy spa. But instead of spending tons of money, you can make them in your own kitchen in about 10-15 minutes.
What Are Hard Lotion Bars?
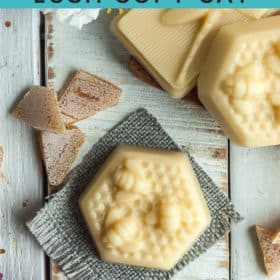
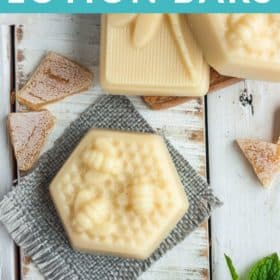
Ohhh, my friend, you haven’t lived until you have used a hard lotion bar. It looks like a bar of soap but contains ingredients that are moisturizing to your skin.
It is not soap so you wouldn’t bring it into the shower or bath, but you can put it on right after showering.
How Do You Use a Hard Lotion Bar?
The best part is how easy they are to use and store! You simply rub the lotion bar on your skin until the heat from your skin warms the bar up and releases the moisturizer.
How Do You Store Them?
Anything air-tight will work. Old mint tins, squat mason jars, or even a ziploc bag will work.
Coconut oil is liquid at 76˚F or above, so keep them out of direct sunlight and in a cool dry place for best results. You can also gift it to someone in a pretty homemade DIY fabric gift bag.
How Long Do Lotion Bars Last?
If stored properly (see above) they should last for five-plus years. The lotion bar may develop a harder coating from the wax but they are still perfectly safe to use.
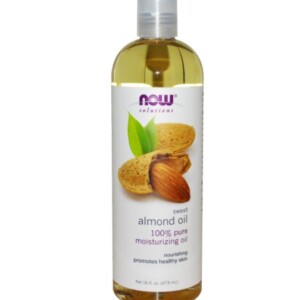
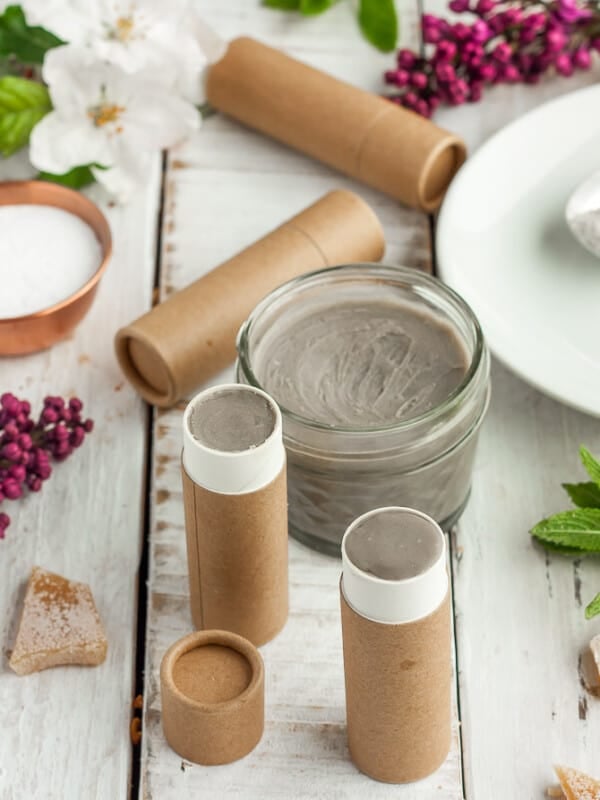
Helpful Lotion Bar Recipe Supply List
- Coconut oil
- Double-boiler
- Sweet Almond Oil
- Cosmetics-grade beeswax
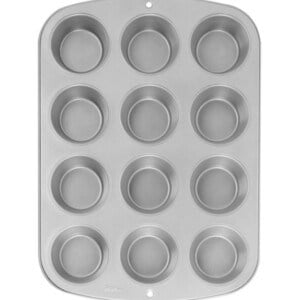
- Silicone baking mold
- Or a cutesy soap mold like thisor this.
- An old spoon that you can dedicate to just use with beeswax
Many of these same ingredients and supplies can be used in our homemade chapstick recipe and natural homemade deodorant.

How to Make This Lotion Bar Recipe – Step by Step
- Place 2 cups of water in a medium-sized pan fitted with a double boiler. Place beeswax in the double boiler and allow it to fully melt.
- Add the coconut oil and sweet almond oil, and stir gently until the coconut oil is melted.
- Using an oven mitt, remove the double boiler from the pan and wipe the water off of the bottom of the boiler. Pour the melted mixture into your molds, and allow it to set for a few hours, or overnight.
Pro Tips/Recipe Notes
- Having a double-boiled dedicated to just wax crafts means you don’t have to spend a ton of time cleaning it in-between recipes. You could also use a mason jar in a pot of simmering water.
- Vegans can use carnauba wax in lieu of beeswax.
- If you have a coconut allergy you can sub in shea butter.
- If you have a nut allergy you can sub in olive or avocado oil for the sweet almond.
- Using an empty deodorant tube makes it super easy to apply this lotion bar recipe and makes it kid-friendly for them to apply themselves.
Variations
Want a scented lotion bar? Add 10-15 drops of your favorite essential oils in step 2 with the sweet almond oil. Please note, I don’t sell essential oils or anything but I do use them myself around the house.
- Lavender is a calming scent that many people love.
- Bergamot is great for when you want to chill out.
- A mixture of peppermint and eucalyptus smells clean and can be very energizing.
- You could even add a sleepy blend of oils (this is the one I use) for a night-time lotion bar recipe.
These bars smell so lovely even without essential oils, and they work amazingly well. They have become one of my most requested handmade holiday gifts from friends and family.

Lotion Bar Recipe {Homemade Hard Lotion Bar}
Ingredients
- 1 part beeswax (melted)
- 1 part sweet almond oil
- 1 part coconut oil (melted)
Instructions
- Note: by "equal parts" for the ingredients, it would mean you use the same measurements of all the ingredients. Let's say you want to use 1/3 cup of beeswax, you'd then want to use 1/3 cup of the almond oil and 1/3 cup the coconut oil. This allows you to use scale the recipe up to your preferred amount for your molds.
- Place 2 cups of water in a medium-sized pan fitted with a double boiler. Place beeswax in the double boiler and allow it to fully melt.1 part beeswax (melted)
- Add the coconut oil and sweet almond oil, and stir gently (with a spoon dedicated solely to beeswax crafts) until the coconut oil is melted.1 part sweet almond oil, 1 part coconut oil (melted)
- Using an oven mitt, remove the double boiler from the pan and wipe the water off of the bottom of the boiler.
- Pour the melted mixture into your molds, and allow to set for a few hours, or overnight.
Notes
- Vegans can use carnauba wax in lieu of beeswax.
- If you have a coconut allergy you can sub in shea butter.
- Using an empty deodorant tube makes it super easy to apply this lotion bar recipe and makes it kid-friendly for them to apply themselves.


Hello!
How do I measure out a hard piece of beeswax to make it “equal” to my other ingredients? I assume it’s ok to use both a liquids and solids measuring cups even though they are different? (I would use a liquid measure the the almond oil, but solid for the coconut oil and beeswax? Or use same got all?)
Thanks!!
Hi Heather, I actually use the same measuring cup for everything in this recipe. It’s a very forgiving recipe and doesn’t need to be 100% “equal” in measurements. For the beeswax, if it comes in flakes, I measured it in my measuring cup. Sometimes my beeswax comes in a brick, and I cut it into small chunks with a knife and then transfer to the measuring cup.
This is a recipe that has some wiggle room, so don’t overthink it too much!
A colleague brought a group of peers these lotion bars as gifts at a conference we all attended. They were fabulous! I love how easy they are to travel with and my husband loved the mess-free application.
Wondering if I can use vitamin e oil instead of sweet almond oil? thanks
Sophia, yes that should work!
Many apologies for the delay in responding. My site was undergoing maintenance and I was unable to access the backend to see/answer questions.
Shamefully, I bought the ingredients for this 3 houses ago (and moved them with me every time). Today, I unpacked them and set to making lotion bars. Even in Texas, the dry, winter air makes my skin cry out in pain. I was so happy to have found the time to make them, as immediately, just handling them for packaging up, my hands were happy! This double batch will go to my kid’s school, who asked the alumni for contributions to the Holiday Bazaar. Thanks for this great homemade gift!
So glad you love them, Sandy! They’re a favorite for our own use and for gifting.
Can I substitute Mango Butter instead Shea?
Thank you!!!
I haven’t tried it but I assume so!
Hi, I am wondering if the amounts in this lotion bar recipe are in volume or weight?
Thanks Much,
Debbie
Volume 🙂
I’ve made these several times. Love them! Gave some to a friend. She calls them body butter! 😁
Can you add patchouli Essential oil to it and if so how much?
There is a note under “Variations” about essential oils:
Want a scented lotion bar? Add 10-15 drops of your favorite essential oils in step 2 with the sweet almond oil.
Patchouli is a strong scent, so I would start with 5-10 and see how it goes.
Finally got around to making these, I replaced coconut oil with shea butter and they are perfect for moisturising my very dry skin.
The shea butter sounds like an amazing swap! Now, if only these bars could help us both with the constant dirt under our nails from the garden. 🙂
I also found that they are great as a face cleanser, if anyone uses an oil cleansing method with a hot cloth, these work brilliantly and were really good Christmas gifts.
What a great idea, Nic!
I have recently found another thing to do with these bars, they are a brilliant for conditioning the outside of my wooden salad bowls! And a friend has been using the one I gave her for Christmas to condition her hair, she rubs it in a couple of hours before she washes it. It’s multi use!
What a clever and creative use, Nic!
I have been meaning to make these ever since you posted the “recipe”, but just got to it a couple of days ago. These are AMAZING! My dry, itchy skin feels so much better! I used a greased muffin tin as a mold and it worked well. I have already given away two of the bars as a gift. Thanks for sharing this Sarah
Awesome Jean, I’m thrilled you love them so much! They’re one of my favorite easy gifts.
Sarah,
Do you know if it matters if you use refined or unrefined coconut oil?
Thanks!
Use either (and the cheapest) – it won’t impact the result! The biggest obvious difference between the two is the smell of coconut.
Love this idea! I am going to make for Christmas gifts. Do you have a rough idea of how much beeswax/coconut oil/almond oil is needed to make a dozen soap bars? I can’t really tell how much coconut oil or almond oil I need to buy. Thanks!
The smallest bottle of almond oil is usually about 2-4 oz and that will be enough for years and years of lotion bars. Coconut oil comes in 16 oz as the smallest jar I believe and that will be plenty!
But in order to know how much you’d need to make 1 dozen, I’d need to know the size of your mold.
Ah yes. The mold cavity dimensions are: L:4cm, H:3.5cm, W:4cm.
Hi! Can’t wait to try this! Where did you find the sweet honeycomb mold?
My cousin bought it in a small shop somewhere in Portland. I found a similar one on amazon that is linked in the post.
I made these as gifts for Christmas using lavender oil as a scent. Friends are reporting improved nails, better sleep and the wish for more! I am having to cost them as they insist on buying them from me. Love them. I made a little fabric pouch for gifting and I keep mine in a little tin.
I LOVE the idea of using them as a sleep aid Carol!! So glad you and your friends are enjoying these.
I’m back into making these lotion bars! Love the additional instructions to add essential oils to the bars! These will be my Christmas gifts for most people this year! I’ve also decided that I no longer need to buy hand lotion when I can make an easy moisturizing lotion bar!!!!
So glad you’re enjoying them Sherrie, and happy gifting!
Be sure to warn any husbands/brothers/men in your life that it’s best to keep lotion bars away from the more “sensitive” area if they contain peppermint essential oil. My husband learned the hard way it can really tingle and not in a good way! I really like this recipe and plan on making a batch for my gifts. Thank you!
I’m both laughing and crying Jeannie!
Love love love this post. Laughed my soft baby butt off!
Putting in a “friends and family” request for this as a gift. ????
Maybe I know a person who could hook you up…
Did I spark this post? ????lol! This will be my Christmas present staple. I’m thinking of stacking them in a hand decorated mason jar and tying a nice ribbon on it. Merry Christmas!
LOL, I’m in your brain Sherrie!
Actually, I have been working on updating the post for a while now and whenever I put a lot of work into something old, I republish it. Or in Troy’s case, I marry it!
I think lotion bars in a little jar would be so pretty!
I’m excited to make these tonight!!
How should I store them? Wax paper? scrap piece of fabric? have you ever had one of these melt in your purse on a hot day? Or are these an ‘at home only’ kinda thing?
Thanks!!!!!!!!!!!
J/K, I actually read through the other comments. Small ziplock, months in purse a-okay!
Here I go!!!
🙂
Bwahaaa, I love your sense of humor!
I bought the silicone molds that have six round cavities. I believe they are approx 1.oz each. Could you tell me the needed amount of the ingredients to fill this mold?
6 oz total would be 2 oz of each ingredient. I would go a little light on each as you probably don’t want to fill them to the very top of each mold.
I’ve recently seen a whole bunch of ads/buzz for shampoo bars (less plastic used, they still foam up). Do you make those too?
I haven’t made a shampoo bar before. Plus I doubt any bar of soap could handle all your thick hair!