As an Amazon Associate, I earn from qualifying purchases.

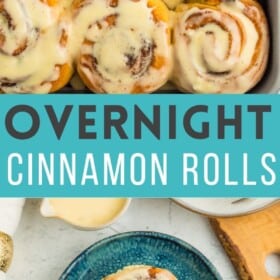
Imagine waking up to the amazing scent of soft, gooey, and delicious homemade Overnight Cinnamon Rolls baking in your oven. Spoil your family with these make-ahead cinnamon rolls with homemade orange cream cheese icing.

Imagine waking up on a cold morning with a pan of make-ahead cinnamon rolls ready to pop into the oven.
Even though I can’t be in your kitchen when you make them, I have packed so many tips into this recipe that you will totally ace it. Don’t be scared. I’m here, we’re in this together. You’re about to be the most popular person in your house.
Overnight cinnamon rolls. Let’s do this.
Reader Review
“Everytime I make these, I have to come back here and say how wonderful they are! I just made these for my aunts and they told me they are better than Cinnabon. The dough is an absolute dream to work with – soft, easy to roll, and not sticky at all. Overnight directions make these perfect for Christmas morning!”
Emily
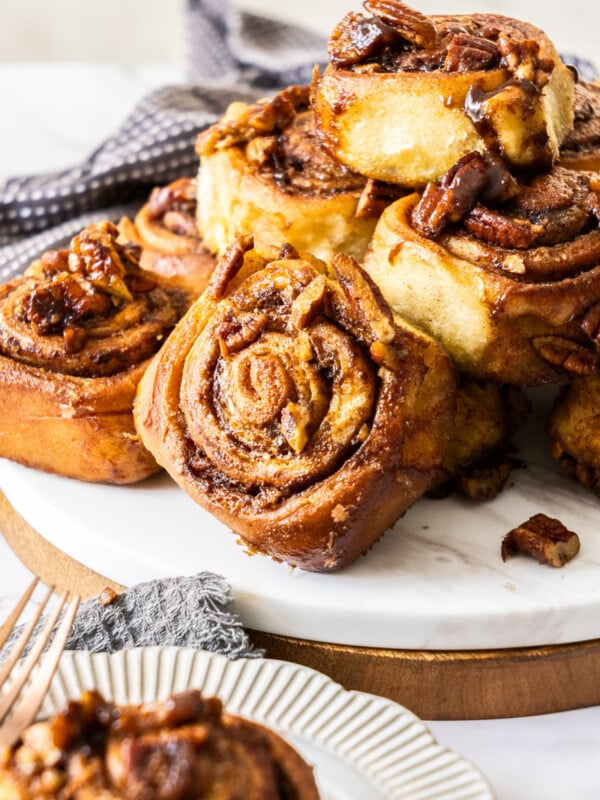
Try our pecan rolls if you’re looking for something with nuts.
Let’s Talk About Rise Times
If you’ve never worked with yeasted doughs before AND like exact directions, notations like “until doubled in size ~1 hour” might make your butt clench so tightly you could turn a grain of sand into a pearl. You want specifics. I get it.
But there are many factors that go into how your dough will rise. The temperature of your house is a huge part of it, as is the age of the yeast, how much the dough was kneaded, etc.
Pay attention to the cues I give you in the recipe (noted by “Looks Like”) and just embrace that sometimes, little things in life are out of our control. But hey, at least in this instance those things contain cinnamon and brown sugar.

Here’s How to Make Them
*I’ll walk you through it here with some photos and tips, and you’ll also find a printable recipe card at the bottom of the post with exact measurements, etc. You can also click “jump to recipe” to skip down.
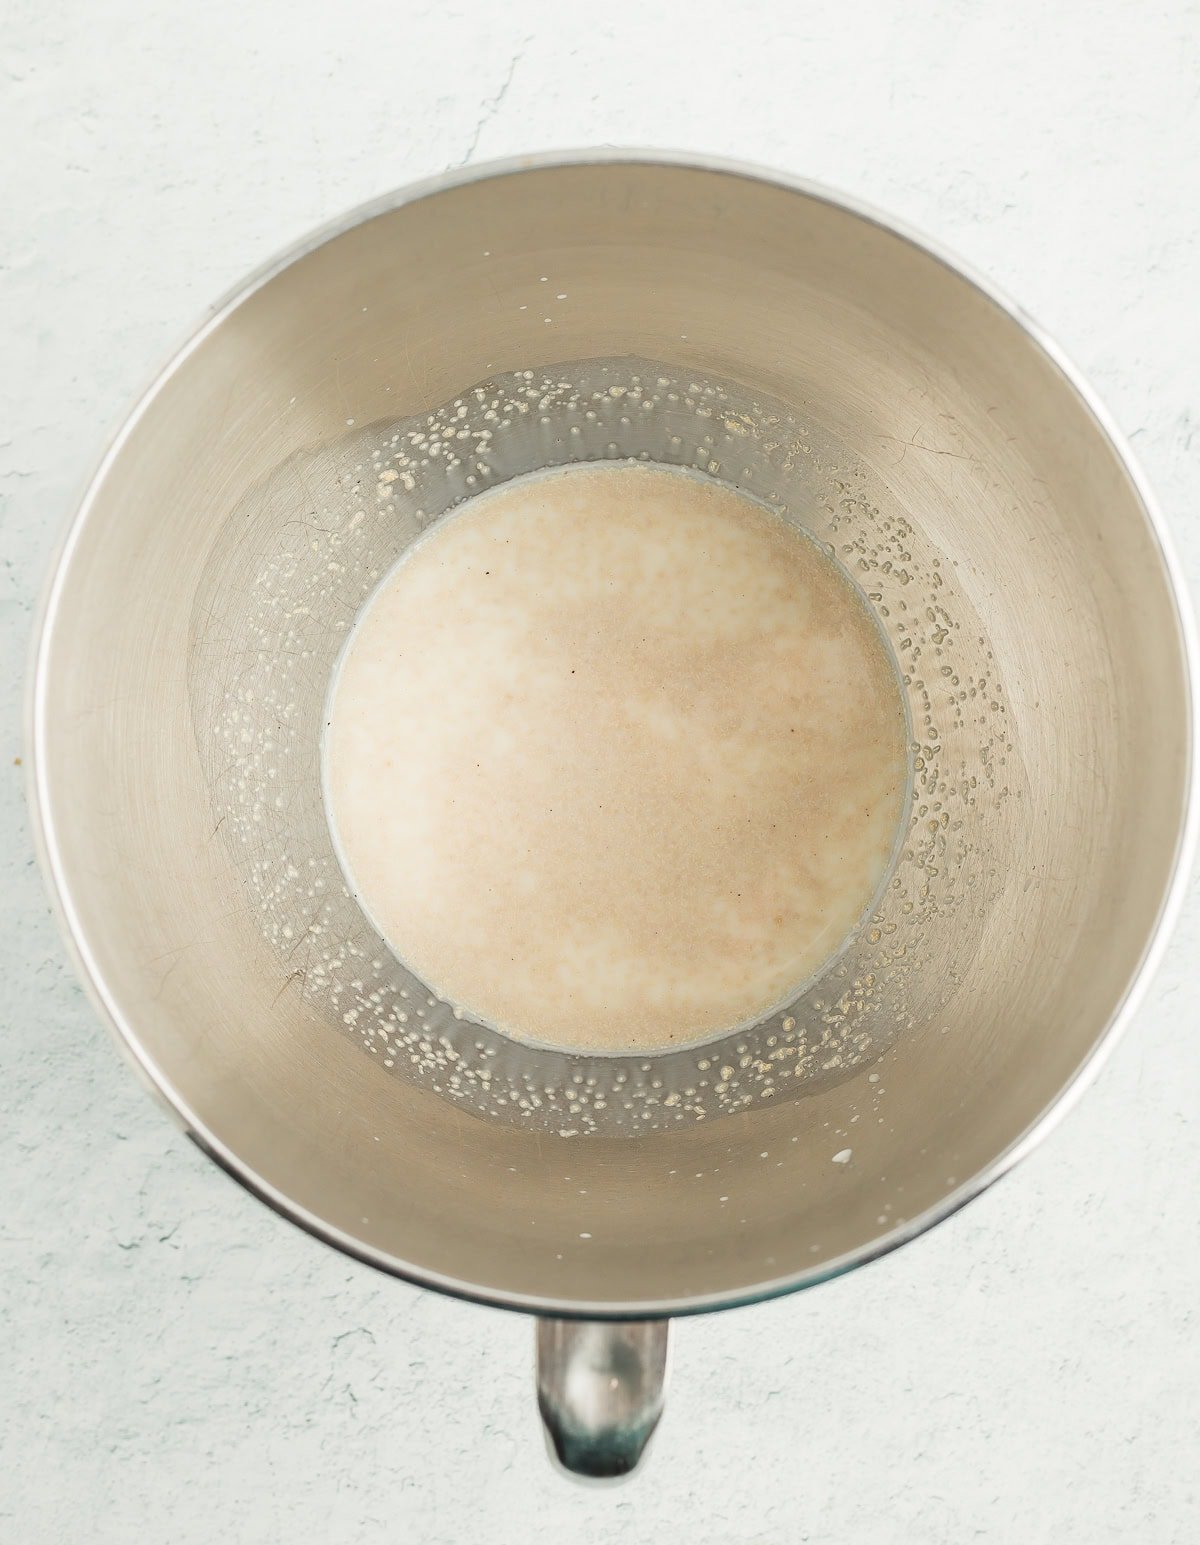
Proof the Yeast
Whisk together warm milk, honey (or sugar), and yeast in the bowl of a stand mixer. Let it sit until foamy and doubled in size. Looks Like: the top of a super creamy root beer!
Make the dough
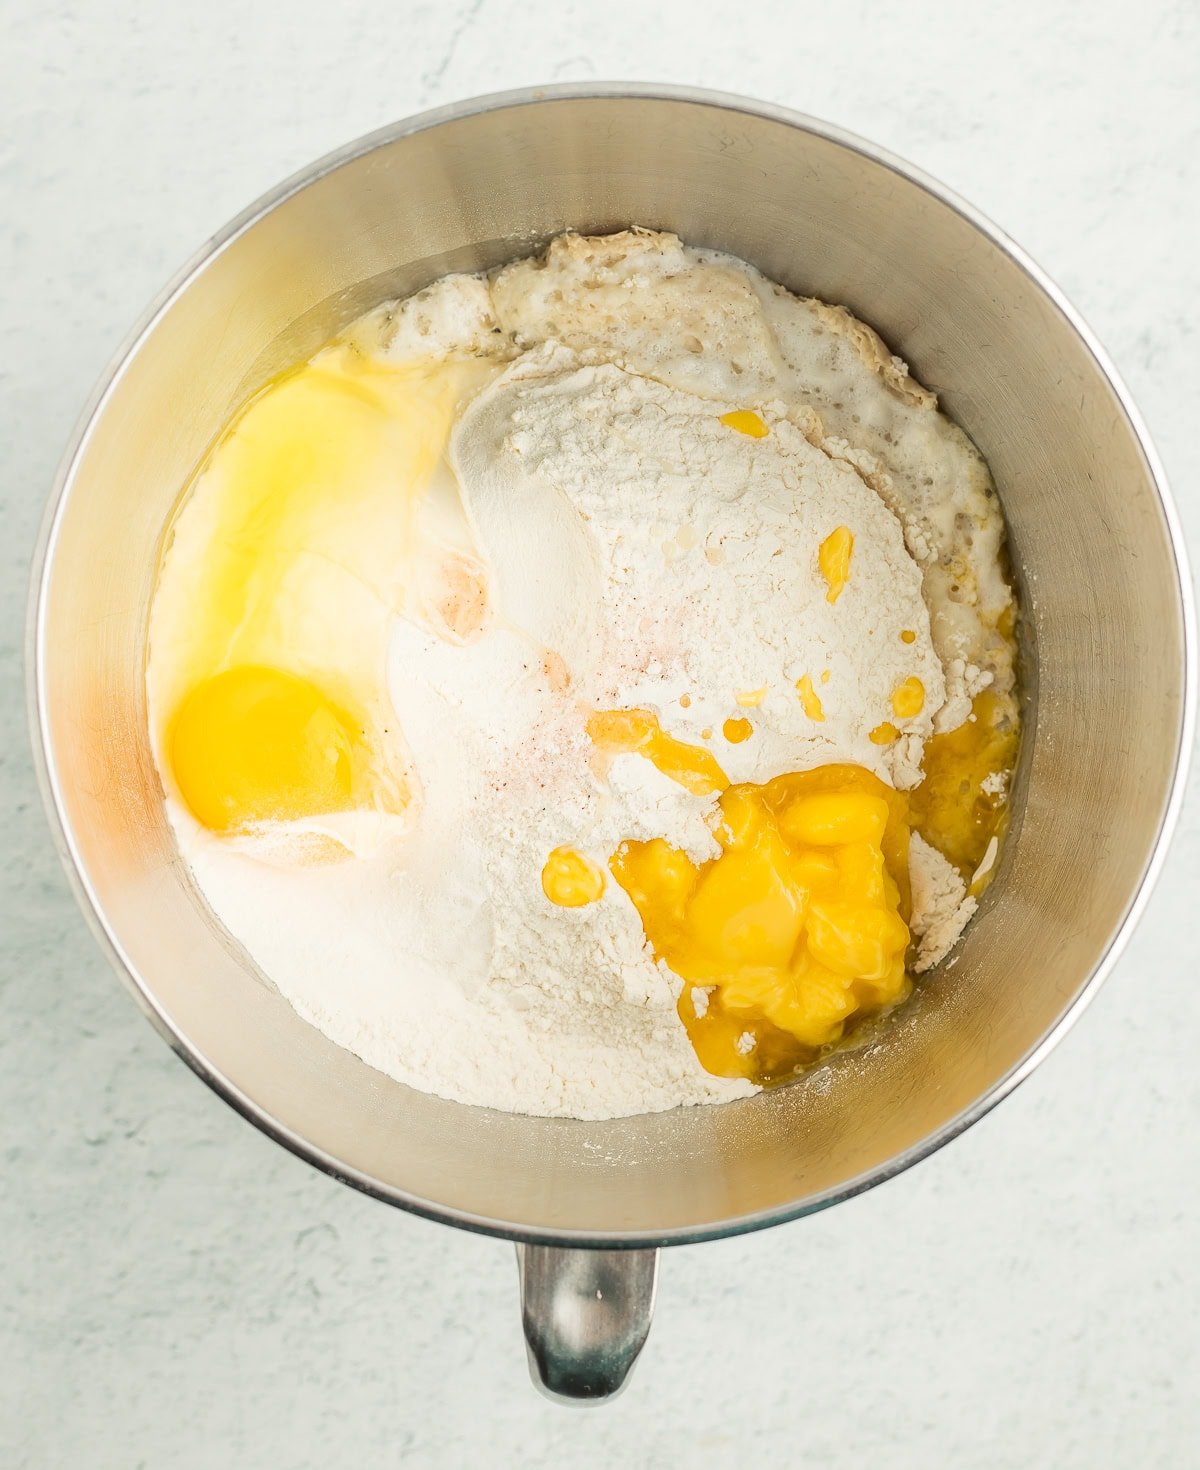
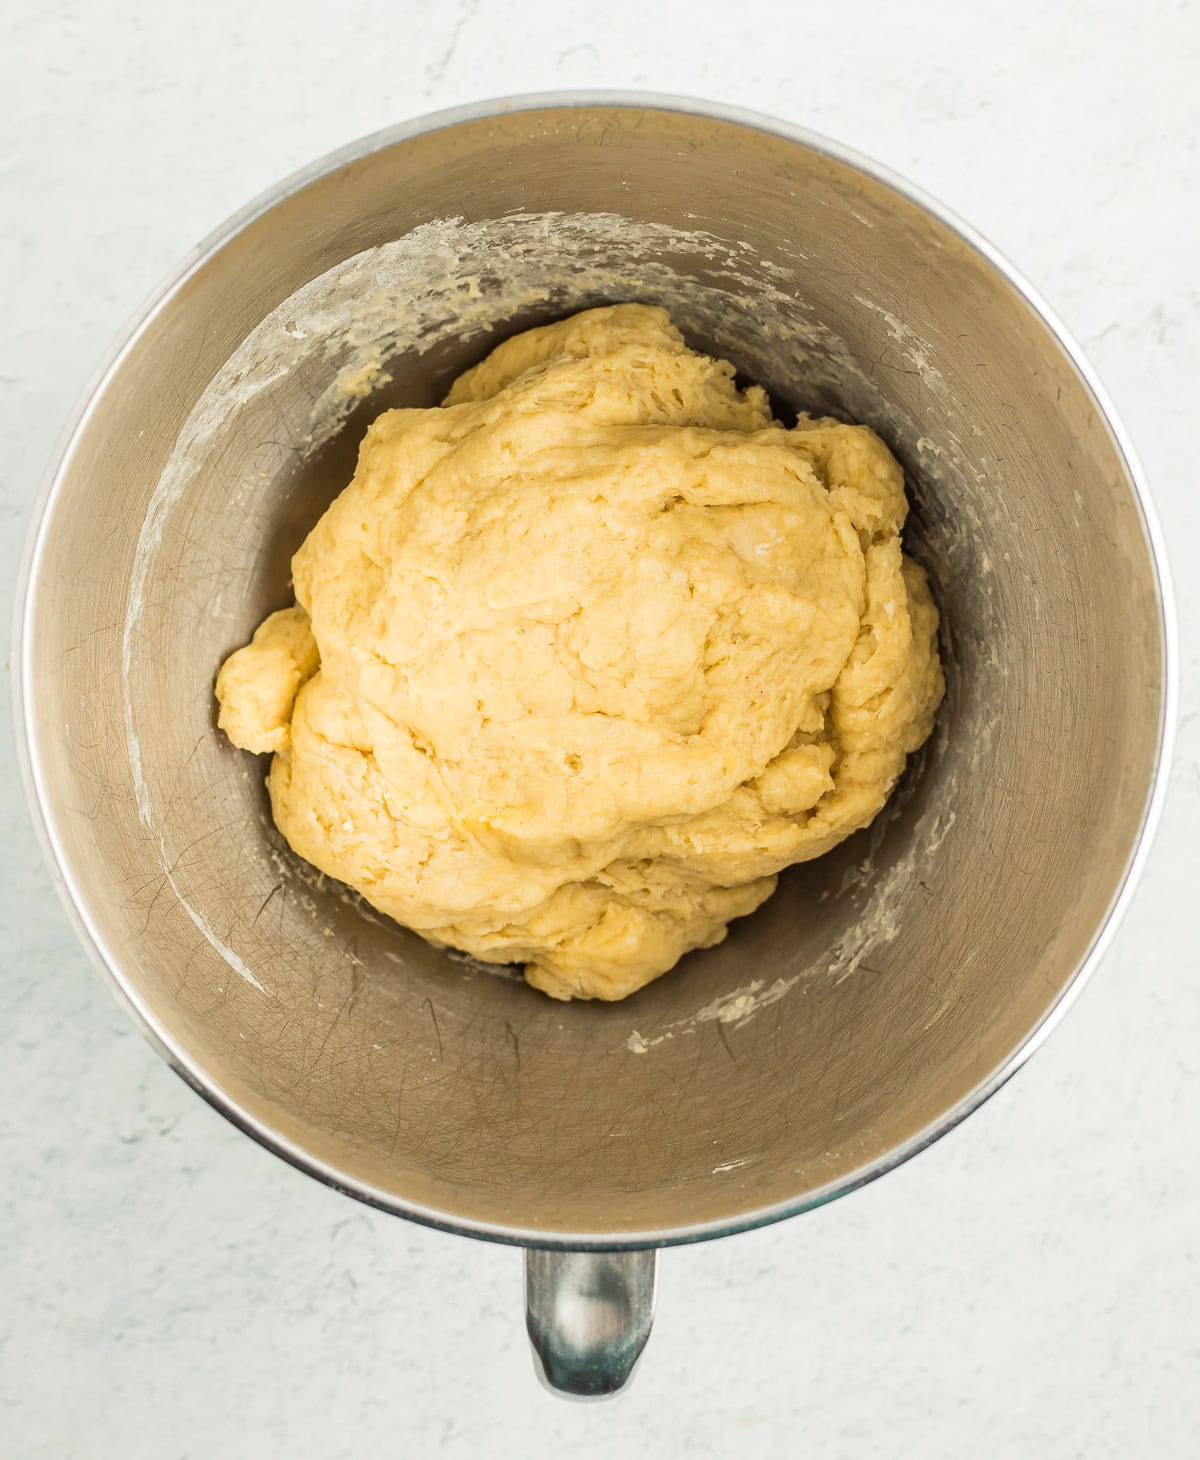
Add flour, sugar, eggs, salt, and butter. Using the dough hook attachment on the stand mixer, mix the dough until it is a solid mass and the sides of the bowl are clean (about 2 minutes). If the dough is still super sticky, add flour 1 tablespoon at a time until it is no longer sticking to the sides.
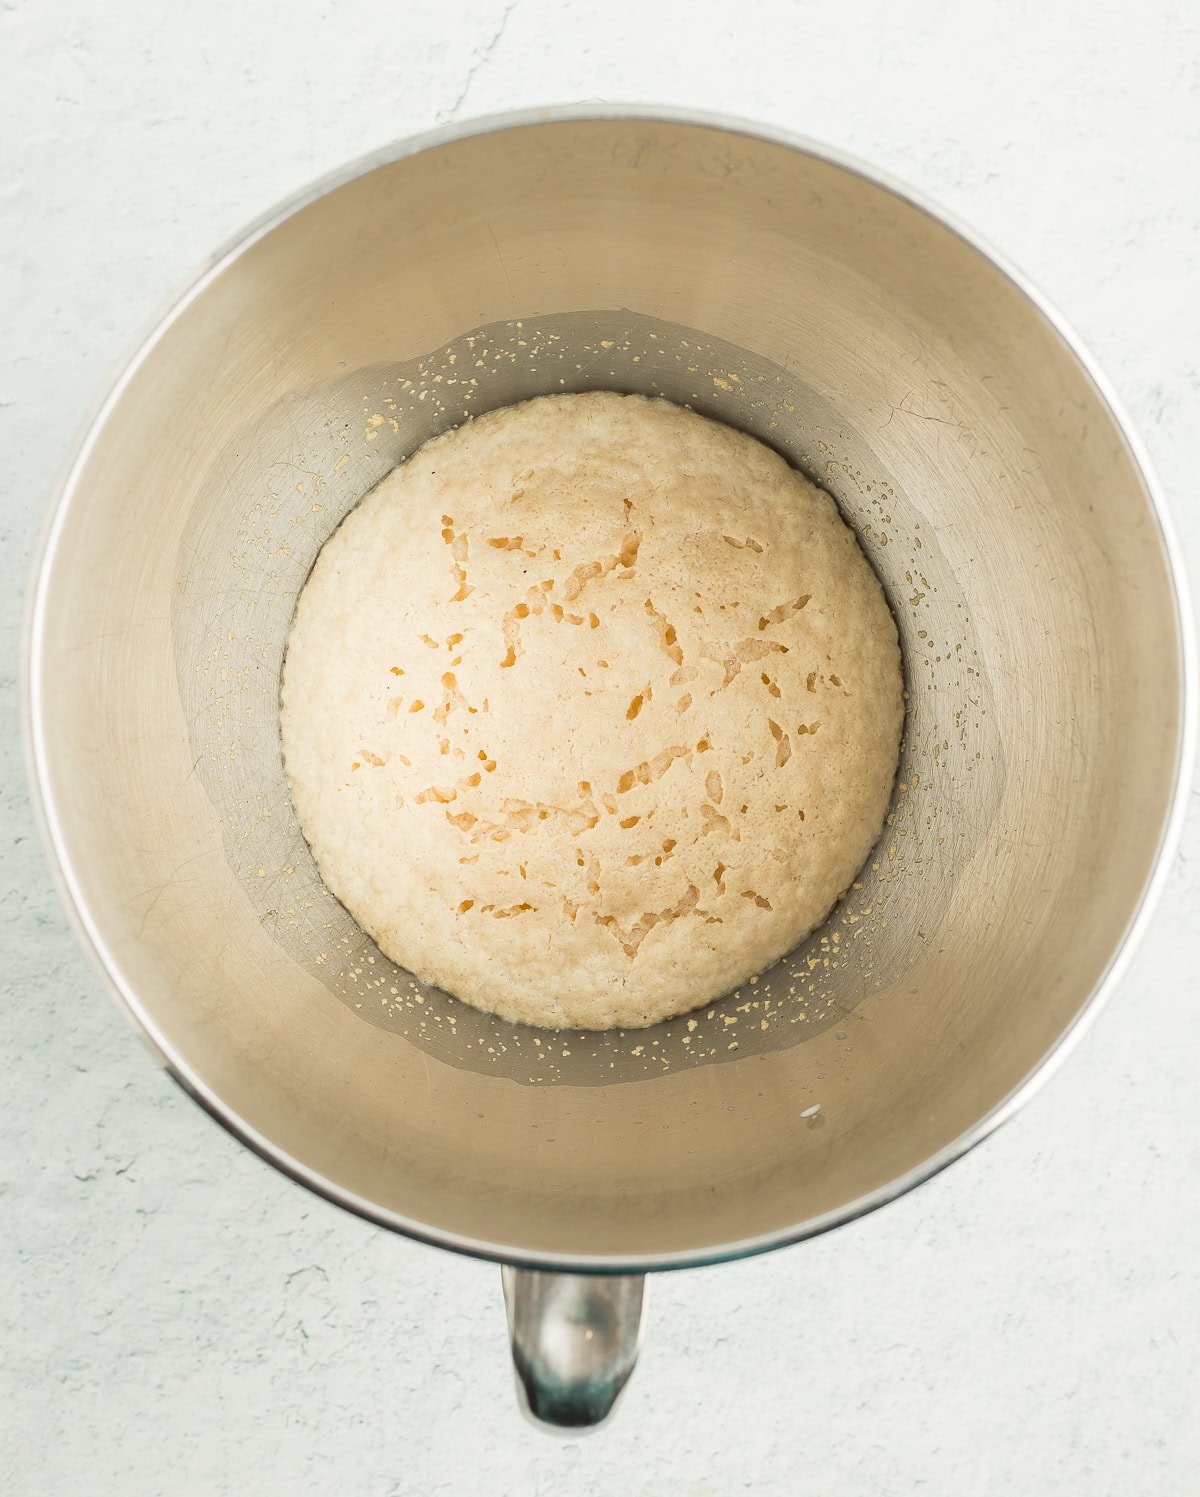
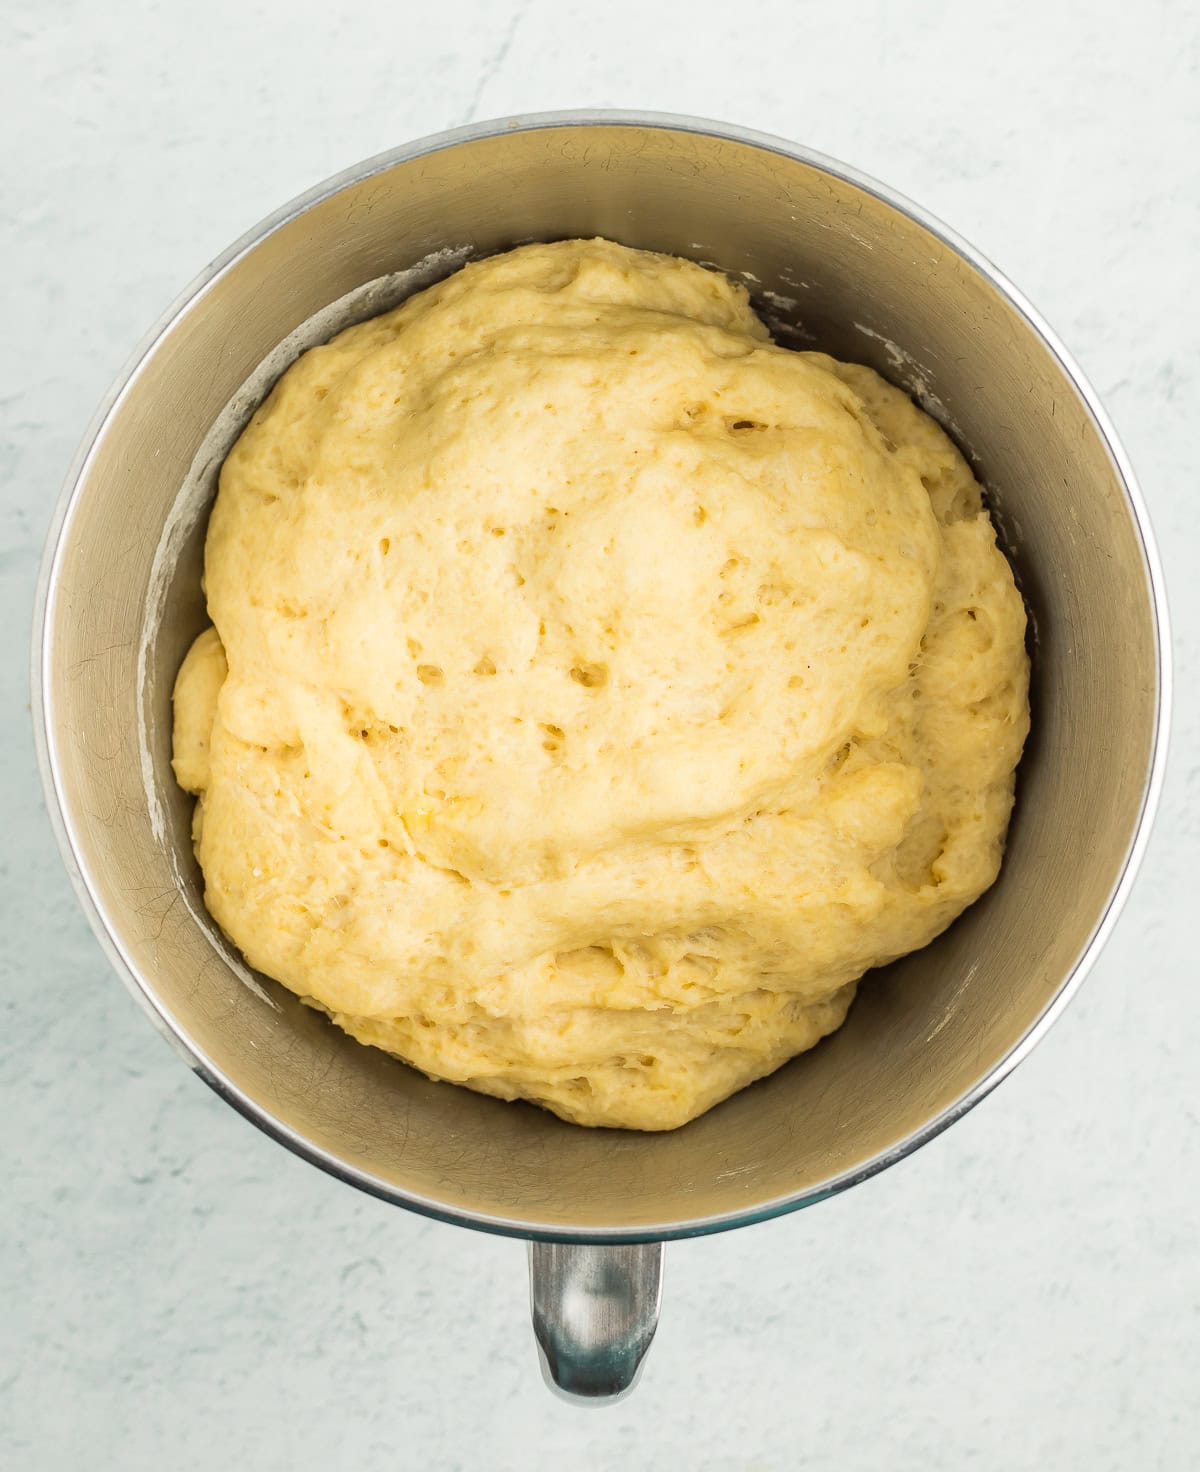
Gather the dough in one hand and quickly grease the bowl (I use a drizzle of olive oil). Place the dough back in and cover the bowl with a clean damp kitchen towel. Let it sit until the dough has doubled in size (about 1 hour). Looks Like: a puffed-up mass of dough with the top sides pulling away from the bowl. Feels like: the super-soft underside of your granny’s squishy arm. You know what I am talking about. Just go with it.
proofing dough in an Instant Pot (Cold Kitchen Tip):
If you have a colder kitchen (I do!) and you have an Instant Pot, you can proof your dough in an Instant Pot using the yogurt setting and a glass lid.
Drizzle a bit of olive oil into the Instant Pot insert and add the dough. Cover with the glass lid, press “Yogurt” and set the timer for 30 minutes. Check after 15. It took mine about 35 minutes to double in size.
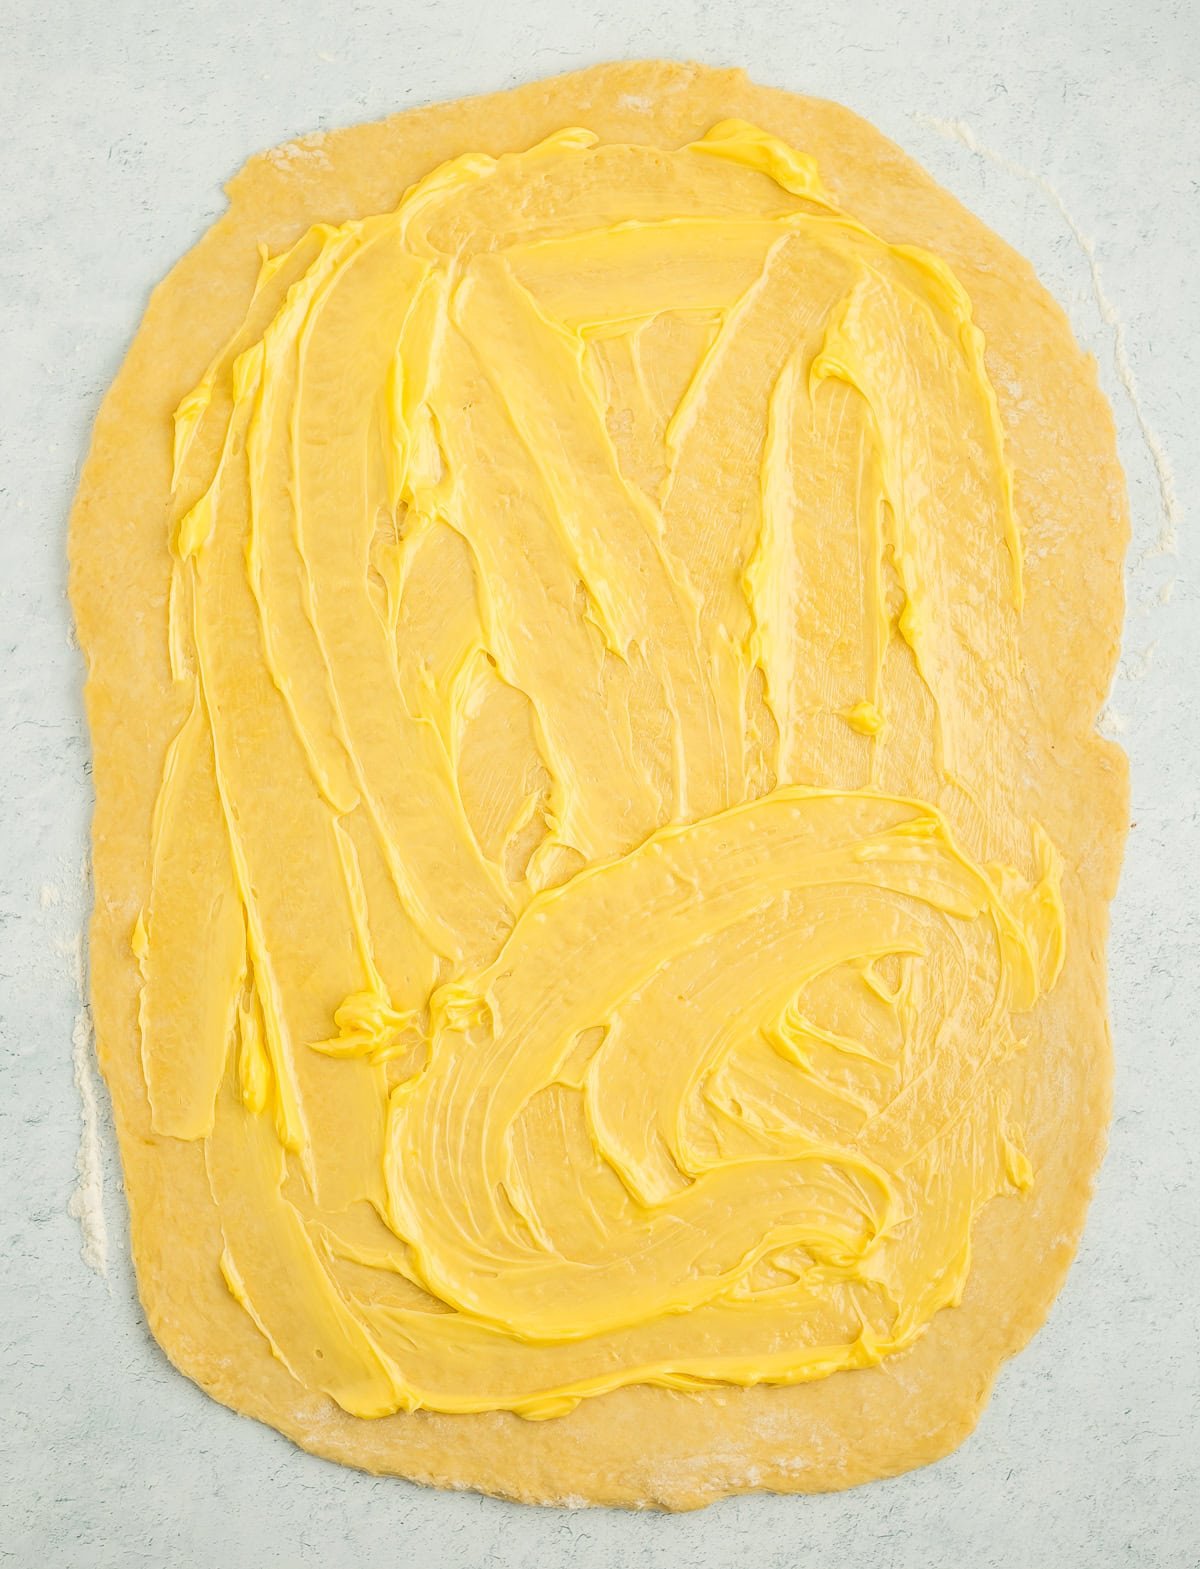
Sprinkle a bit of flour onto a clean surface. Make a ball out of the dough and gently press it with your hands to create a rectangle. Pro tip: using the palm of your hand before using a rolling pin will save you a lot of work. Roll out the dough to make a large rectangle (about 18×22 inches).
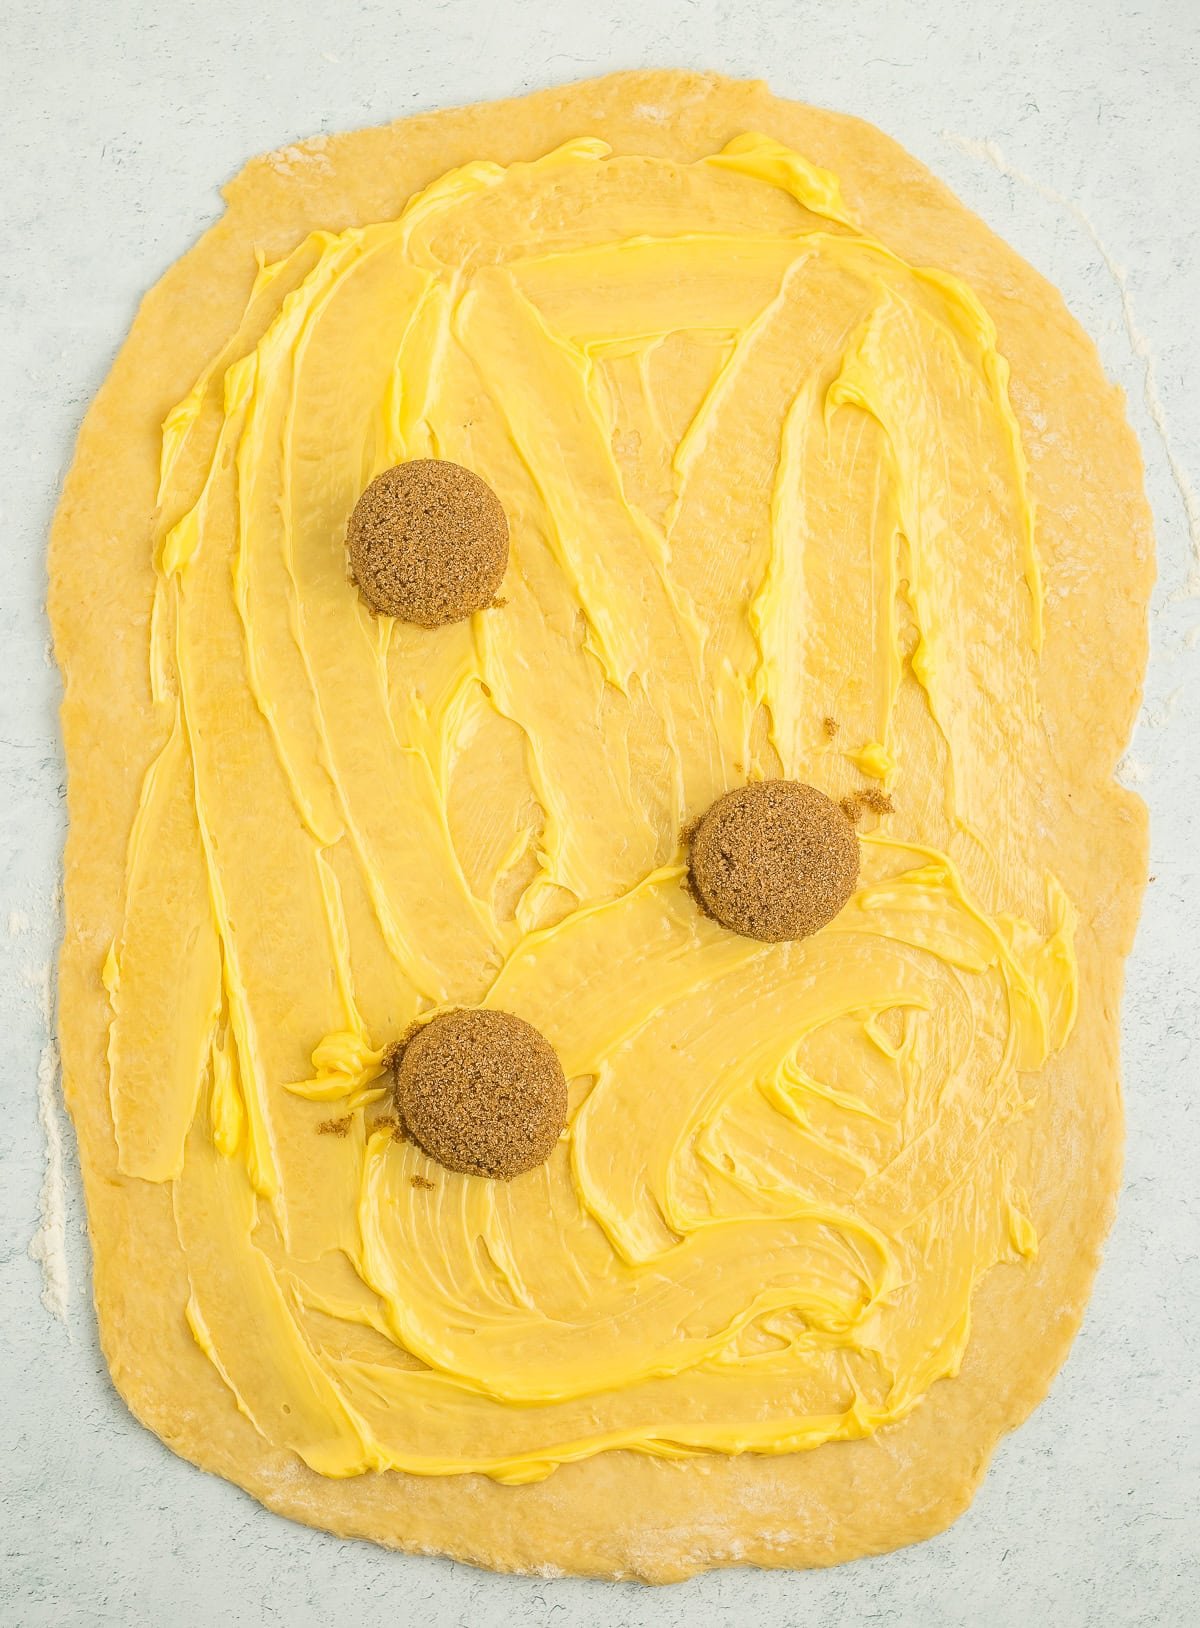
Spread softened butter over the dough, leaving a small butter-less perimeter around the outside. Cover with brown sugar and top with cinnamon.
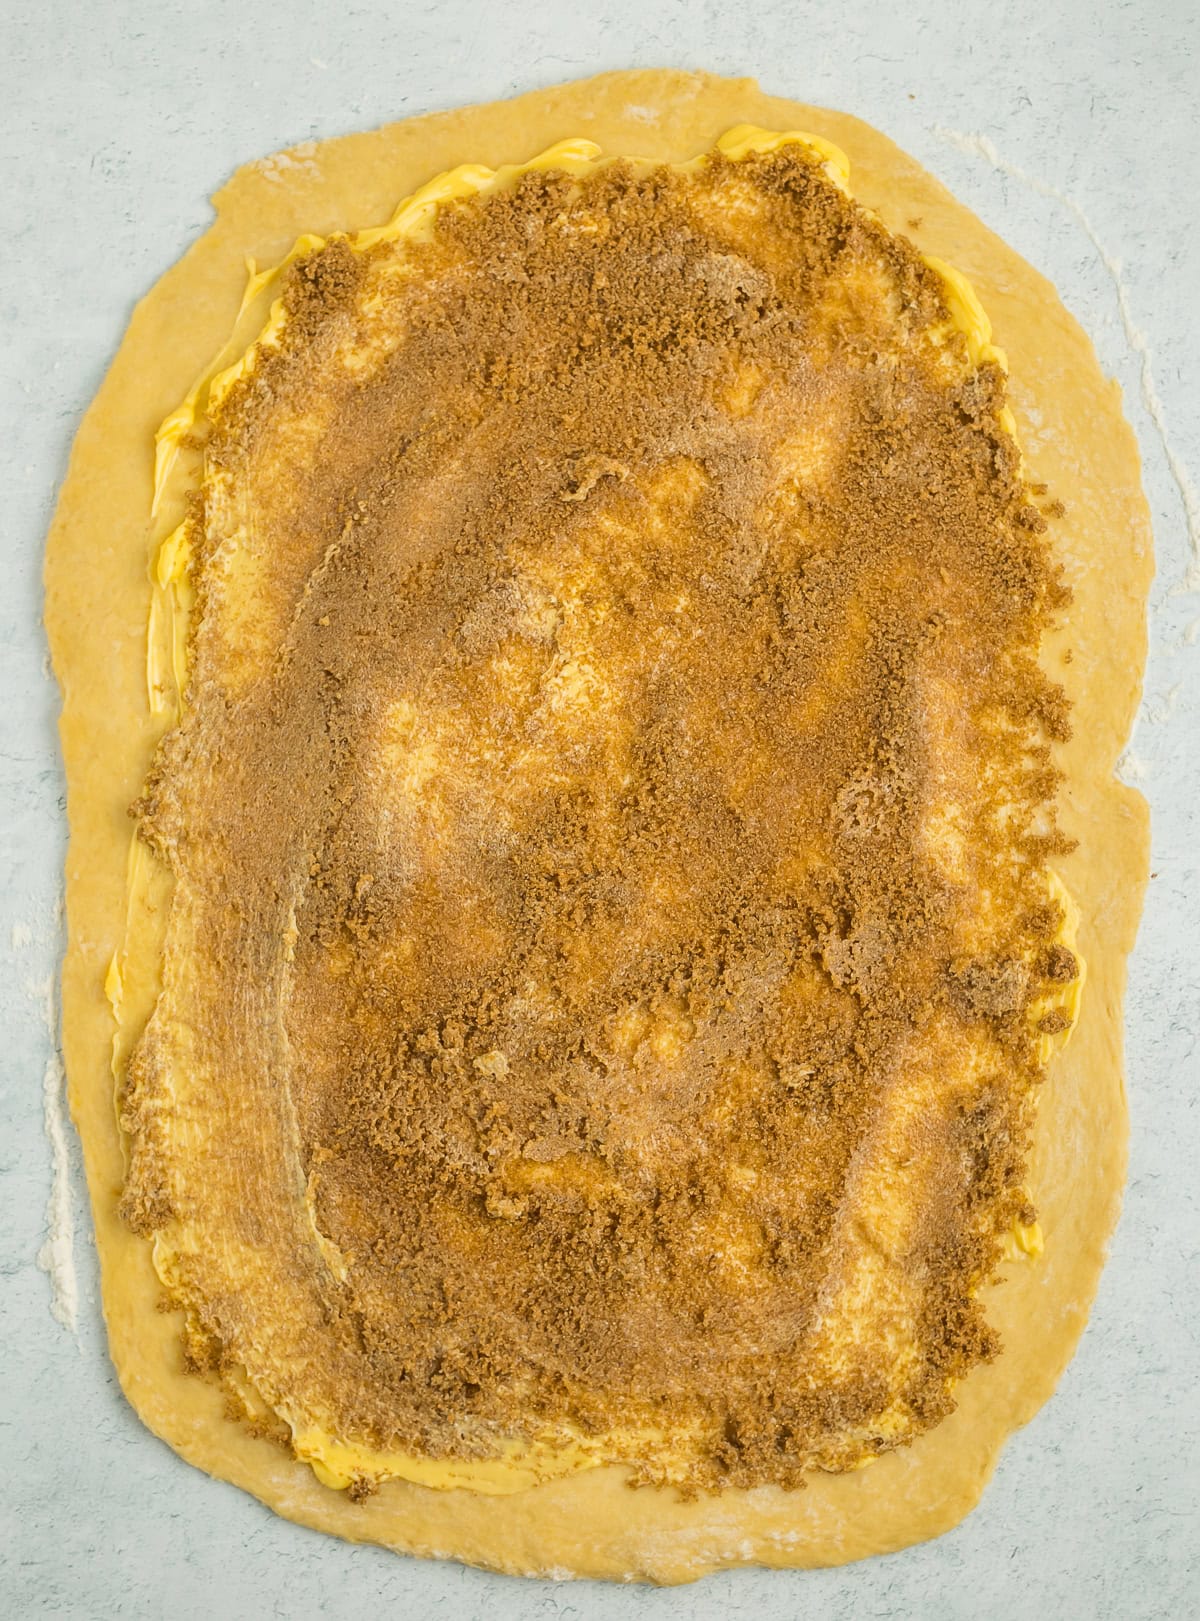
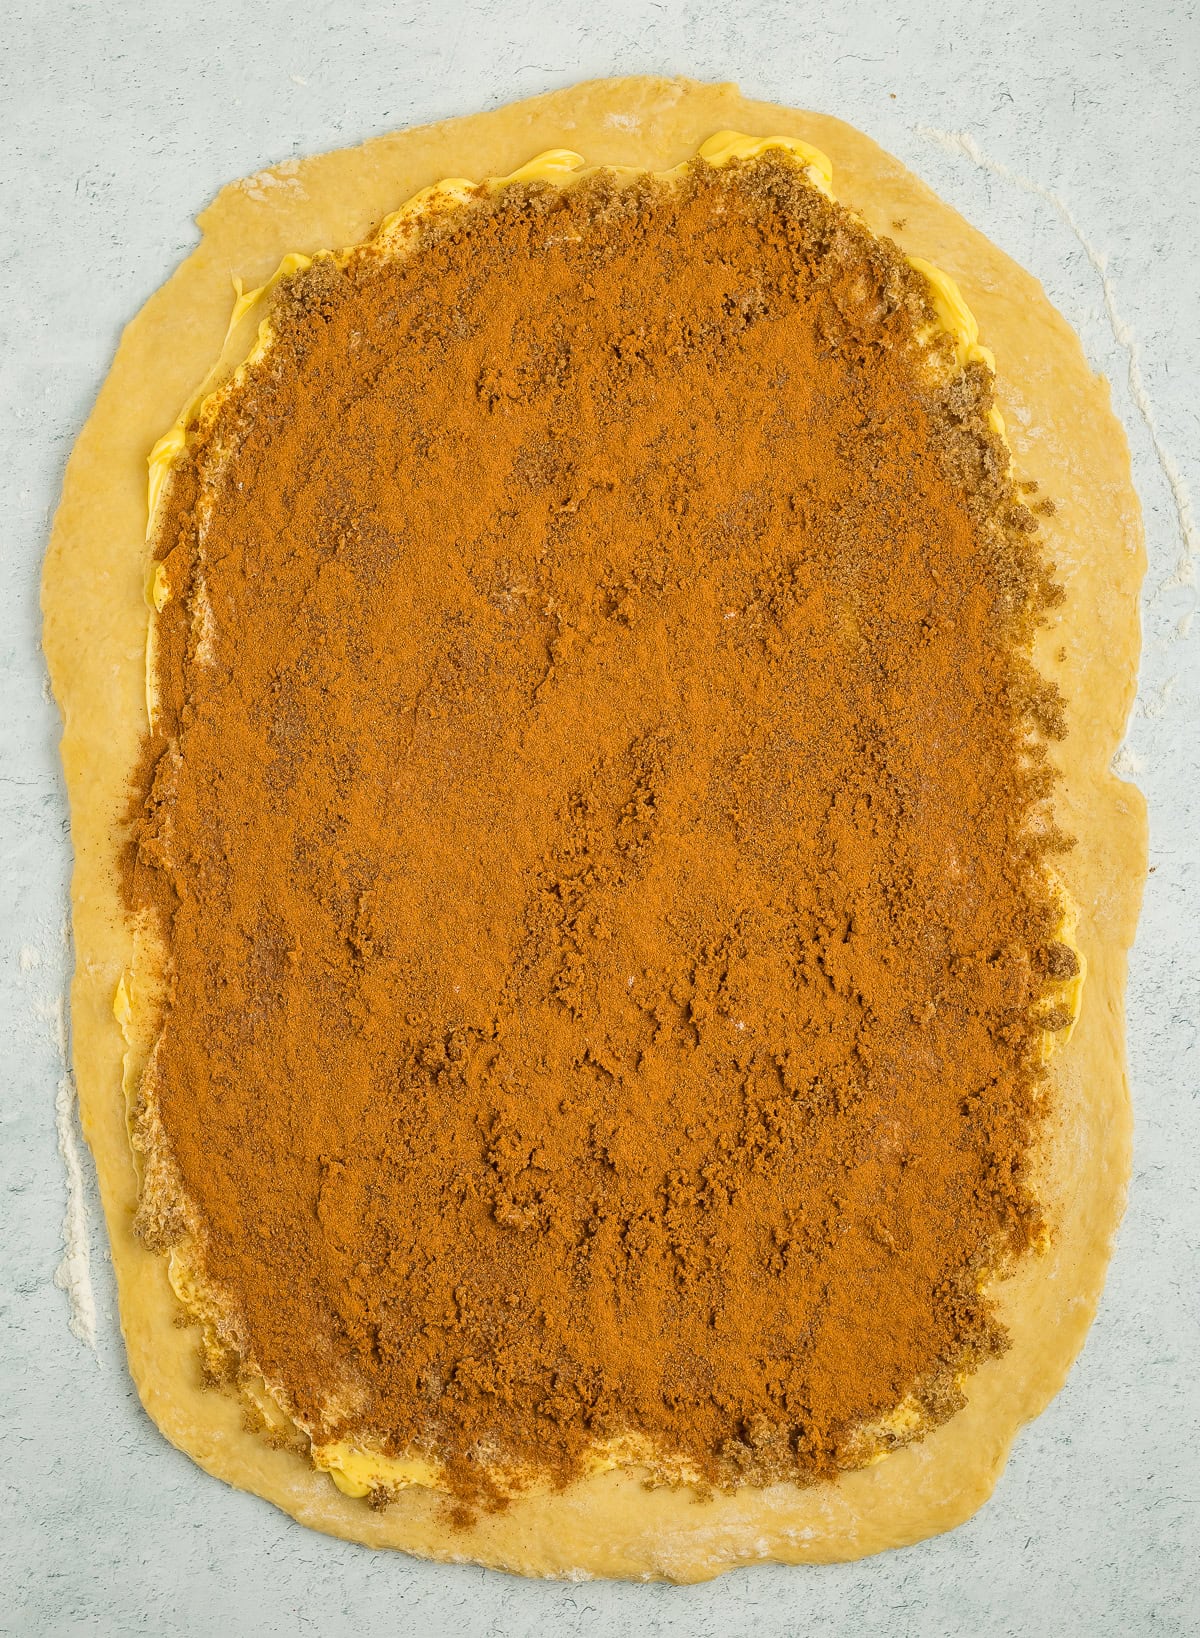
Starting with the long edge of the dough furthest from you, tightly roll the dough towards you until you have a solid “roll”.
Cut into 12-15 rolls. Pro tip: using a bread knife (aka serrated knife) will create the cleanest cuts. Some people use dental floss, but I am totally pro-bread knife for this step.

Grease a 9×13 baking pan and place the cinnamon rolls in the pan so that they’re close but not necessarily touching.
Set the baking pan aside in a warm place until the rolls have doubled in size (about 1 hour, depending on the temp of your kitchen). Looks Like: the dough will have “fluffed” u,p and the rolls are likely touching each other in the dish.

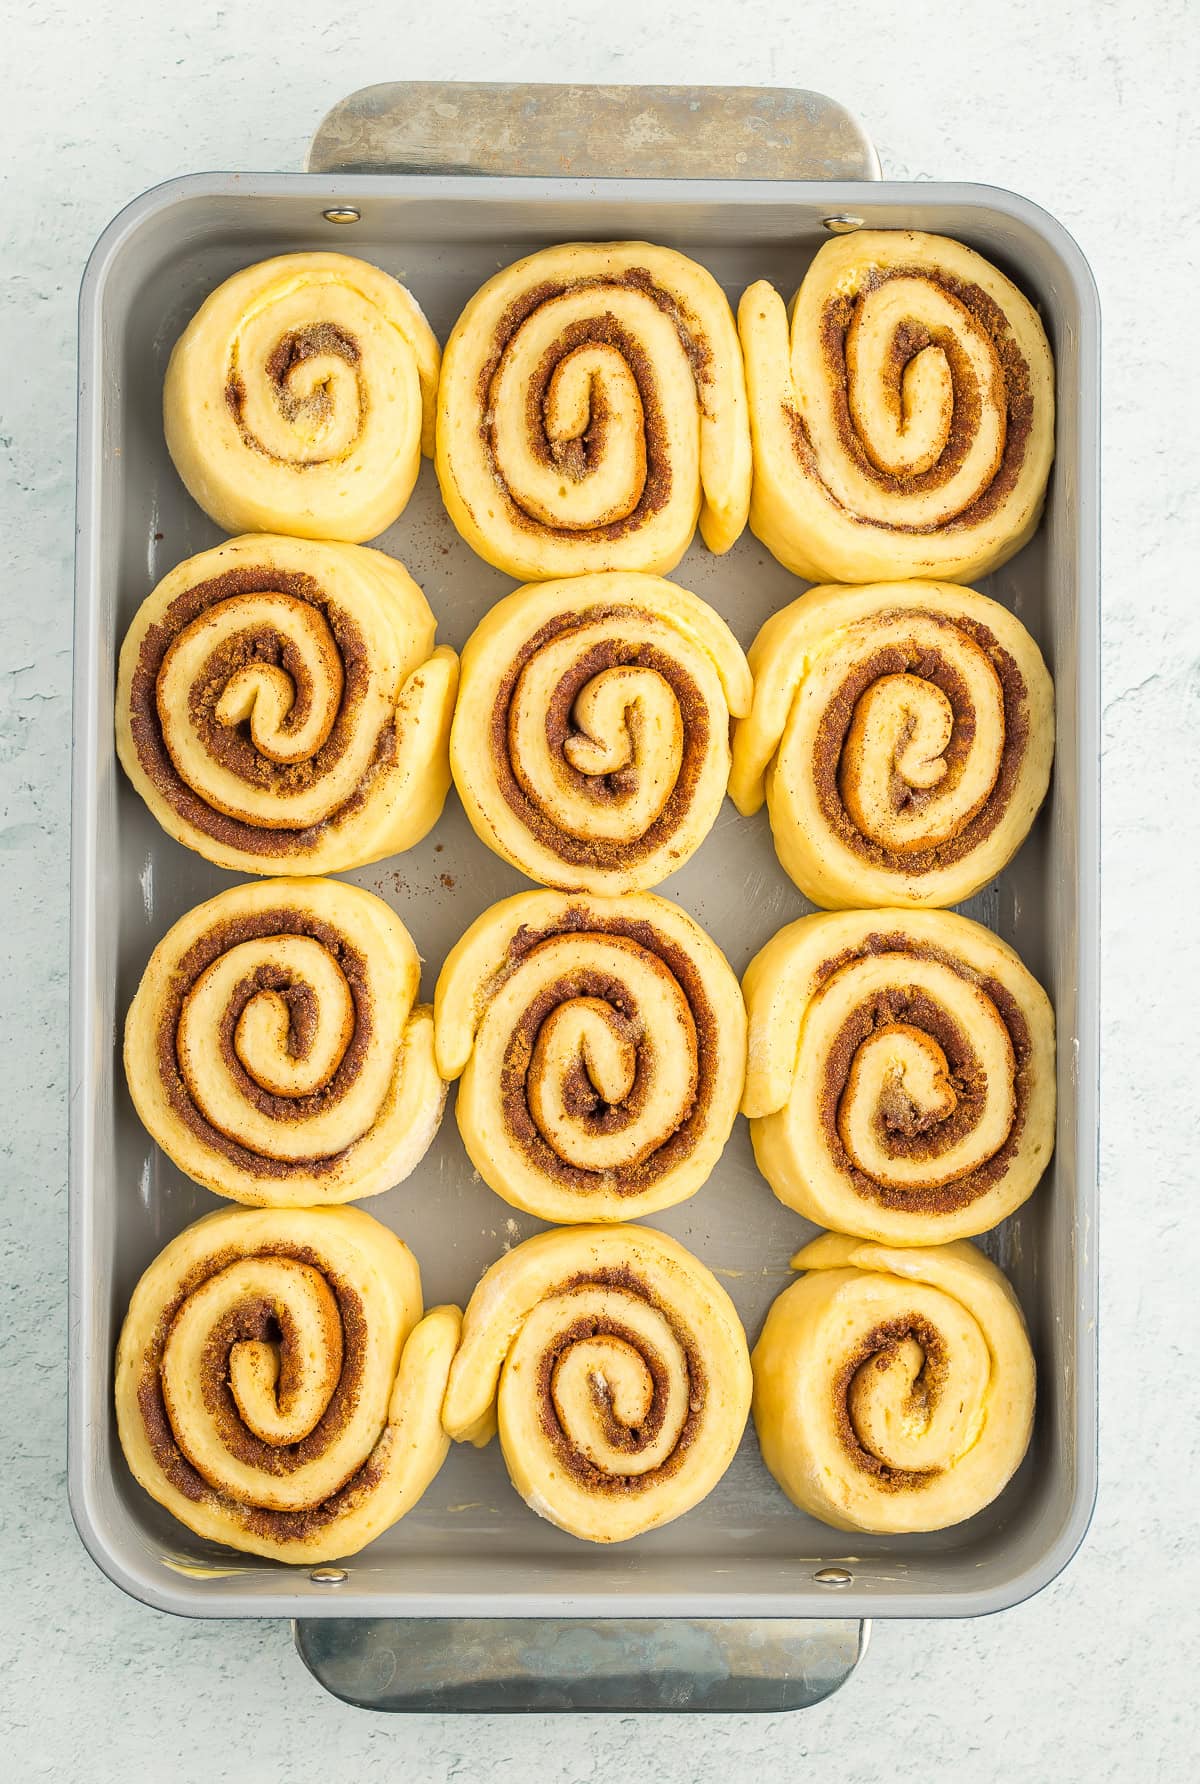
You can go ahead and bake them now if you’d like, but if you’re planning ahead, tightly cover the pan and store it in the fridge for up to 36 hours.
To bake: preheat the oven to 350˚F. Bake for 25-28 minutes! Smells like: heaven on earth.
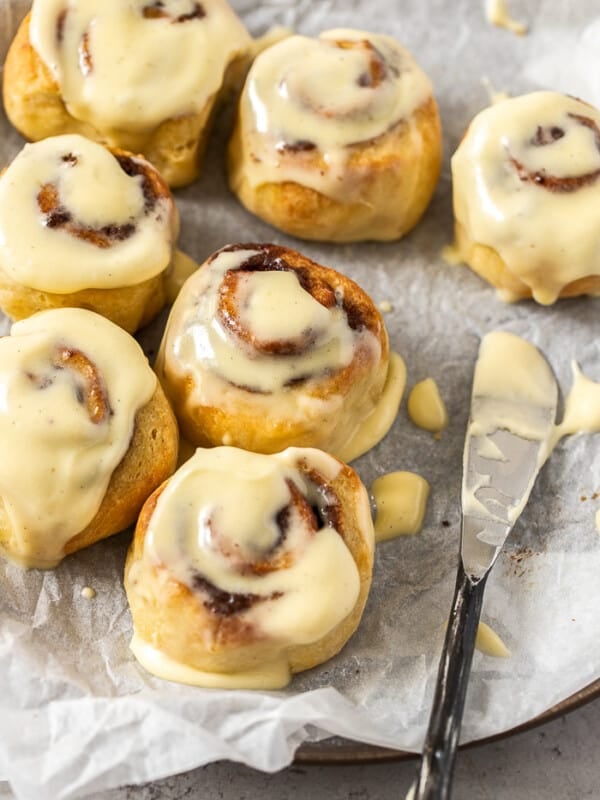
Let’s Make the cream cheese icing
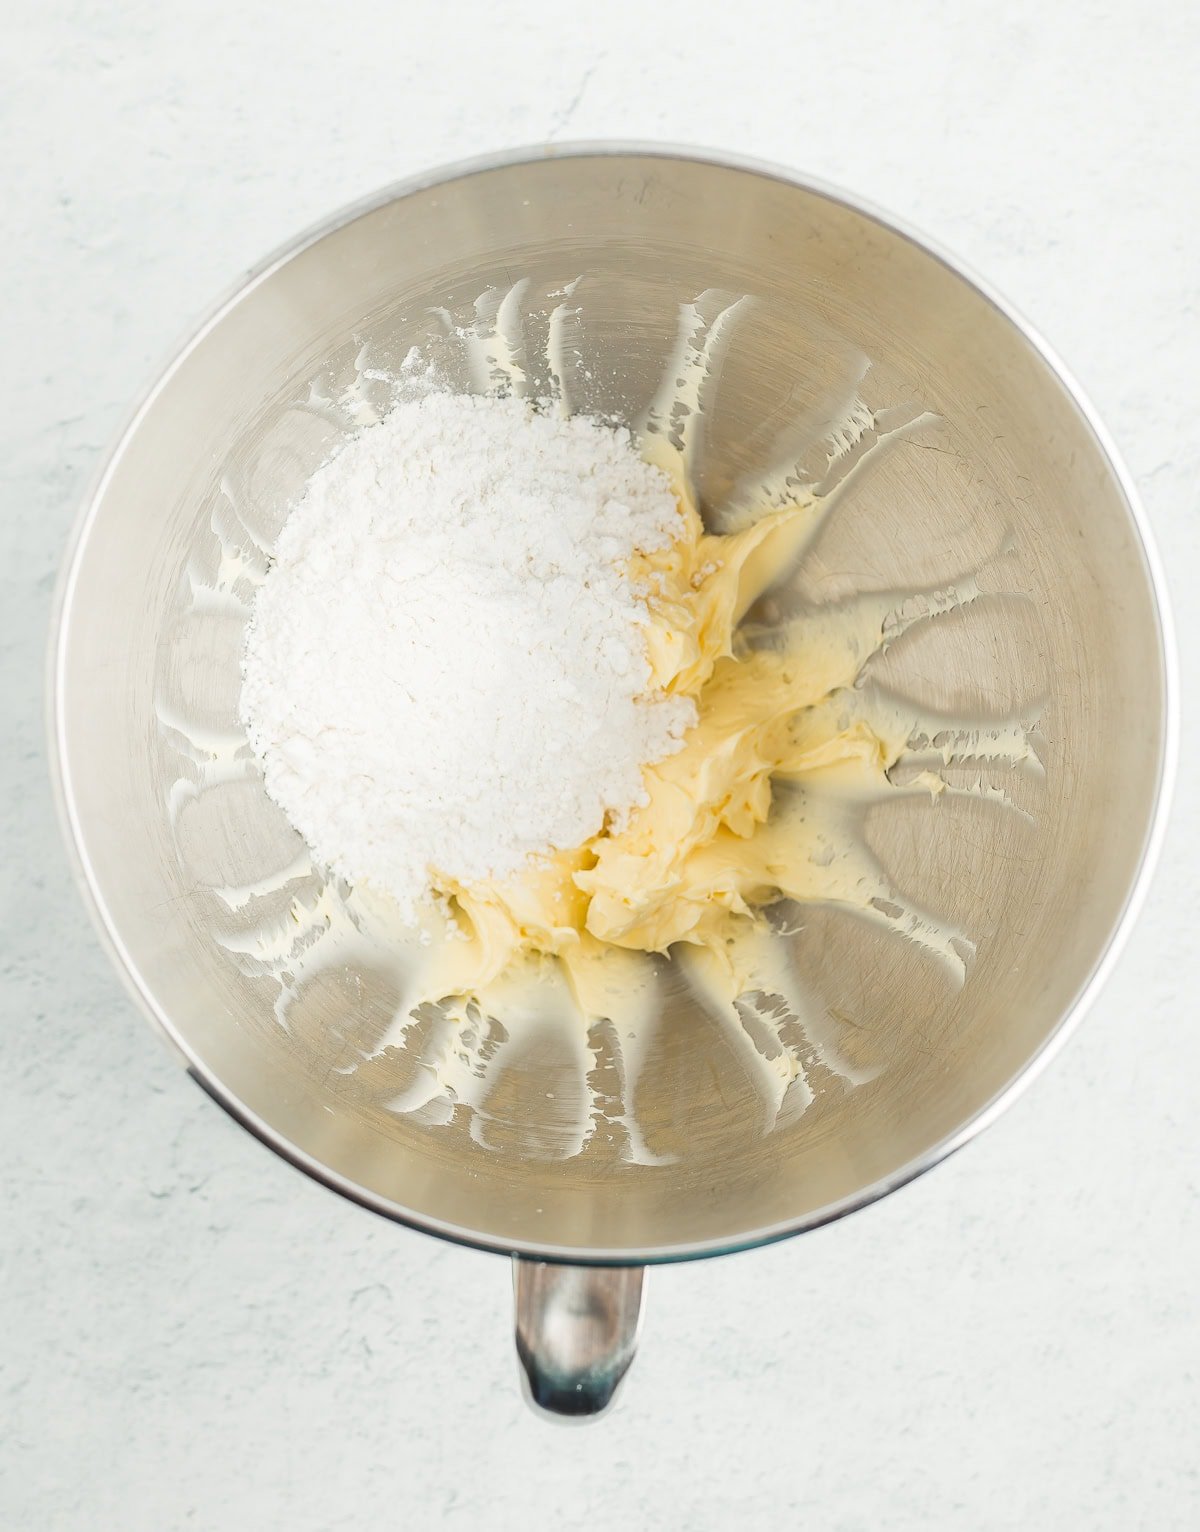
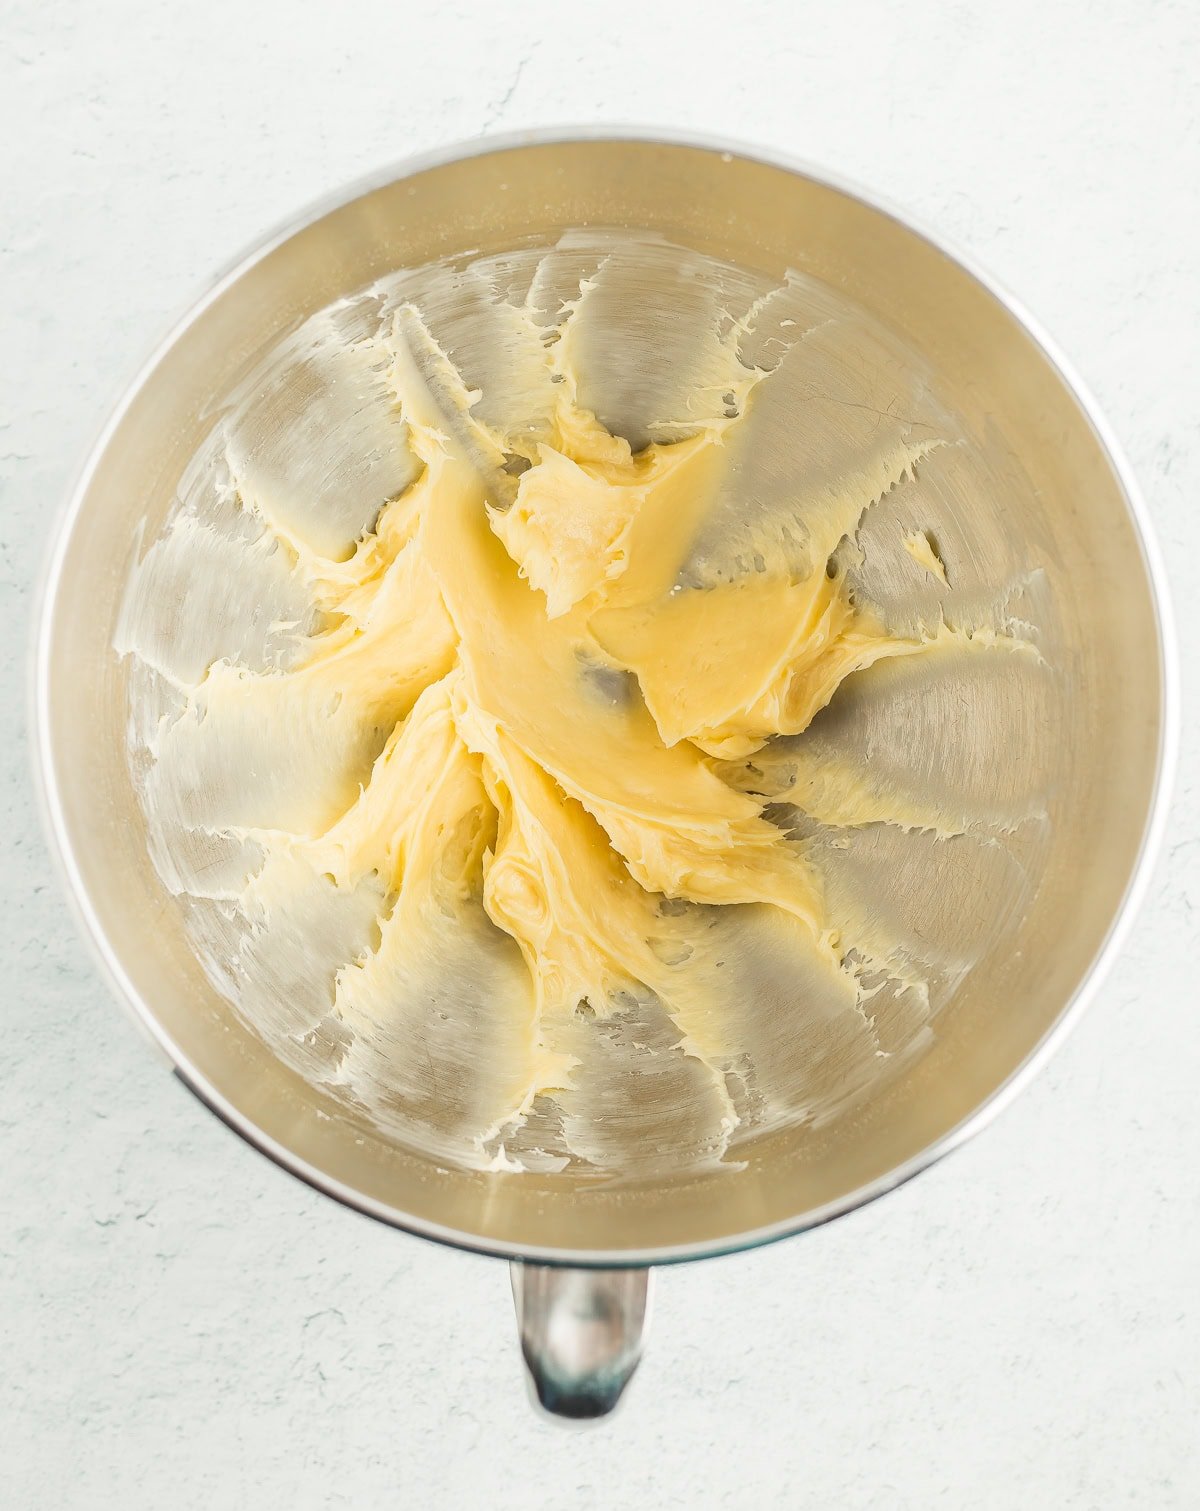
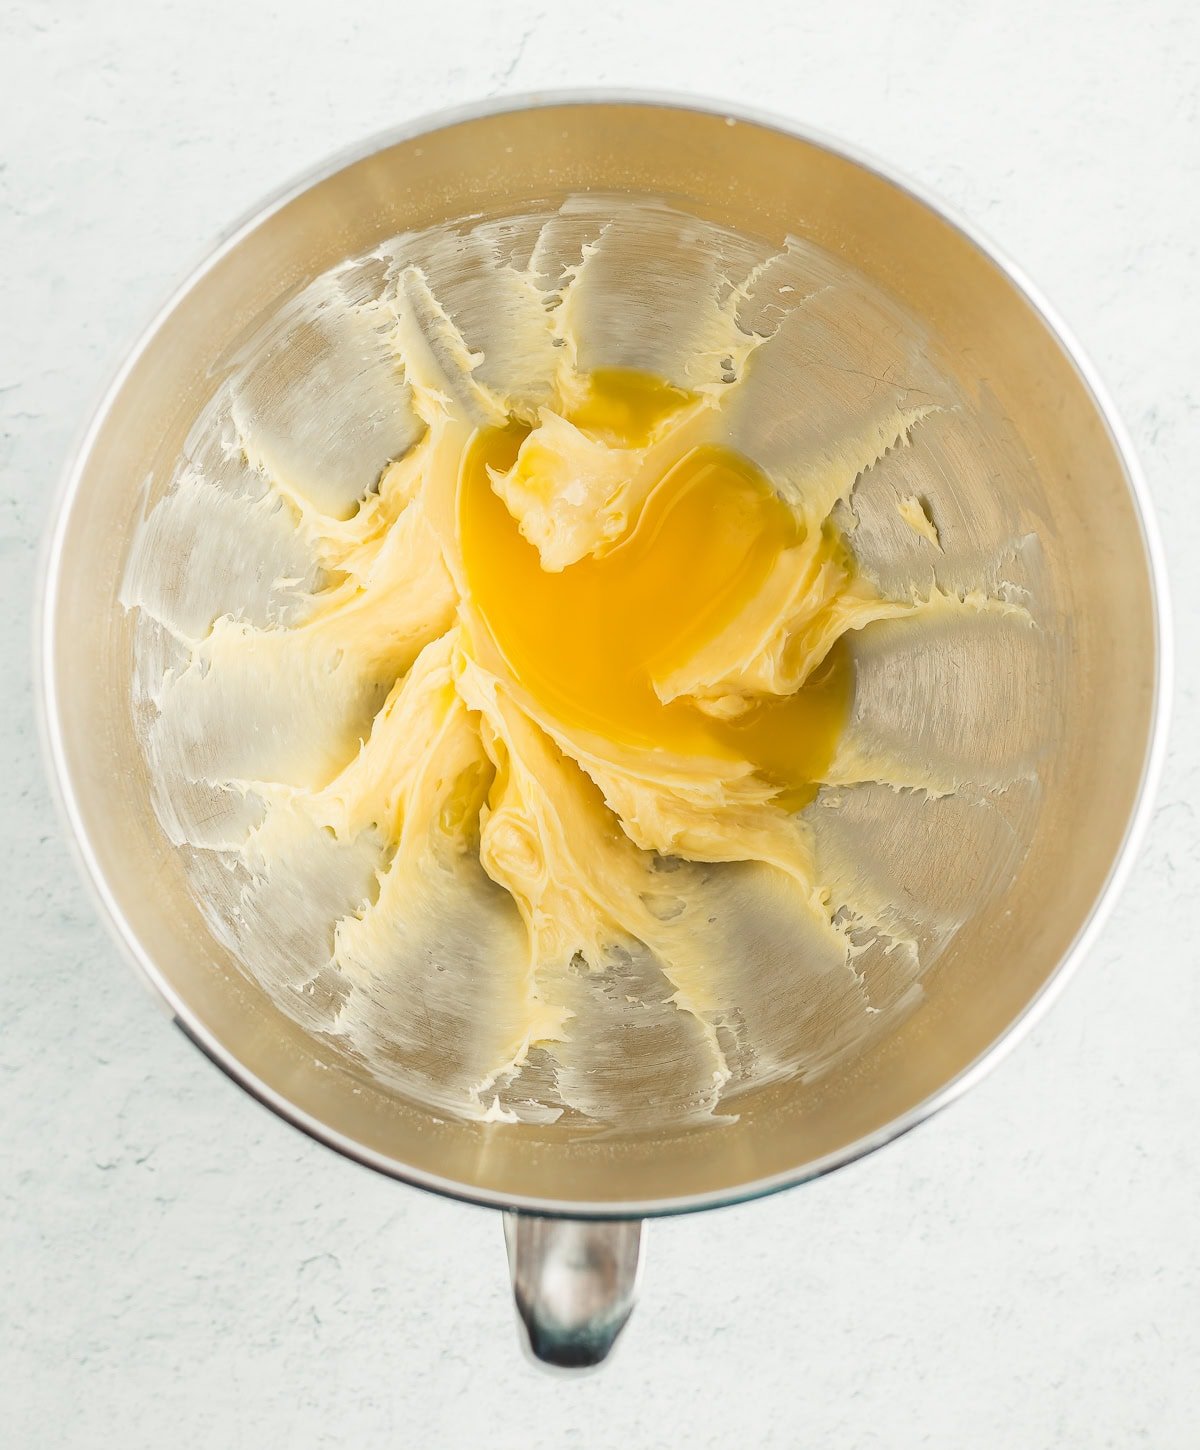
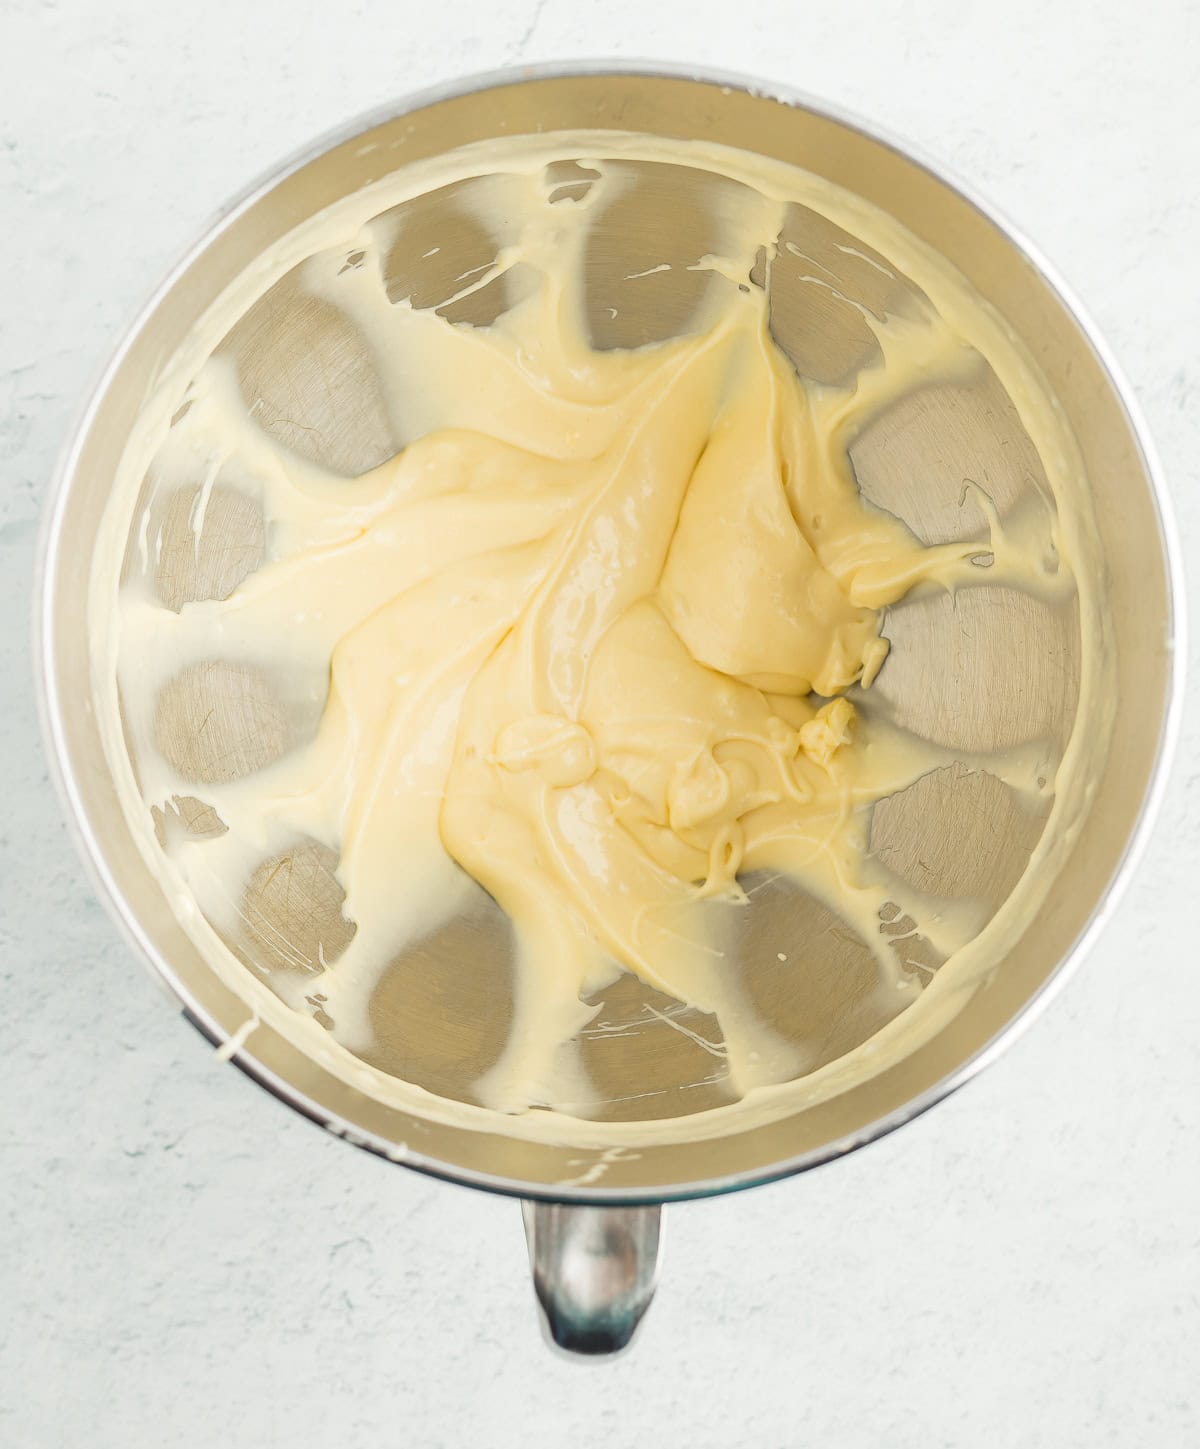
While the rolls are baking, combine room-temperature butter and cream cheese in a mixer fitted with a paddle attachment. Mix on medium until soft and fluffy. Looks Like: whipped butter.
Reduce the mixer to low and add the powdered sugar 1/4 cup at a time (related: how to make powdered sugar). Pro tip: taste as you go because not everyone likes their frosting the same level of sweetness. Make this frosting YOURS.
Add in the vanilla, almond extract, and orange juice, and slowly increase the mixer speed to medium-high until well combined. Pro tip: if you want a spreadable frosting instead of a pourable icing, skip the orange juice. If you still want an orange flavor (you do!), add in 1 tbsp of orange zest with the vanilla.
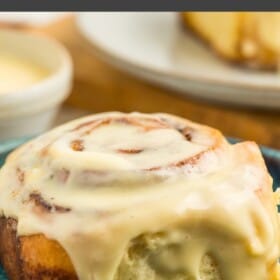
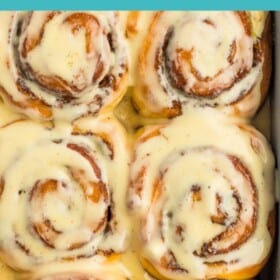
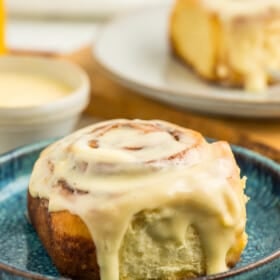
Pour/spread the icing over warmed rolls. Then stand back while your family rushes the kitchen and then starts to loudly chant your name and slow clap. It may look like the “Oh, Captain, my Captain” scene from Dead Poet’s Society. Maybe.

Pro Tips/Recipe Notes
- No stand mixer? You can technically mix the dough by hand but be prepared for it to take about 10 minutes and for your arms to get freaking jacked. Invest in tank tops to show off your new muscles.
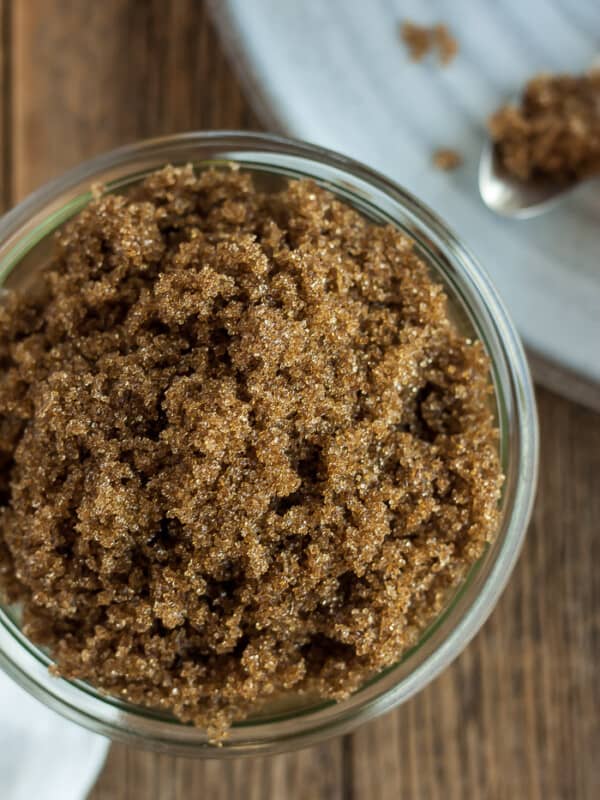
- Did you know you can make your own brown sugar? It’s true! Check out our post on Homemade Brown Sugar.
- This recipe has been written specifically for all-purpose flour because it is easy to find and economical. You’re welcome to use bread flour if you have any on hand. The extra gluten will create an even fluffier overnight cinnamon roll. If that’s even possible!
- Types of milk – I would recommend 2%, whole, or buttermilk. Results with 1% or lower are generally poor. I have not personally tested this recipe with non-dairy milk, but readers have noted success with almond milk.

Fluffy Overnight Cinnamon Rolls With Cream Cheese Icing
Ingredients
Dough
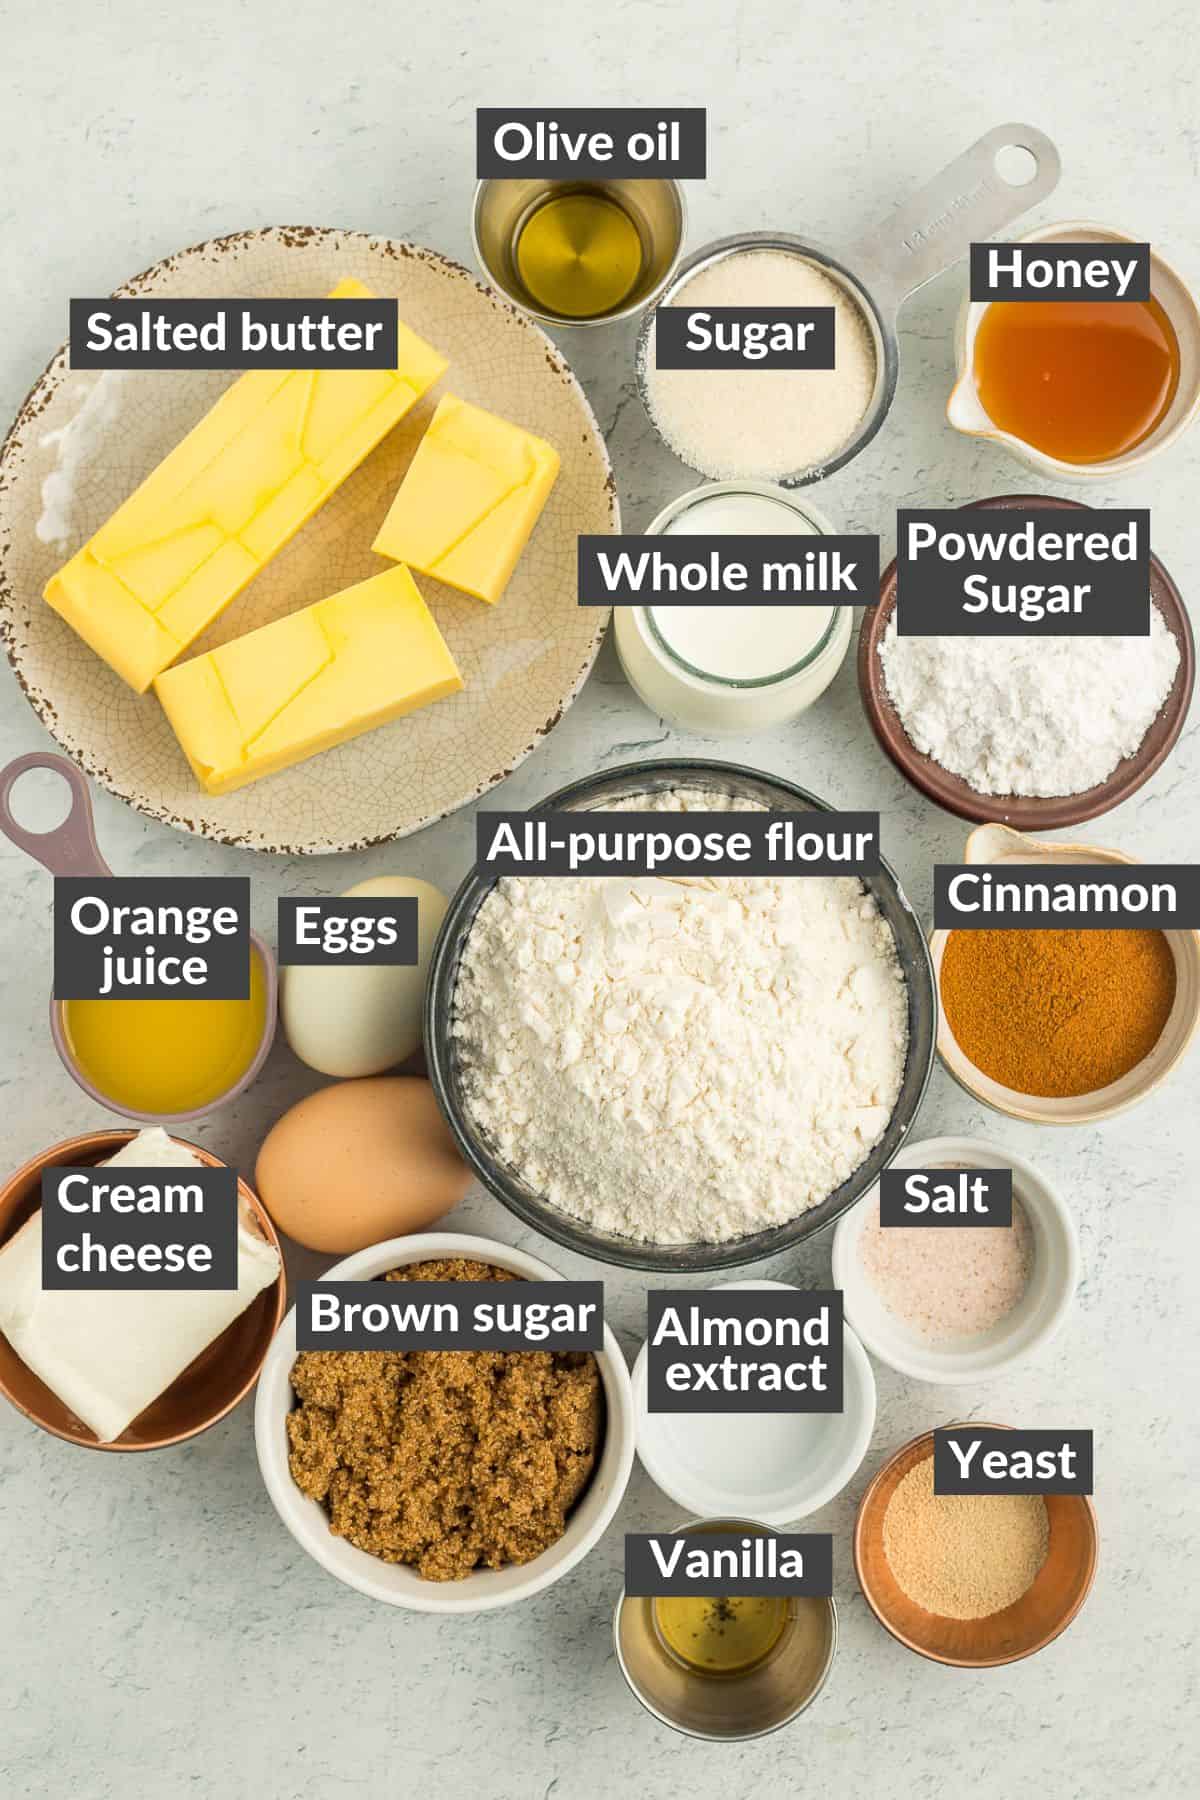
- 1 cup milk, warmed to 110˚F {recommend: 2%, whole milk, or buttermilk}
- 1/4 cup honey {or white sugar}
- 2 1/4 tsp active dry yeast
- 2 large eggs {room temperature}
- 1/3 cup salted butter {melted, slightly cooled}
- 1/3 cup sugar
- 1 tsp salt
- 4 1/2 cups all-purpose flour {spooned and leveled into the measuring cup}
- drizzle olive oil {for greasing the bowl}
Filling
- 1/2 cup salted butter {softened}
- 3/4 cup brown sugar, packed
- 3 tbsp ground cinnamon
- 2/3 cup heavy cream {optional}
Orange Cream Cheese Icing
- 3 oz cream cheese {softened}
- 3 tbsp butter {softened}
- 1 cup powdered sugar
- 1 tsp pure vanilla extract
- 1/8 tsp almond extract {optional}
- 1/4 cup orange juice {or 1 tbsp orange zest}{optional}
Instructions
Proof the Yeast
- Whisk together warm milk, honey, and yeast in the bowl of a stand mixer. Let it sit until foamy and doubled in size. Looks Like: the top of a super creamy root beer! If you have instant yeast, skip this step and combine the yeast, honey, and milk along with the dough ingredients together and follow directions in the next step (Step 1 under "Make the Dough".1 cup milk, warmed to 110˚F, 1/4 cup honey, 2 1/4 tsp active dry yeast
Make the Dough
- Add flour, sugar, eggs, salt, and butter to the proofed yeast in the stand mixer. Using the dough hook attachment on the stand mixer, mix the dough at "stir" or "2" until it is a solid mass and the sides of the bowl are clean (about 2 minutes). If the dough is still super sticky, add flour 1 tablespoon at a time until it is no longer sticking to the sides.2 large eggs, 1/3 cup sugar, 1 tsp salt, 4 1/2 cups all-purpose flour, 1/3 cup salted butter
- Gather the dough in one hand and quickly grease the bowl (I use a drizzle of olive oil). Place the dough back in and cover bowl with a clean damp kitchen towel. Let it sit until the dough has doubled in size (about 1 hour). Looks Like: a puffed up mass of dough with the top sides pulling away from the bowl.drizzle olive oil
- You can also proof your dough in an Instant Pot using the yogurt setting and a glass lid. Drizzle a bit of olive oil into the instant pot insert and add the dough. Cover with the glass lid and press "yogurt" and set the timer for 30 minutes. Check after 15. It will take 15-40 minutes to double in size.
Assemble the Cinnamon Rolls
- Sprinkle a bit of flour onto a clean surface. Make a ball out of the dough and gently press it with your hands to create a rectangle.
- Roll out the dough to make a large rectangle (about 18×22 inches).
- Spread softened butter over the dough, leaving a small butter-less perimeter around the outside. Cover with brown sugar and top with cinnamon.1/2 cup salted butter, 3/4 cup brown sugar, packed, 3 tbsp ground cinnamon
- Starting with the long edge of the dough furthest from you, tightly roll the dough towards you until you have a solid “roll”.
- Cut into 12-15 (~1.5-2 inches wide) rolls. Pro tip: using a bread knife (aka serrated knife) will create the cleanest cuts.
- Grease a 9×13 baking pan. Place the cinnamon rolls into the dish. Set aside in a warm place until the rolls have doubled in size (about 1 hour). Looks Like: the cinnamon rolls will have "fluffed" up and are likely touching each other in the dish.
- Tightly cover the pan and store in the fridge for up to 48 hours. (You can also bake them right away if desired).
- Preheat the oven to 350˚F.
- {OPTIONAL}: Five minutes before baking, pour 2/3 cup of heavy cream over the tops of the cinnamon rolls. You'll need to bake for an additional 2-5 minutes, and I highly recommend gently flipping each of the cinnamon rolls in the pan once they're out of the oven.2/3 cup heavy cream
- Bake uncovered for 25-28 minutes or until the tops are lightly golden brown.
Make the Icing
- While the cinnamon rolls are baking, combine butter and cream cheese in a mixer fitted with a paddle attachment. Mix on medium until soft and fluffy.3 oz cream cheese, 3 tbsp butter
- Reduce the mixer to low and add the powdered sugar 1/4 cup at a time.1 cup powdered sugar
- Add in the vanilla and almond extract and orange juice and slowly increase the mixer speed to medium or medium-high until well combined.1 tsp pure vanilla extract, 1/8 tsp almond extract, 1/4 cup orange juice
- Pour/spread the icing over warmed cinnamon rolls.
Notes
- If using instant/rapid yeast, you can skip step 1 of proofing the yeast.
- Types of milk – I would recommend 2%, whole, or buttermilk. Results with 1% or lower are generally poor.
- Make sure you spoon the flour into the cup, rather than scoop the measuring cup into the flour. This can pack the flour in, causing too much flour to be added, resulting in dry, dense cinnamon roll dough.
- No stand mixer? You can technically mix the dough by hand, but be prepared for it to take about 10 minutes.
- Five minutes before baking, pour 2/3 cup of heavy cream over the tops of the cinnamon rolls. This is optional, but it leads to amazingly tender cinnamon rolls. You’ll need to bake for an additional 2-5 minutes, and I highly recommend that you gently flip each of the cinnamon rolls in the pan once they’re out of the oven.
- To freeze: press a piece of plastic wrap over the cinnamon rolls after the second rise. Tightly wrap the pan in foil and freeze unbaked cinnamon rolls for up to two months. To thaw: place in the fridge overnight. Bake as normal.
Nutrition
Nutrition information is automatically calculated, so should only be used as an approximation.


Made these for Christmas morning. Subbed in a cranberry spice filling and added a few spoonfuls of cranberry sauce to the frosting because pink frosting makes any morning better. Despite being cursed when working with yeasted dough, these turned out fantastic.
I LOVE the idea of cranberry filling and pink frosting. YUM!
I don’t even really like cinnamon rolls, but I thought these would be easy for Christmas morning. They were and very delicious. I reduced the amount of cinnamon the second time I made them because I don’t really like cinnamon (why am I, someone who doesn’t like cinnamon or cinnamon rolls making these?) but that should be a strong testimonial as to how delicious and easy these really are!
This is the best testimony for this recipe because you 1) don’t like cinnamon 2) don’t like cinnamon rolls. I laughed and smiled while reading this. 🙂
I have made lots of cinnamon rolls and am always not too impressed – but this recipe is by far the best I’ve ever tried. It is so so so good – and easy to follow. My family loves it so much! It’s now my go to recipe!
Jamey, I’m so thrilled you liked them so much, and I appreciate you taking the time to leave a review. 🙂
These have been my go-to since I discovered your recipe about a year or so ago, I think? My family loves them and I always make 2 batches-one for the freezer and one to enjoy right away! I am not sure if this was answered in another comment, but I use unsweetened vanilla almond milk instead of dairy milk (we aren’t DF, it’s just a preference and I still use regular old butter in these) and they’ve always turned out wonderfully. I’ve made them for neighbors who now request them from me and I’ve passed your recipe along to them as well. I make these as gifts for friends and today I colored the dough of 2 batches, one red and one green, and split them up to make a checkerboard pattern. They’ll be headed to friends for Christmas tomorrow. I am so happy I found this recipe! For anyone nervous to try, it is a bit involved, but the author walks you through every step and once you’ve done it a few times, you can do it with your eyes closed! Thank you so much for sharing!
Why have I never thought to color the dough before? You’re a genius, Katelynn!
OHEMGEEEEEE. I wish I could give these 10 stars. These are the BEST cinnamon rolls I have ever made. EVER. Should I also say I’ve been making them for 10 years? I made a regular batch and a gluten free batch and both were amazing. Usually when I make them GF I end up doing a crumble thing because the dough won’t rise and won’t roll. Not these, they rose perfectly and rolled like a dream. My one addition was two teaspoons of Xanthum Gum for a half of batch of GF rolls. My kids and husband ate both the regular and GF and ask we weekly to make them again. I will never use another recipe for cinnamon rolls.
Question – I love some whole wheat flour in my rolls. Could I substitute some in this recipe? Maybe 1/3 WW and 2/3 AP? Thanks Sarah!
I have not tried it yet. If you do add whole wheat, I’d also include some vital wheat gluten.
This is one of the best cinnamon roll recipes I’ve tried. Other recipes can be too sweet or too dry and these are the perfect balance of the two! If you don’t bake, Sarah walks you through it so you feel confident.
I don’t have a stand mixer, so I brought the dough together (no kneading) and left it to rise a little longer than 30 minutes and it was still fine to handle and work with.
Awww, I’m flattered Nic, thank you!! So glad they worked out so well for you and I’m thrilled you enjoyed these rolls.
And yes, they’re not overly sweet but I know many people have doubled the filling for their preferences.
Long time listener, first time caller-just made the cinnamon rolls this morning & they are awesome! Was a little worried cuz I didn’t think I had enough rise in the dough last night but they are light & tasty! I am a chocoholic so I added chocolate chips to the filling & made regular cream cheese frosting, but other than that followed your recipe & will definitely make again! Side note – I wanted to use mini chocolate chips instead of the regular ones I had but the grocery store was all out. Obviously a LOT of people are quaran-baking these days as all baking supplies are in short supply. I’ve been a long time fan & want to thank you for continuing your site!
Also-a friend of mine is involved with a community organization that feeds the homeless & they reached out as a lot of their usual volunteers can no longer help as they are part of the immune-compromised/elderly population. So my friend set up a network for those of us who can to make sandwiches & cookies which she’ll pick up on designated days. So if any of your readers have been looking for ways to help like I have been, maybe they can contact a local organization & see if they can bake for the cause!
Awwww, so glad to read this Jen!! I’m kind of obsessed with the idea of adding chocolate chips. Did you also do cinnamon or JUST chocolate?
Quaran-baking made me snort. I haven’t heard that term now, but I’m totally adopting it.
Love the baking for a cause. Thank you so much for suggesting that!
Cinnamon & chocolate-so yummy!
I think I love you!
These cinnamon rolls are legit! They were suprisingly easy to make, and the dough was a dream to work with. Best part is that when you are ready to eat in the morning, just pop them in the oven for 25-30 min and the most delicious breakfast is ready!
Soooo glad you liked them! You can freeze them too which makes it even better.
Ok, coming back here to say: You can turn these into the most epic pecan sticky buns ever! All other sweets are ruined for me forever. My wedding cake will now be alternating layers of this recipe as cinnamon buns and sticky buns.
Um, can I get an invite to that wedding????
I made these today. Since I was off work I didn’t do the overnight rise, just did a second rise. They turned out great. Will definitely be keeping this recipe bookmarked.
So glad you enjoyed them Cherly! Cinnamon rolls are pretty much a hug with icing. 🙂
This was my first successful batch of cinnamon rolls. I have always been intimidated by yeast recipes and my rolls were always flat and dense. Soooo happy with how these turned out. Love your blog!
Jennifer, I’m thrilled to hear you had success at last! I wish you many cinnamony journeys in the future. 🙂
I finally made these!
I used my food processor with the dough blade instead of a stand mixer because I didn’t have one. That works great.
The dough is very easy to handle and rolls out beautifully.
I made this recipe more difficult than it needed to be because I mixed all the filling ingredients together (that is what I get for not fully reading directions) and ended up doubling my work, but it certainly didn’t hurt anything.
After they rested in the fridge overnight, I took the pan out of the fridge and placed it on the counter to warm a little as the oven heated up on Christmas morning. I had made the frosting the day before, so that was ready to go with no more effort from me. A couple of the rolls cooked up a little goofy because the middles rose right out of the bun, but they tasted AMAZING. They were much lighter and airier than I was expecting! I will likely use less sugar in the frosting next time (there will absolutely be a next time!) and I will also make a half batch because despite six people having some, I STILL have several left.
Thank you for sharing this gem!
I think you need to start all comments with “the baby is not here yet” or the “baby has been born” 🙂
I’m interested to hear how big of a food processor you have because it’s a decent amount of dough. Great to know you made it fine in there because it’s a good option for people without a stand mixer.
So glad they worked out well for you and I’m with you on liking my frosting on the less sweet side!
Thanks for leaving a review!
The baby is not here yet.
You are HILARIOUS!
We are still waiting for her to arrive. *Technically* she is due tomorrow.
I am not even sure HOW to find out about my food processor…. I got it years and years ago after saving up my airmiles (is that a thing there? You get ‘miles’ for shopping at certain stores, our credit card gives them to us as well, and they add up and you can redeem them for items. I got my toaster oven that way too. I think you can put them towards flights as well.) Anyhow, I know it is a Cuisinart. And pretty heavy-duty. And it is amazing.
Hubby just ate a roll that he had warmed up in the microwave for 15 seconds. He says it was very good that way, but he recommends waiting a bit before eating it because the filling was too hot.
Does it need to rest for 36 hours befor cooking them or is 24 hours long enough.
You can cook them right away (after the second rise) if you’d like! the 24-36 hours is the limit to how long they should stay in the fridge before freezing.
Can you use parchment paper under rolls.
Sure! In fact, I do that for cinnamon rolls we gift to teachers every Christmas.
hey!!! so I was going to make these tomorrow for thanksgiving breakfast. I was reading through the recipe and saw that it said that I need to use a stand mixer and I was wondering if I could make these without one. I love how you wrote the recipe and really enjoy making bread.
Hi Olivia, yes you can! Under the recipe tips there this a note: “You can technically mix the dough by hand, but be prepared for it to take about 10 minutes and for your arms to get freaking jacked.”
When you remove the refrigerated rolls, do you need to let sit on the counter to 1hr to let them come to room temperature before baking?
Suzanne, you can bake them straight from the fridge! If you’d like to let them sit to come to room temperature before baking you can, but it isn’t necessary as all the proofing and rise time will happen before they go in the fridge.
Made these for our Christmas morning breakfast and they were just as easy as you said! I really appreciated the “looks like” “feels like” instructions, especially when the dough felt like my grandmothers soft and squishy under arm. I baked half the rolls and froze half, but still made the full recipe of frosting (without the OJ and with extra cream cheese) because I’m a pig like that. So tasty!
The frosting to roll ratio is always a personal preference and I fully support a cream cheese frosting indulgence!
Do you think the frosting could also be prepared in advance? I’m wondering if I can make that the night before as well, then maybe warm it up gently in the microwave (on a low power) to make it pourable/spreadable again. Then all the prep dishes will be clean on ‘cinnamon roll day’. I’m thinking that this would be an AWESOME Christmas morning treat. But it isn’t a treat for me if I have to mix and clean up after the frosting.
Also: can you define “poor”? As in: The results are poor with 1% milk. That is all I buy. If I don’t know what I am missing, will they still be “poor”? I think adding a little instant milk powder helps – I used to do that with my yogurt. (Yogurt I started making myself because of YOU!)
And lastly: you have “Proofing the Dough” as a ‘headline’ (I don’t know what else to call it). Shouldn’t that be Proofing the Yeast?
( Now, I just have to decide if I will be nice to my citrus-hating daughter and leave the OJ out, or if she can just suck it up…..)
Yep, you totally could make it ahead of time! I would microwave it 10 seconds at a time until it is ready to go.
Poor as in it has a thin consistency and lacks some “uumph”! I wouldn’t add any instant milk powder…but maybe a bit more powdered sugar to pop it up. Whoot, look at you go with the yogurt!
I’ve always always always called it proofing the dough but I think you’re totally right.
I am not a baker at all and my husband is gluten intolerant. How do you think these would come out using a gluten free flour blend?
I have never tried it with a GF flour so I can’t speak to the results. Based on what I have seen, GF flours are really hard to “proof” with yeast. If you give it a try I’d love to hear how it goes.
In the filling section, is the second brown sugar supposed to be cinnamon?
Gah, yes. You proofread something six times and yet things still slip by. Thanks for catching that; it’s updated now!