As an Amazon Associate, I earn from qualifying purchases.


This easy tutorial will teach you how to make homemade rice heating pads that are a perfect project for any beginning sewer. Heat these DIY rice bags for a microwavable heating pad or stick them in the freezer for a homemade ice pack.

These rice heating pads are great for easing aches and pains. They’re perfect for snuggling up to on the couch or placed at your feet in bed to warm up.
You can also turn them into an aromatherapy rice bag simply by adding herbs or essential oils.
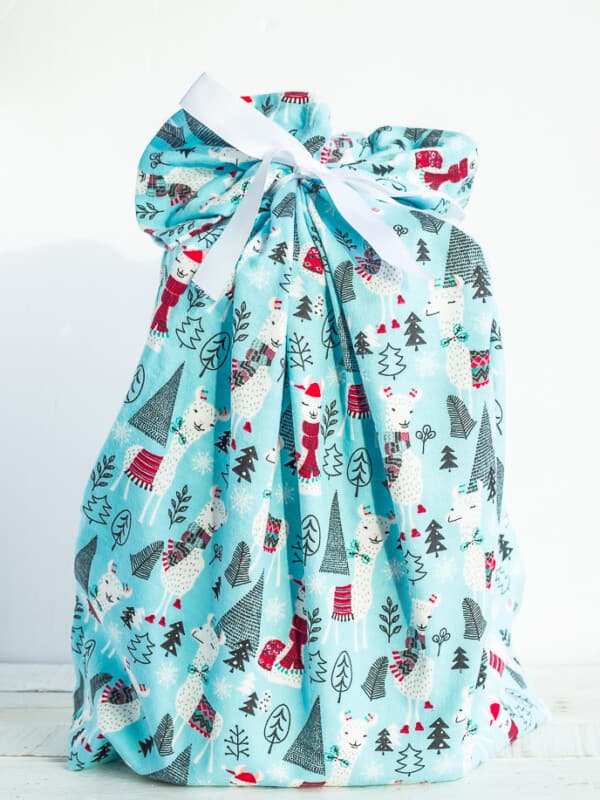
This project is just as simple as learning how to make fabric gift bags. I believe in you and you can totally do this project!
How Long Does a Rice Heating Pad Stay Hot?
Well, I’m so glad you asked because I legit spent 3 hours with the stopwatch feature on my phone tracking down the answers for you. Yes, I am a nerd.
For a rice-filled heating pad that is 5×7 inches:
- Microwave for 60 seconds and it will be hot/warm for up to 45 minutes.
- Microwave for 90 seconds and it will be hot/warm for up to 70 minutes.
Can You Use Uncooked Rice as a Heating Pad?
Yes, uncooked rice is fantastic for filling homemade heating pads. Rice is affordable and it is easy to source for these rice bags.
Can You Use Any Rice As a Heating Pad?
Yes, any kind of uncooked rice will work for filling heating pads. That being said, I encourage you to use the cheapest rice you can find. It conducts heat the same as more expensive rice and will make your crafting more affordable.
Rice Heating Pad Supply List
- fabric (100% cotton or muslin)
- binder clips or clothespins
- thread
- sewing machine or needle for hand sewing.
- scissors
- uncooked rice
Choose the size of your fabric to best suit how you want to use the microwavable heating pads. Need it for your shoulders? I’d start with a piece of fabric that is 20 x 6 inches.
Need something to snuggle next to your stomach? Try something that is at least 10 x 10. Just keep in mind the size of your microwave because if the rice bag is too large it won’t heat evenly.
Try 2 x 2-inch squares to slip into gloves for homemade hand warmers.
Other Options For Filling Microwavable Heating Pads
You don’t want to use rice or maybe you have an allergy? I got you friend! Here are some great alternatives:
- Flaxseed
- Dried beans
- Boiled and dried cherry pits
- Corn (choose field/feed corn as opposed to popcorn)
- Dried lentils
How Do You Make Rice Heating Pads?
*Ok friends, these are SO easy! I’m going to walk you through it here with photos and then you’ll find a printable version of these instructions at the very bottom of this post.
Before we get started, let’s talk about two terms – Right side of the fabric which is the pretty/printed side. Wrong side of the fabric, which is the underside that won’t show in the final product. Got it?
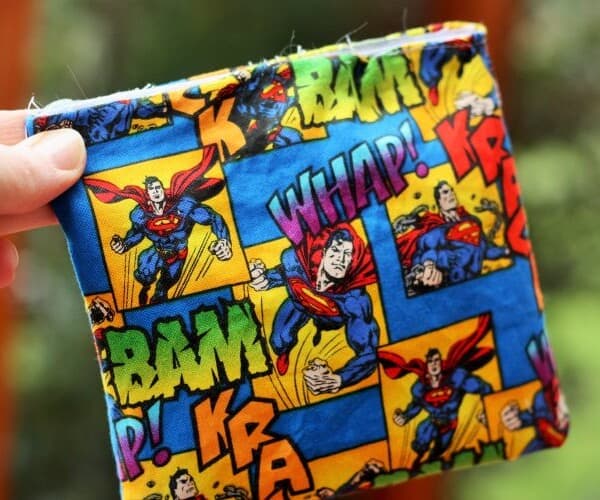
Start with some 100% cotton or muslin fabric that is double the size of what you want the end product to be.
Decide which part of the fabric will be the top of the bag, and then fold an edge over (~1/4 inch) to create a hem. Press with an iron and pin. Use a sewing machine and sew a basic stitch, back-stitching at the two ends. Then, fold the right sides of the fabric together with the hemmed edges at the top.

Make a basic stitch around the sides like you’re creating a pocket, leaving the hemmed edges open.

Next, turn it right side out so that the right side of the fabric is showing. Fill the bag with rice. Pro tip: if you’re new to sewing, fill the bag halfway with rice for the first few bags you make. They’ll be easier to work with and sew shut. If you’re a more experienced sewer, fill bags two-thirds full of rice before sewing them shut.

I like to use clips or clothespins to keep the rice in while sewing. Use a basic stitch and sew the two hemmed sides together.

That’s it! You’ve done it and you’re now officially awesome! Once you get the hang of the process, you can knock out a DIY rice heating pad in under 10 minutes. I whipped up these four in 30 minutes, INCLUDING taking all the step-by-step photos.

Can You Wash a Rice Heating Pad?
If you make your bags without a separate cover, they are not washable. You could always slip your rice bag into a pillowcase or cover it with a towel if you think it will get dirty.
Or, make something like these Zero Waste Produce and Bulk Bin Shopping Bags, slip the rice heating pad in, and close the drawstring. You can clean the bag as often as needed.
Can you Heat a Rice Bag Without a Microwave?
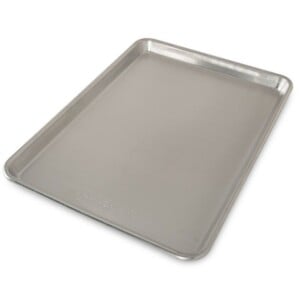
Yes! I once made a huge microwavable heating pad for my husband’s lower back…without realizing it wouldn’t fit in our microwave. Doh! We would heat it in the oven on a baking sheet for 15 minutes at 300˚F.
How to Make Aromatherapy Rice Bags
My preference is to add 1-2 drops of the essential oil to the outside of the fabric so that I can change the oils as needed. But, if you want to scent your rice, add 15 drops of essential oils per 2 cups of rice.
I don’t sell oils for an MLM, but we do use them in our house. For kiddos with colds, I microwave the aromatherapy rice bags for 60 seconds and then add 2 drops of this kid-safe Germ Buster. For help sleeping, I use 1 drop of Sleep Tight.
Other lovely scents for your rice bags are lavender (I limit the use of this oil around all the males in my house), peppermint, lemon/grapefruit, or a homemade “Vicks” blend of lavender, eucalyptus, and rosemary. You can use those same oils in my Homemade Vicks Soother Tablets.
If you are gifting these to friends, consider potential allergies before adding any oils or herbs.
Pro Tips
- If your rice heating pads are more than 10 x 10 inches, the rice will shift around quite a bit. You can solve this issue by sewing segments called baffles to keep the rice in place before sewing the hemmed edges together. Turn the fabric right side out, then sew a straight line from the bottom end to the top. You’ll want to make a few of these lines and add rice to each segment.
- If you use flaxseed or cherry pits as filler, place 1 cup of water in the microwave while you’re heating the bags (don’t get the bags themselves wet). Both flax and cherry pits are great if you need your bag to have a moist heat. Moist heat is wonderfully soothing for earaches.
- These microwavable heating pads are great if you’re a nursing mom and are dealing with clogged ducts or a difficult letdown. Make small versions and place them after heating in your bra for 5 minutes prior to nursing/pumping. And in those 5 minutes, eat a No Bake Lactation Cookie. You’ve earned it! I would not recommend adding herbs or essential oils to nursing heating pads without approval from a lactation consultant, midwife, or OBGYN.
- Always test the temperature of the rice bag before allowing kids to use them. Some microwaves heat the filling unevenly and you want to be extra cautious.
- A 10 x 10 rice bag heated for 90 seconds would be great to keep dishes warm at potlucks or holiday dinners.
Homemade Rice Heating Pads

Ingredients
- Fabric
- Thread
- Sewing machine or needle
- Scissors
- Uncooked white rice
- Binder clips or clothespins
Instructions
- Fold and press a 1/4 inch hem at the top of your fabric.
- Fold the right sides of the fabric together with the hemmed edges at the top.
- Make a basic stitch around the sides like you’re creating a pocket, leaving the hemmed sides open.
- Next, turn it right side out so that the right side of the fabric is showing. Fill the bag with the rice.
- Use clips or clothespins to keep the rice in while sewing. Use a basic stitch and sew the two hemmed sides together.
Notes
- If you’re new to sewing, fill the bag halfway with rice for the first few bags you make. They’ll be easier to work with and sew shut. If you’re a more experienced sewer, fill bags two-thirds full of rice before sewing shut.
- If you use flaxseed or cherry pits as filler, place 1 cup of water in the microwave while you’re heating the bags.
- Always test the temperature of the rice bag before allowing kids to use them. Some microwaves heat the filling unevenly and you want to be extra cautious.


Could a laundry scented additive be added to the rice heating pad? Or some chips of scented bar of soap
Hi Lucy, I don’t see why not! With a word of caution that heavily scented items may impact the smell of the inside of your microwave. And that could potentially eventually transfer the smell onto your food.
No popcorn? You’re such a party pooper! 😉
I mean, it would be a fun prank… 🙂