As an Amazon Associate, I earn from qualifying purchases.
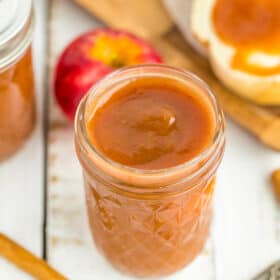
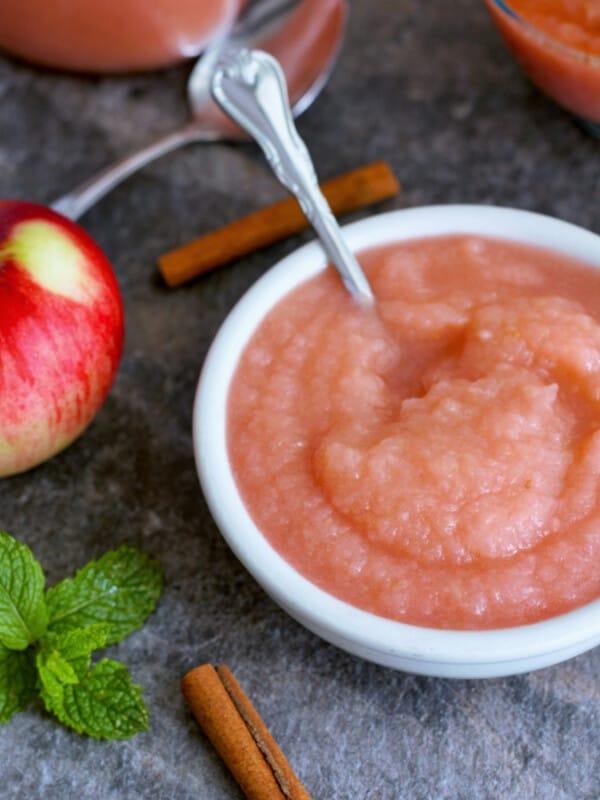
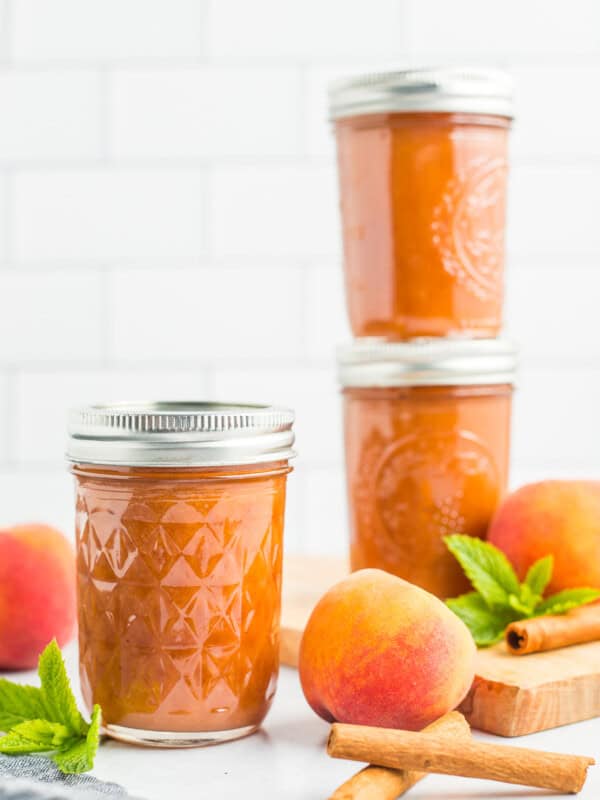
Canning Apple Butter is an amazing way to preserve the apple harvest. This is the best low-sugar apple butter, and it’s delicious on toast, yogurt, muffins, or oatmeal.

Homemade apple butter is a classic fall favorite. You can simmer this recipe in a slow cooker all day (your house is going to smell amazing!), make it on the stovetop, or even in an Instant Pot.
This apple butter recipe for canning is suitable for a water bath canner, but I’ll also teach you how to freeze it if canning is not your jam.
The act of canning apple butter is as iconic to fall as canning peaches is to summer. But lucky for you, this crockpot apple butter recipe is a lot more hands-off!
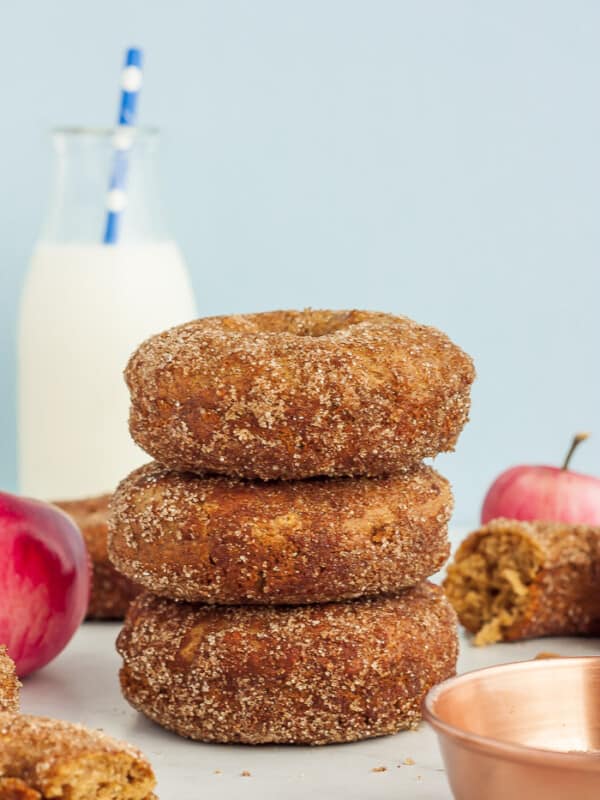
If you want to use homemade apple butter for something extra special, try it in a batch of cinnamon apple donuts.
How to Make Apple Butter
When choosing apples, most varieties typically work great, but you’ll have the best results with any apple labeled as “saucing apples”. Easy-to-find varieties such as Gala, Fuji, Braeburn, and Cameo would all be great.
Apples that are best for juicing will produce a watery apple butter.
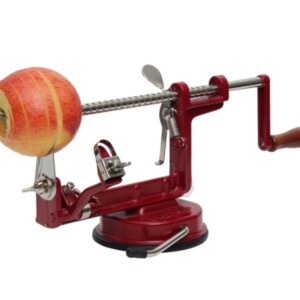
Peel and chop your apples into semi-uniform pieces. Pro tip: you don’t have to peel them, but from a food preservation standpoint, it does remove additional contamination risk.
I use this apple peeler to make quick work of peeling and coring apples, but a plain ol’ vegetable peeler and a chef’s knife will also work.

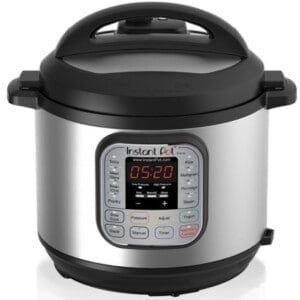
Add the apples, sugar, and spices to your slow cooker (I use my Instant Pot with the slow cooker lid).
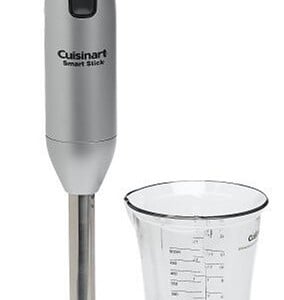
Set your slow cooker to low for six hours. After the time is up, blend your apples. I use an immersion blender, but you could also transfer the apple butter in batches to a blender or food processor.

Technically, you’re done at this point if you’d like to be. Put it in containers and freeze if you’d like. But, if you want to learn to also can it, read on!
How to Can Apple Butter
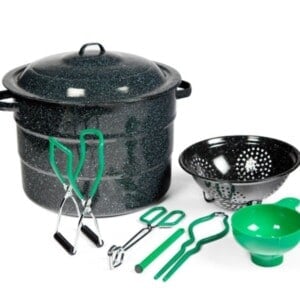
Prepare your canner by filling it with water. You need to have enough water to cover the jars by 1 inch once the water is boiling.
Set the canner on the stove. Turn the burner to high. Once it reaches a boil, reduce it to a simmer. You want to keep the water hot so that everything is ready when your jars of apple butter are ready to go.
Wash and clean your jars. You’ll want to keep them warm to avoid having them crack when placed in the canner. You can fill them with hot water or place them on a tray in the oven at 170˚F.
Wash your lids and set them aside in a clean place. You no longer need to simmer lids in water to keep them sterile. Woot!
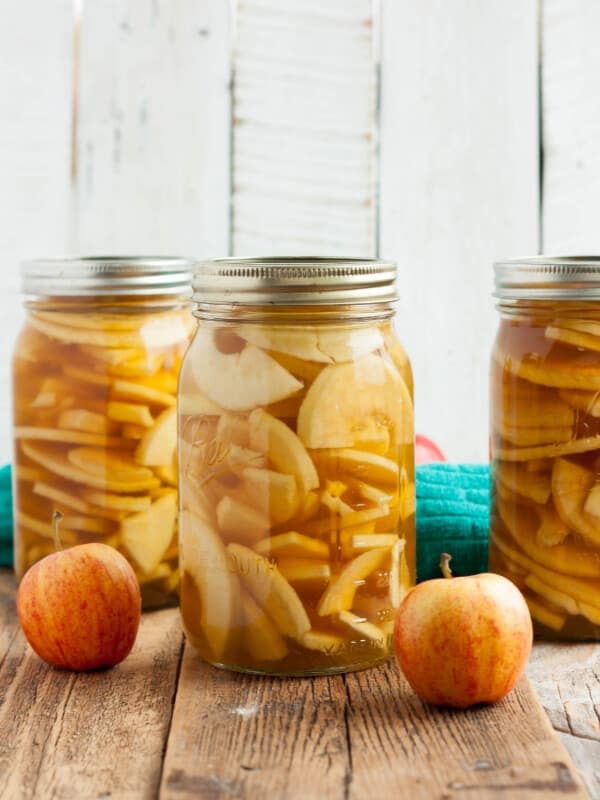
Ladle in the warm apple butter (I like using a canning funnel), leaving 1/4 inch of headspace.
Remove the bubbles from the jar (I use a plastic chopstick).

Use a wet, clean rag and wipe the rim of the jars to make sure they are free of any delicious apple butter.
Place a clean lid on the jar, and then a ring, and tighten the ring to fingertip tight (tight enough that it won’t come off, but not so tight that a normal person couldn’t budge it).
Do not add the jars to the canner as you finish filling them. You’ll want to pack the canner all at once to avoid uneven processing.

Bring the water in the canner back to a rolling boil, and then lower your jars into the canner using a jar lifter. Put the lid on the canner.
Processing times will vary based on altitude and size of jar. See the chart below. Pro tip: the water must return to a rolling boil in the canner before you can start the timer.
Processing Time for Apple Butter
| Processing Time for Apple Butter | ||||
| Process Times at Altitudes of: | ||||
| Style of Pack | Jar Size | 0-1,000 ft | 1,001-3,000 ft | Aove 6,000 ft |
| Hot | Half-Pints & Pints | 5 min | 10 min | 15 min |
| Quarts | 10 min | 15 min | 20 min | |
| *Source: National Center For Home Food Preservation | ||||
Once the jars have been processed for the appropriate amount of time, remove the canner from the burner, wearing oven mitts, carefully take off the lid of the canner, and allow it to sit for 5 minutes. Pro tip: I tend to just slide the canner into the middle of my stove, as it weighs a ton.
Carefully remove the jars with canning tongs, and place them on a thick towel in a place where they can be undisturbed for 12 hours.
The lids will likely start to pop within 20-30 minutes of being removed from the water. That popping sound is music to your ears, as it tells you that everything has been sealed. It’s a reward for all your work!
After the jars have rested for about 12 hours, press down in the middle of each lid. If it “gives” at all, the jar didn’t seal. Either enjoy it that day, put it in the fridge, or reprocess it.
How to Freeze Apple Butter
Apple butter freezes like a boss. You can freeze in your favorite freezer containers, use silicone trays like these Souper Cubes, or even freeze in glass canning jars.
Make sure you use wide-mouth canning jars or jam jars, and leave 1 inch of headspace (the space between the top of the apple butter and the top of the jar).
Allow the apple butter to fully cool in the jars before freezing. To defrost: set the jar out at room temperature overnight.
Pro Tips/Recipe Notes
- You do not need to add water to the apple butter while it is cooking. After 30 minutes the apples will start releasing all their awesome natural juices.
- You do not need to add lemon juice to this recipe for it to be safe for canning. The natural sugars in the apples make this recipe safe to process in a boiling water bath canner.
- Feel free to adjust the spices to taste. Personally, I see cinnamon as a condiment and tend to keep adding a little bit more throughout the process.


Get my Canning e-book!
It’s 51 pages of every helpful tip and trick you could want as a brand new canner, AND it includes 13 ad-free canning recipes that are designed to take you from novice to pro.
Canning Apple Butter (4 Ingredients)
Equipment
Ingredients
- 4 pounds apples {about 10-14}
- 1 cup sugar {optional – see notes}
- 2 tbsp ground cinnamon
- 1/4 tsp ground cloves
Instructions
How to Make Apple Butter
- Peel and chop your apples into semi-uniform pieces.4 pounds apples
- Add the apples, sugar, and spices to your slow cooker. Cook for 4-6 hours on low with the lid on. You do not need to add water to the slow cooker.1 cup sugar, 2 tbsp ground cinnamon, 1/4 tsp ground cloves
- After the time is up, blend the apples with an immersion blender, or transfer in batches to a blender or food processor.
Canning Apple Butter Instructions
- Prepare your water bath canner by filling it with water. You just need to have enough water to cover the jars by 1 inch once the water is boiling.
- Set the canner on the stove. Turn the burner to high. Once it reaches a boil, reduce it to simmer. You want to keep the water hot so that everything is ready when the apple butter is.
- Wash and sanitize your jars. You’ll want to keep them warm to avoid having them crack when placed in the canner. You can fill them with hot water, or place them on a tray in the oven at 170˚F.
- Wash your lids and set aside in a clean place.
- Place a canning funnel on top of one of the jars.
- Ladle the warm apple butter into jars, leaving 1/4 inch of headspace. Headspace is defined as the space between the top of the food and the top of the jar.
- Remove any bubbles from the jar (I use a plastic chopstick).
- Use a wet clean rag and wipe the rim of the jars to make sure they are free of any delicious apple butter.
- Place a clean lid on the jar and then a ring. Tighten the ring to fingertip tight.
- Using canning tongs, gently place your jars in the canner. Put the lid on, and set your timer. Pro tip: the water must return to a boil in the canner before you can start the timer.
- Process half-pints, pints and quarts based on the elevation guide below:*0-1,000 ft – Half-Pints & Pints =5 min Quarts =10 min*1,001-6,000 ft – Half-Pints & Pints =10 min Quarts =15 min*6,000 ft+ – Half-Pints & Pints =15 min Quarts =20 min
- Once the apple butter has processed for the appropriate amount of time, remove the canner from the burner, and carefully remove the lid of the canner (Pro tip: use oven mitts to take the lid off because the steam is super hot).
- Using canning tongs, carefully remove the jars, and place them on a thick towel in a place where they can be undisturbed for 12 hours.
- After the jars have rested for about 12 hours, press down in the middle of each lid. If it "gives" at all, the jar didn't seal. Either enjoy it that day, put it in the fridge, or reprocess it.
Notes
- Apples contain enough natural sugar to be safe for canning without added sugar.
- You do not need to add water to the slow cooker. After 30 minutes, they’re going to start releasing all their awesome natural juices while cooking.
- Makes 8 half-pints, 4 pints, or 2 quarts.
- Once the jars have sealed, remove the rings. Label and store sealed jars in a cool (best results are 50-70˚F), dark place for up to 12-18 months.
- Nutrition values are an estimate only.
Cook apples, sugar, cinnamon, and cloves in a heavy-bottomed saucepan on low for 3-6 hours, stirring occasionally.
Nutrition
Nutrition information is automatically calculated, so should only be used as an approximation.


Delicious! Just a note to anyone depending on a specific quantity turnout — the 6lbs of mixed farmers market apples I used only resulted in 5 x 8oz jars instead of 12. Came out great though!
I made grape jelly using juice, it did not set. What do I do? Can I save the juice and how would I be able to get it to jell? Thank you.
Carolyn, I’m sorry but I have no experience with making jelly. I’m unable to help you with this.
Can I use my own apple butter recipe for this same canning process? Also, what time is needed for 10 oz jars? Thanks!!
Big blanket CYA: yes, you probably can use your own recipe. But without knowing what it contains, I cannot say without a shadow of a doubt if it is safe or not.
For 10 oz jars, you would need to process at the same time as pints – 15 minutes.
I noticed there is no lemon juice or pectin in this recipe is it still safe for canning and if so what is the shelf life
Hi Barbara, (almost all) fruits are safe for canning without lemon juice. Pectin is not a preservative but rather something that is meant to thicken jam.
Yes, this is safe to can due to the natural sugar in the fruit and the added sugar.
Step 13 in the recipe card says: Label the sealed jars, and store in a cool dark place for up to a year.
Some people keep canned goods for 18+ months, but I feel safest only keeping them for 12(ish).
THE FLAVOR IS AMAZING. HOWEVER, I FOLLOWED THE RECIPE EXACTLY AND WAS ONLY ABLE TO GET 3 PINT JARS OUT OF IT. FOR THE AMOUNT OF WORK THAT WENT INTO MAKING THE RECIPE, THE RESULT WAS VERY DISAPPOINTING.
Hi Sharral, (my best guess) it sounds like the apples you used might have been a drier/baking variety. Without the natural juices from the apples, it would impact the overall yield. We make this apple butter recipe every single year and have never only had 3 pints as the yield.
If you’re interested in trying it again in the future, I recommend using an apple that is ideal for saucing, such as Gala, Fuji, Braeburn, and Cameo.
I made this recipe and canned it like it said to but one problem. I let them sit and I noticed on the lids little brown spots. The jars are brand new could it be the apple butter?
Are the spots on TOP of the lid (AKA the outside) or on the white inside part of the lid?
If it is on the outside, it is likely a result of the type of water you have and is harmless. If it is on the inside, it’s likely that the apple butter was popping/bubbling in the jars while in the canner. As long as the lids are sealed it should be fine.
You’re welcome to email me a photo of the spots at [email protected] or DM me on Instagram if that is easier.
I can’t find the note with regards to sugar being optional. Can you please explain. Can the sugar be left out?
Hi Christine, it’s towards the top of the post. I’ll copy and paste it below for you. Please let me know if you have any follow up questions.
CAN I MAKE THIS APPLE BUTTER SUGAR FREE?
Yes! This recipe is adapted from The Ball Blue Book Book Guide to Preserving. The original recipe calls for four pounds of apples and FOUR cups of sugar. All the nopes from me!
I have pared it down to only one cup of sugar because it helps keep the final (canned) product fresher for a longer period of time. But, I have canned it before without any added sugar and it is still shelf stable for 12 months.
Now, I never advocate changing up tested canning recipes, but given that you can safely can applesauce with no sugar added, I am completely comfortable canning low-sugar apple butter.
You can also use honey, but please note if you plan to can this apple butter, the high temps for preserving will kill any of the beneficial properties.
Hello I just tried this recipe, amazing by the way, but I am having an issue finding a pot big enough to cover the top of the lids by 2 inches I’d say it’s covering it by a half inch to an inch but I only have one jar and it’s a quart size jar. Will I have any proceeding it in the shelf?? What will happen if I can’t find a deep enough pot? Is it still good? Sorry if my questions are silly.
The 1 inch of water is best practice for safety to make sure that the jar stays submerged the whole time it is processed. If you only have 1/2 inch that is a personal decision if you are ok with it or not. For legal reasons, I only advise best practices.
That being said, if you are having trouble finding a pot deep enough for quart jars, the easy fix is to switch to using 2 pint jars instead of 1 quart. They will easily fit in the pot, and will definitely be covered with water the whole time.
I must have the world’s juiciest apples! After 6 hours on high with the lid on, I had a big sweet- smelling puddle of liquid with apple chunks. I pureed, and kept it going with the lid off to try to evaporate some of it. It literally took 12 hours for my mix to turn into creamy apple butter 🙁
I’ve adjusted things since then (mostly my expectations for how long it takes), but the recipe itself is great. All joking aside I’m sure it’s my apples being extremely juicy, but just be aware it might take much MUCH longer to get actual apple butter rather than slightly thick applesauce.
I live at 7,000 feet and need to know the high latitudes conversion info. I’ve made jams but don’t process them in a canner.
Toni, generally altitudes above 6,000 feet recommend that you triple the processing time for half-pints and pints and double the processing time for quarts.
So in this instance, half-pints would process for 20 minutes, and pints for 30.
Might seem like a silly question but do you leave the lid on or off the crockpot?
On. 🙂
Do you have to water bath. Since ur putting hot liquid into hot jars? Shouldnt they already be sterile? I’ve never used a water bath for any of my jams.
Common best practices are always to water bath anything you are making for shelf-stable storage. I know there are a lot of traditions for doing other types of canning, but I cannot advocate for it or recommend it based on current safety standards.
Hi I had a quick question. I made a huge batch of apple butter this year and the only jars they had available at my store were quart size. Would I need to make any adjustments to water bath time? Thanks so much.
I would do 20 minutes for quarts similar to applesauce: https://www.sustainablecooks.com/canning-applesauce/
Each quart is going to be A LOT of apple butter to finish before it goes bad in the fridge. I would probably freeze it in smaller portions rather than can it for this year. And fingers crossed you find smaller jars next year (?).
Soooo I don’t have a slow cooker or an instant pot.
how would you adapt it for stovetop cooking?
I was thinking of adding maybe 1 cup of liquid (either water, apple cider or apple juice), bring to a boil, then simmer covered until desired constitency.
What do you think?
I think that would work! Maybe start with a little less water though; the apples release juice pretty quickly. You can always add more if needed.
Wicked good. Simple. Had only 2 lbs. Made the mix used half of it. Crock pot hi 4 hrs. Delicious!! Used on the side with pork chops similar to using apple sauce.. 😋 😋 😋 thank you.
I’m so glad you enjoyed it. And extra points for using “wicked”! 🙂
Sarah!
I’m sure you don’t remember me, as I’ve been absent from the Blogosphere for almost a decade now. But, I just had to shoot you a quick note because I was so excited to see you’ve had another beautiful baby since I last checked in here. Congrats!
I have a lot to catch up on, I see 🙂
Have a great weekend!
I do remember! And yes, it’s been a long time. I hope you’re well.
can you tell me please about how many cups would the puree of apple sauce be i have it already for the slow cooker just not sure how many cups to put in
Margaret, the recipe notes it makes 8, 8 oz jars. So that would be around 8 cups total.
Hi! Quick question – I’m not a complete newbie to canning, but I couldn’t find a good answer to this one while searching. I cooked apple butter over about 12 hours in the crock pot yesterday and canned it using the water bath method (pints processed 15 min), but looking back at my recipe, I realized that I didn’t bring the mixture to a complete boil before ladling it into jars. All of the jars sealed properly. Do you have thoughts about whether the butter is safe and will preserve, given that it wasn’t quite up to boiling before processing. Thank you for your insight!
I don’t boil my apple butter before canning, so I would think it would be fine!
If I don’t have a special canning pot, could I just use my large stock pot? I don’t have a wrack for the bottom of it, but is their any other way to use that instead anyways? I heard something about putting foil on the bottom of it but not sure how to go about that. Sounds like a great recipe!
As long as the pot is deep enough to cover the tops of the jars with water by 2 inches, you can use any pot you’d like.
I’ve never heard of foil being used as a rack and honestly, I think it would float up and not stay put. In a pinch, I have used a few canning rings zip-tied together as a rack on the bottom of a pot.
I have a question. I purchased 2 pecks of Jonthans…would I be able to use all of them at the same time? I am thinking of using my Roaster Oven, can cook as low as 150 to as high as 450.
Hi Jean, as long as you’re able to cook them together, you absolutely can use them at the same time! And that’s great to get it all done at once.