As an Amazon Associate, I earn from qualifying purchases.
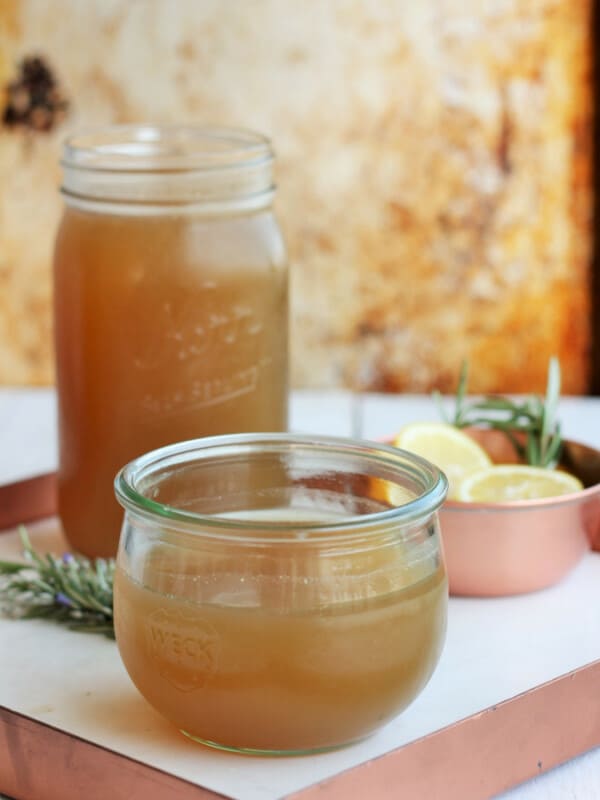
Canning Chicken Broth is an amazing way to preserve this delicious staple of so many homemade recipes. “Putting up” homemade chicken broth is a very simple process, and I’ll show you step-by-step how to make AND can it!

So many cozy and delicious recipes start with chicken broth. A flavorful broth makes every soup, stew, or casserole taste even better.
I love to have a mix of both frozen and shelf-stable broth on hand. Read on to learn how to safely can or freeze your delicious homemade stock.
Even better, homemade chicken broth is easy to make and is essentially made with “scraps” like leftover roasted chicken and veggie peels.
How to Can Chicken Broth
I’ll walk you through the process here with photos, and you’ll also find a printable version with detailed times/PSI in the recipe card at the bottom of this post.
Wash and clean your jars. For canning broth, I recommend quart-sized regular-mouth jars. It is no longer necessary to sterilize jars before canning (hurray!), but you should make sure they are preheated enough not to crack when placed in hot water.
You can put them in a clean dishwasher and run them through a quick wash cycle, or place them in a large pan with some water in a low-heat oven (my lowest temp is 170˚F degrees) until you need them. I’ve even just put hot tap water in them before and left them on the counter.
Wash your lids with hot, soapy water and place them in a clean bowl for now.
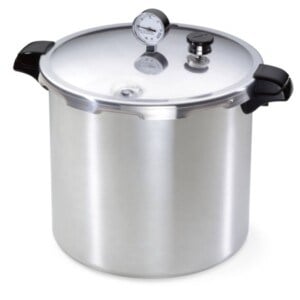
Add 3 quarts of water to your pressure canner and put it on a burner set to high. Make sure there is a canning rack in the bottom of the canner.
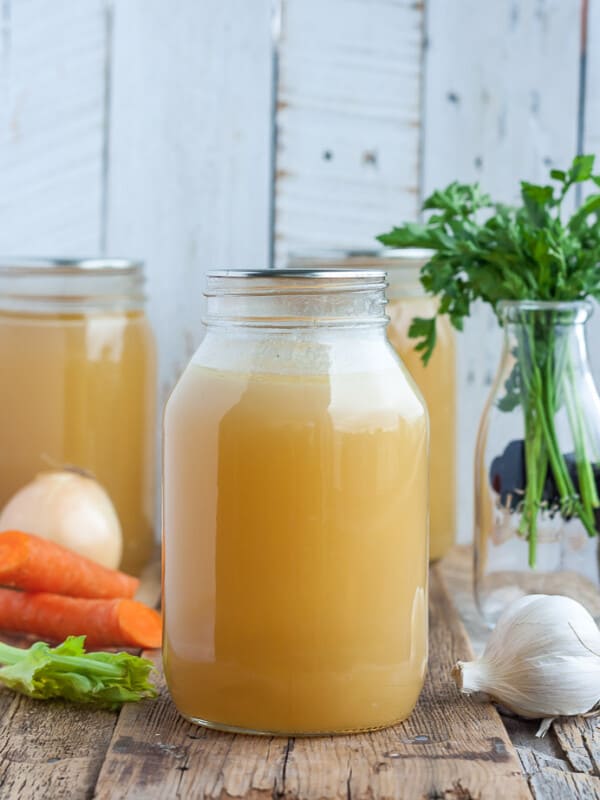
Place a funnel on a canning jar, and ladle in the hot broth, leaving 1 inch of headspace.
Remove any bubbles from the jar (I use a plastic chopstick). Use a wet clean rag and wipe the rim of the jars to make sure they are free of any food.
Place a clean lid and then a ring on the jar and tighten the ring to fingertip tight (tight enough that it won’t come off in the canner, but not so tight that Thor couldn’t budge it).

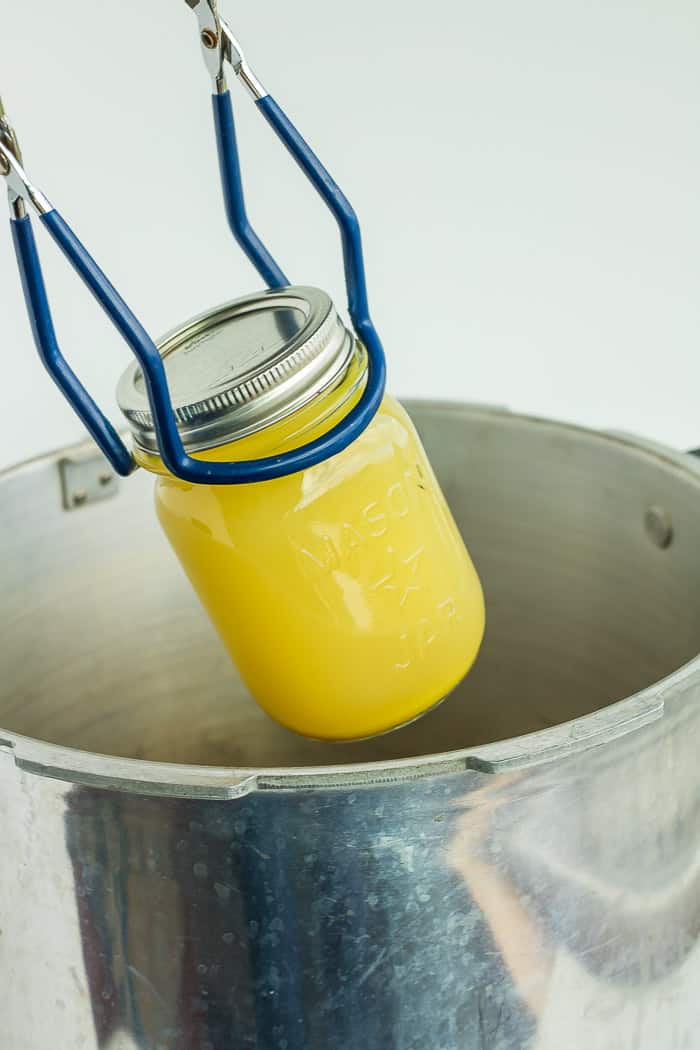
Using canning tongs, carefully lower the jars into the canner. Lock the lid. Soon, steam will start coming through the vent pipe (I call it the steam chimney). Allow the steam to pass through for about 10 minutes. Then put the pressure regulator (I call it the chimney cap) on top.
Pretty soon, the air vent will pop up. That is a sign that you’re starting to build pressure inside the canner (get excited. This is happening!).

Processing times will vary based on altitude. See the chart below.
Pressure Canning Chicken Broth/Stock in a Dial-Gauge Pressure Canner
| Canner Pressure (PSI) at Altitudes of | ||||||
| Style of Pack | Jar Size | Processing Time | 0-2,000 ft | 2,001-4,000 ft | 4,001-6,000 ft | 6,001-8,000 ft |
| Hot | Pints | 20 min | 11 lbs | 12 lbs | 13 lbs | 14 lbs |
| Quarts | 25 min | 11 lbs | 12 lbs | 13 lbs | 14 lbs | |
| *Source: National Center For Home Food Preservation | ||||||
Processing Time for Chicken Broth/Stock in a Weighted-Gauge Pressure Canner
| Canner Pressure (PSI) at Altitudes of: | ||||
| Style of Pack | Jar Size | Processing Time | 0-1,000 ft | Above 1,001 ft |
| Hot | Pints | 20 min | 10 lb | 15 lb |
| Quarts | 25 min | 10 lb | 15 lb | |
| *Source: National Center For Home Food Preservation | ||||
When the dial gauge reaches the appropriate PSI, reduce the burner temp to medium, and start your timer. The pressure must stay at the PSI or (a little bit) above for the duration of the cooking time. You’ll likely need to adjust the temp on the burner a few times depending on your stove.
When the time is up, remove the canner from the burner and allow it to sit until you hear a distinctive “click” of the air vent dropping. Remove the pressure regulator and carefully remove the lid of the canner. (Pro tip: I always use oven mitts when I take the lid off because the steam is super hot).
Let the jars sit for 5 minutes in the canner and then carefully lift them out with canning tongs. Pro tip: allowing the jars to sit in the canner with the lid off can help reduce the siphoning of liquid in your jars. Siphoning is when liquid seeps out from under the lids and reduces the overall amount of liquid in the jar.
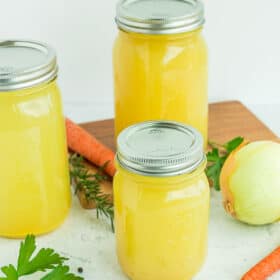
Place hot jars on a towel where they can sit undisturbed for 12 hours.
After a few hours, to check for sealing, gently press down in the middle of the lid. If the lid has no give, it’s sealed. If you can press the lid in and it pops a bit, your jars are not sealed.
HELP! WHY ARE MY JARS LEAKING?
If you find that broth has leaked out after the jars have sealed, you have experienced a common canning issue called siphoning. It happens to the best of us!
Siphoning is typically caused by not allowing the jars to rest in the canner after they have finished processing. In the directions, you’ll see that I recommend you remove the canner from the burner, remove the lid of the canner, and let it sit for 5 minutes.
This is important as it allows the jars time to rest before being allowed to cool on the counter. Doing this process will significantly cut down on siphoning.
IF YOU HAVE SIPHONING IN YOUR JARS, FOLLOW THESE STEPS:
- Check – are the lids still sealed?
- Look – have you lost less than half of the amount of liquid in the jar?
- Examine – does the broth still look fresh with bright colors?
If the answer to the above three steps is “yes!”, it is likely safe to eat.
Canning Chicken Broth {Recipe & Canning Instructions}
Ingredients
- 1 chicken carcass
- 1 tbsp apple cider vinegar
- 3/4 tsp black peppercorns
- 2 bay leaves
- 5 cups veggie scraps {carrots, onion, celery}
- water to cover stock
- 3 quarts water {for canner}
Instructions
Make The Chicken Broth
- Place the chicken, veggie scraps, apple cider vinegar, and herbs in a large stockpot.
- Cover with water and place a lid on the stockpot. Cook on low for 6-12 hours.
- Place a strainer/colander in a large mixing bowl.
- Carefully pour the stock into the strainer and allow the stock to drain into the bowl.
- Optional: Once the stock has finished draining, place a fine-mesh strainer over another bowl and pour the stock through the sieve.
- Skim any fat off the broth.
How to Can Chicken Broth
- Wash and sanitize your jars. You’ll want to keep them warm to avoid having them crack when placed in the canner. You can fill them with hot water, or place them on a tray in the oven at 170˚F degrees.
- Wash your lids with hot soapy water and place them in a clean bowl for now.
- Add 3 quarts of water to your canner and put it on a burner set to high. Make sure there is a canning rack in the bottom of the canner.
- Place a funnel on a canning jar, and ladle in the hot broth, leaving 1 inch of headspace.
- Remove the bubbles from the jar (I use a plastic chopstick).
- Use a wet clean rag and wipe the rim of the jars to make sure it is free of any food.
- Place a new clean lid and ring on the jar and tighten the ring to fingertip tight.
- Using canning tongs, gently place the jars in the canner.
- Lock the lid. Soon, steam will start coming through the vent pipe.
- Allow the steam to pass through for about 10 minutes. Then put the pressure regulator on top.
- Pretty soon, the air vent will pop up.
- In a dial-gauge pressure canner, process pints and quarts based on the elevation guide below (see processing chart in post for additional altitude adjustments):*0-2,000f ft {PSI: 11 lbs of pressure} = Pints 20 min, Quarts 25 min*2,001-4,000k ft {PSI: 12 lbs of pressure} = Pints 20 min, Quarts 25 min*4,001-6,000k ft {PSI 13 lbs of pressure} = Pints 20 min, Quarts 25 min*6,001-8,000k {PSI 14 lbs of pressure} = Pints 20 min, Quarts 25 min
- When the dial gauge reaches the appropriate PSI, reduce the burner temp to medium, and start your timer. The pressure must stay at the PSI or (a little bit) above for the duration of the cooking time.
- When the time is up, remove the canner from the burner and allow it to sit until you hear a distinctive “click” of the air vent dropping. Remove the pressure regulator and carefully remove the lid of the canner (Pro tip: use oven mitts to take the lid off because the steam is super hot).
- Let the jars sit for 5 minutes in the canner and then lift them out with canning tongs.
- Place on a thick clean towel undisturbed for 12 hours.
- After a few hours, to check for sealing, gently press down in the middle of the lid. If the lid has no give, it’s sealed. If you can press the lid in and it pops a bit, your jars are not sealed.
Notes
- Store in a cool dark place for 12-18 months.
- Prior to canning, you can skim the fat from the hot broth using a spoon or a fat separator. I find both of those tactics to be a bit labor-intensive. Instead, I prefer to refrigerate the stock overnight and skim the solid fat in the morning. If you use this method, you must reheat the stock before canning it.
Nutrition
Nutrition information is automatically calculated, so should only be used as an approximation.

Get my Canning e-book!
It’s 51 pages of every helpful tip and trick you could want as a brand new canner, AND it includes 13 ad-free canning recipes that are designed to take you from novice to pro.


Question: I cooked my broth one day, strained it through a fine mesh strainer (although a few small particles remained), refrigerated it, skimmed off fat, returned to room temp, placed in room temp water in canner, let all heat up in the canner, then pressure canned at proper time and pressure for my altitude. Does this sound ok to you? There is a small light-colored layer on top of each jar; I think it’s remaining fat? Please tell me your thoughts
Based on what you outlined, it should be fine as long as the canning process was a pressure canner and not a water bath canner.
Mine always gets that light layer on top. There never seems to be a way to remove ALL the fat from the broth.
Is there a reason why you cannot use the strained chicken after you have gotten the broth out? It seems like I have a lot of chicken pieces, not the bones. if I don’t put onions or garlic only veggys could I give it to my dogs?
You can absolutely use the strained chicken after you’ve removed the broth. It’s great in soup but not exceptionally flavorful for eating. You can definitely give it your (lucky) dogs!
I’d advise not to tip the jars at an angle when removing them from the cooker. If they are not sealed, contents may leak out under the rim and prevent proper sealing. Great recipe, Thank you.
Thank you! I finally found a perfect video after hours of looking at other ones .
Yours explained everything .
Glad I could help!