As an Amazon Associate, I earn from qualifying purchases.
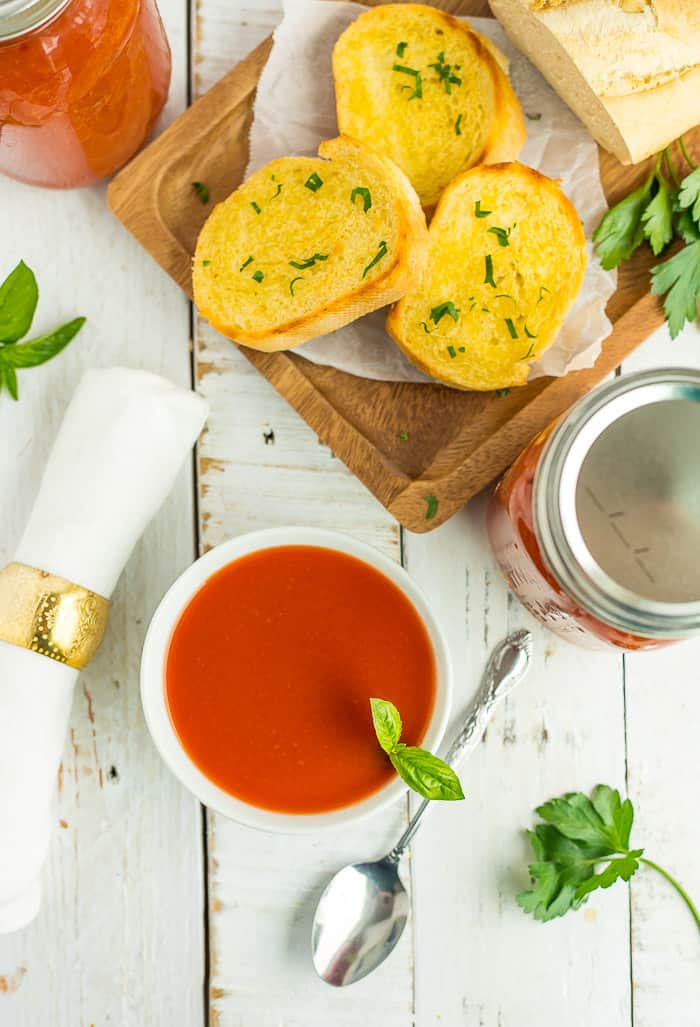
Follow this step-by-step tutorial to learn how easy canning tomato soup base can be. The ultimate comfort food, this homemade canned tomato soup base recipe can be pressure canned or preserved via water bath canning.

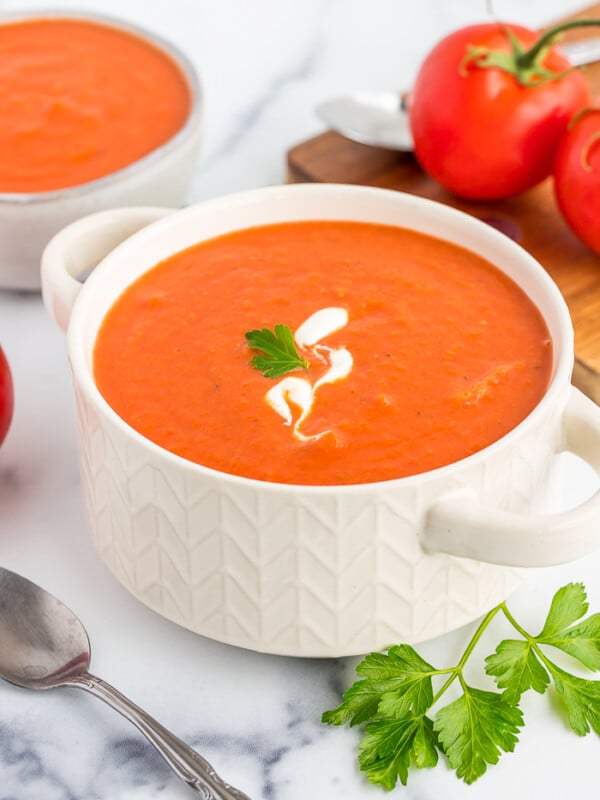
Homemade tomato soup is amazing and tastes so fresh, but peeling and pureeing tomatoes each time you want soup is super time-consuming. Not to mention that tomato season is only about six weeks long in most climates.
So what is a soup-obsessed girl to do? Can her own tomato soup base, of course. Let’s do this!
Why Can’t I Add Spices and Stuff to This Soup?
When you are canning with lower acid foods you don’t want to mess with any of the tried and true and TESTED recipes. Too much of one ingredient or too little of another can throw off the safety of your final product.
Instead, I treat this recipe as a base, much like you would if you bought a can of tomato soup at the store. But when cooking with it, I never just add water; it’s more fun and flavorful to doctor it up.
Check out this recipe for my favorite homemade tomato soup recipe. <— this recipe calls for whole tomatoes but using this tomato soup base allows you to skip the pureeing step.

How to Pressure Can Tomato Soup – Step by Step
I’ll walk you through the process here in photos because it really helps, especially if you’re new to canning. At the bottom of the post, you’ll also find a printable and detailed recipe card.
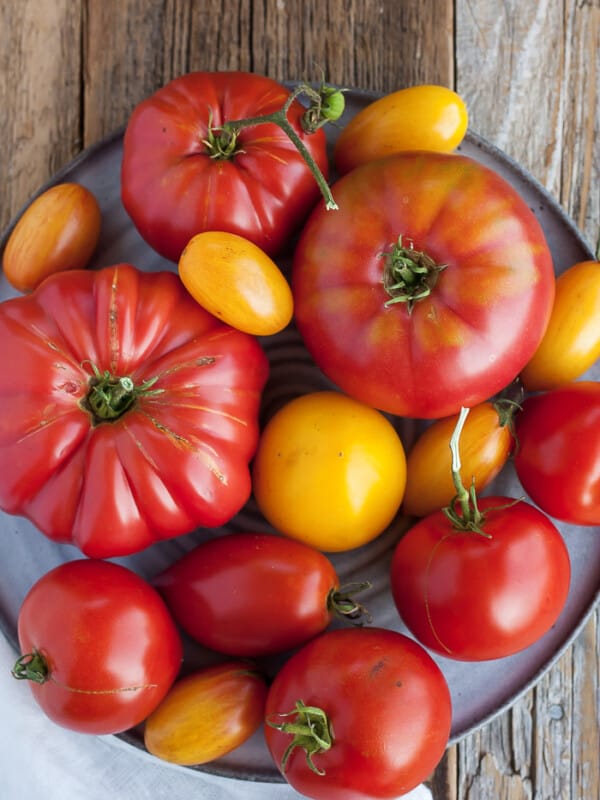
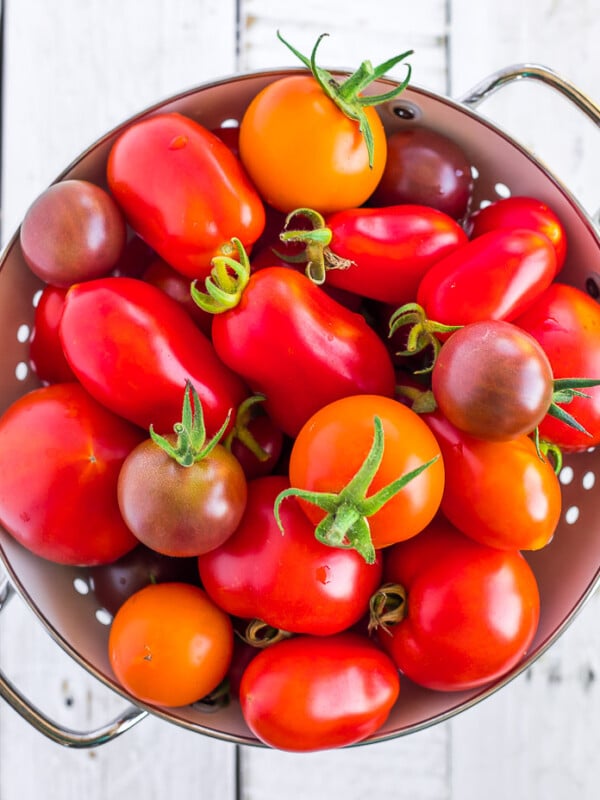
Rinse all your awesome tomatoes and cut them in half. If you have big ol’ tomato chonkers, then cut them into smaller chunks. Add a strainer/colander to a large bowl.
Wash and clean your jars. For canning soup, I recommend quart-sized regular-mouth jars. It is no longer necessary to sterilize jars before canning (hurray!), but you should make sure they are preheated enough to not crack when placed in hot water.
You can put them in a clean dishwasher and run them through a quick wash cycle, or place them in a large pan with some water in a low-heat oven (my lowest temp is 170˚F) until you need them. I’ve even just put super-hot tap water in them before and left them on the counter.
Wash your lids with hot soapy water and place them in a clean bowl for now.
I save canning tomato soup for the end of the season when all that is left are the random tomatoes. Random tomatoes make the best soup because you get all the complex, amazing tomatoey flavor in one delicious bowl.
You need about 45 pounds of tomatoes for 14 pints or 7 quarts. Since I never have that many at once, I do small batch canning and might produce 1-4 quarts at a time. It all adds up, and it all eats the same.
Add the tomatoes to a pot of boiling water and parboil them until you see the skins start to come off one of the tomatoes (about 1-2 minutes).
Use a slotted spoon and remove the tomatoes and place them in the strainer.

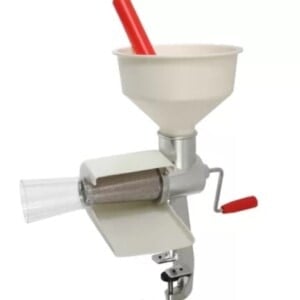
Run the tomatoes through a food mill to remove the seeds and skins. If my tomatoes are particularly watery, I will strain them a bit through a mesh strainer.
Transfer the tomato puree to a pot over low heat or a crockpot set to low. Keep warm until ready to can.

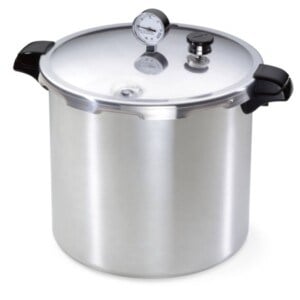
Add 3 quarts of water to your canner and put it on a burner set to high. Make sure there is a canning rack in the bottom of the canner. (Reminder: these are pressure canning instructions. See the instructions below and in the recipe card for water bath canning details).
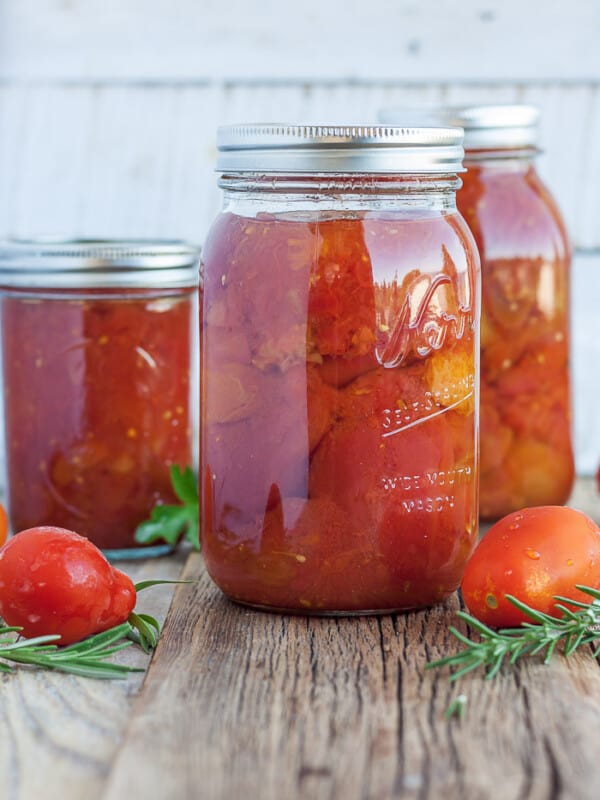
Place a funnel on a canning jar, add the lemon juice or citric acid, and ladle in the warm tomato puree, leaving 1 inch of headspace. Remove any bubbles from the jar (I use a plastic chopstick).
The lemon juice is needed to regulate the acidity of the tomatoes to keep the pH level consistent. Store-bought lemon juice generally has the same level of acidity (5%) from bottle to bottle.

Use a wet, clean rag and wipe the rim of the jars to make sure they are free of any food.
Place a clean lid and then a ring on the jar and tighten the ring to fingertip tight (tight enough that it won’t come off, but not so tight that the Hulk couldn’t budge it).

Using canning tongs, place the jars in the canner. Lock the lid. Soon, steam will start coming through the vent pipe (I call it the steam chimney). Allow the steam to pass through for about 10 minutes. Then put the pressure regulator (I call it the chimney cap) on top.
Pretty soon, the air vent will pop up. That is a sign that you’re starting to build pressure inside the canner. Get excited, nerd!
Under normal conditions, tomato soup needs to be pressure canned at 11 pounds of pressure for 15 minutes for both pints and quarts. See the chart below for any changes to processing times.
Pressure Canning Tomato Soup in a Dial-Gauge Pressure Canner
| Canner Pressure (PSI) at Altitudes of | ||||||
| Style of Pack | Jar Size | Processing Time | 0-2,000 ft | 2,001-4,000 ft | 4,001-6,000 ft | 6,001-8,000 ft |
| Hot or Raw | Pints or Quarts | 20 mins | 6 lbs | 7 lbs | 8 lbs | 9 lbs |
| 15 mins | 11 lbs | 12 lbs | 13 lbs | 14 lbs | ||
| *Source: National Center For Home Food Preservation | ||||||
Processing Time for Tomato Soup in a Weighted-Gauge Pressure Canner
| Canner Pressure (PSI) at Altitudes of: | ||||
| Style of Pack | Jar Size | Processing Time | 0-1,000 ft | Above 1,001 ft |
| Hot | Pints & Quarts | 20 mins | 5 lb | 10 lb |
| 15 mins | 10 lb | 15 lb | ||
| 10 mins | 15 lbs | Not recommended | ||
| *Source: National Center For Home Food Preservation | ||||
When the dial gauge reaches the appropriate PSI, reduce the burner temp to medium, and start your timer. The pressure must stay at the PSA or (a little bit) above for the duration of the cooking time. You’ll likely need to adjust the temp on the burner a few times, depending on your stove.

When the time is up, remove the canner from the burner and allow it to sit until you hear a distinctive “click” of the air vent dropping. Remove the pressure regulator and carefully remove the lid of the canner (Pro tip: I always use oven mitts when I take the lid off because the steam is super hot). Let the jars sit in the canner with the lid off for 5 minutes.
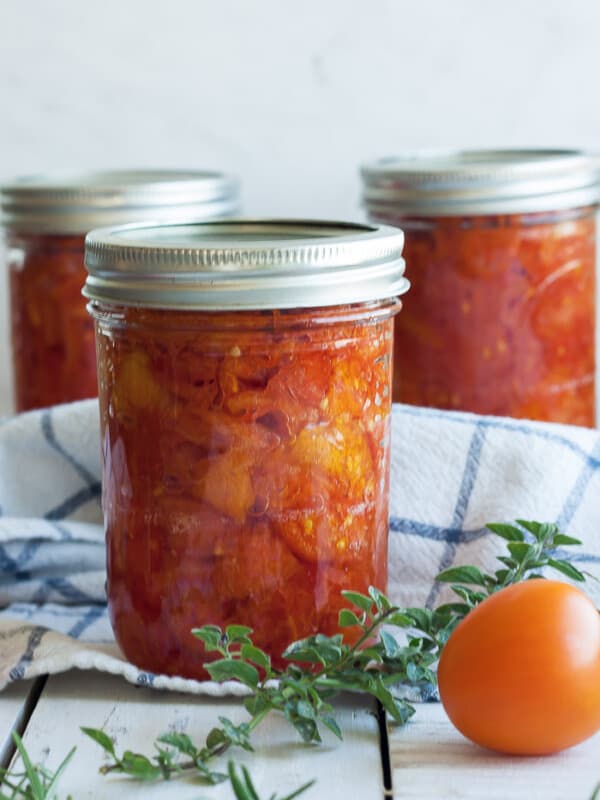
Place hot jars on a towel where they can sit undisturbed for 12 hours.
After a few hours, to check for sealing, gently press down in the middle of the lid. If the lid has no give, it’s sealed. If you can press the lid in and it pops a bit, your jars are not sealed.
How to Can Tomato Soup {Water Bath Canning}
Follow all the steps above for blanching, making, and jarring the tomato soup base.
Prepare your water bath canner by filling it with water. You need to have enough water to cover the jars by 1 inch once the water is boiling.
Set the canner on the stove. Turn the burner to high.
Using canning tongs, carefully place your jars in the canner. Put the lid on. Processing times will vary based on altitude. See the chart below. Pro tip: the water must return to a boil in the canner before you can start the timer.
Processing Time for Tomato Soup - Water Bath
| Processing Time for Tomato Soup - Water Bath | |||||
| Process Times at Altitudes of: | |||||
| Style of Pack | Jar Size | 0-1,000 ft | 1,001-3,000 ft | 3,001-6,000 ft | Aove 6,000 ft |
| Hot | Pints | 35 min | 40 min | 45 min | 50 min |
| Quarts | 40 min | 45 min | 50 min | 55 min | |
| *Source: National Center For Home Food Preservation | |||||
Once the jars have been processed for the appropriate amount of time, remove the canner from the burner, wearing oven mitts, carefully take off the lid of the canner, and allow it to sit for 5 minutes. Pro tip: I tend to just slide the canner into the middle of my stove, as it weighs a ton.
Carefully remove the jars with canning tongs, and place them on a thick towel in a place where they can be undisturbed for 12 hours.
Canning Tomato Soup Base
Equipment
Instructions
Pressure Canning Tomato Soup
- Rinse the tomatoes and cut in half, or quarters for larger tomatoes.20 lbs tomatoes
- Add a strainer/colander to a large bowl.
- Wash and sanitize your jars. You’ll want to keep them warm to avoid having them crack when placed in the canner. You can fill them with hot water, or place them on a tray in the oven at 170F.
- Wash your lids with hot soapy water and place them in a clean bowl for now.
- Add the tomatoes to a pot of boiling water and parboil them until you see the skins start to come off one of the tomatoes (about 1-2 minutes).
- Use a slotted spoon and remove the tomatoes and place in the strainer.
- Run the tomatoes through a food mill to remove the seeds and skins.
- Transfer the tomato puree to a pot over low heat or a crockpot set to low. Keep warm until ready to can.
- Add 3 quarts of water to your pressure canner and put it on a burner set to high. Make sure there is a canning rack in the bottom of the canner.
- Add lemon juice or citric acid to your canning jars.Quarts: 2 tbsp lemon juice OR 1/2 tsp citric acid. Salt (optional) 1 tspPints: 1 tbsp lemon juice OR 1/4 tsp citric acid. Salt (optional) 1/2 tsp10 tbsp lemon juice
- Place a funnel on a canning jar and ladle in the warm tomato puree, leaving 1 inch of headspace. Headspace is defined as the space between the top of the food and the top of the jar.
- Using a long utensil (I prefer a plastic chopstick), remove all the air bubbles from the jar.
- Use a wet clean rag and wipe the rim of the jars to make sure they are free of any food.
- Place a clean new lid on the jar. Add a ring, and tighten to fingertip tight.
- Using canning tongs, gently place the jars in the canner.
- Lock the lid. Soon, steam will start coming through the vent pipe. Allow the steam to pass through for about 10 minutes. Then put the pressure regulator on top.
- Pretty soon, the air vent will pop up.
- In a dial-gauge pressure canner, process pints and quarts based on the elevation guide below:*0-2,000f ft {PSI: 6 lbs of pressure} = Pints & Quarts 20 min*0-2,000f ft {PSI: 11 lbs of pressure} = Pints & Quarts 15 min*2,001-4,000k ft {PSI: 7 lbs of pressure} = Pints & Quarts 20 min*2,001-4,000k ft {PSI: 12 lbs of pressure} = Pints & Quarts 15 min*4,001-6,000k ft {PSI: 8 lbs of pressure} = Pints & Quarts 20 min*4,001-6,000k ft {PSI: 13 lbs of pressure} = Pints & Quarts 15 min*6,001-8,000k {PSI: 9 lbs of pressure} = Pints & Quarts 20 min*6,001-8,000k {PSI: 14 lbs of pressure} = Pints & Quarts 15 min
- When the dial gauge reaches the appropriate PSI, reduce the burner temp to medium, and start your timer. The pressure must stay at the PSI or (a little bit) above for the duration of the cooking time. You’ll likely need to adjust the temp on the burner a few times depending on your stove.
- When the time is up, remove the canner from the burner and allow it to sit until you hear a distinctive “click” of the air vent dropping. Remove the pressure regulator and carefully remove the lid of the canner (Pro tip: I always use oven mitts when I take the lid off because the steam is super hot).
- Let the jars sit for 5 minutes in the canner and then lift them out with canning tongs. Pro tip: allowing the jars to sit in the canner with the lid off can help reduce the siphoning of liquid in your jars.
- Remove with canning tongs and place on a towel where they can sit undisturbed for 12 hours.
- After a few hours, to check for sealing, gently press down in the middle of the lid. If the lid has no give, it’s sealed. If you can press the lid in and it pops a bit, your jars are not sealed.
Water Bath Canning Tomato Soup
- Complete steps 1-8 above.
- Fill your canner so that there will be 1 inch of water over the tallest jar that you are canning. Set it on a large burner set to high.
- Complete steps 10-14 above.
- When the water has reached a rolling boil, place the jars in the canner and place the lid on top.
- Process pints and quarts based on the elevation guide below:*0-1,000 ft – Pints =35 min Quarts =40 min*1,001-3,000 ft – Pints =40 min Quarts =45 min*3,001-6,000 ft – Pints =45 min Quarts =50 min*6,000 ft+ – Pints =50 min Quarts =55 min
- When the time is up, remove the canner from the burner and let the jars sit for 5 minutes in the canner and then lift them out with canning tongs.
- Place on a towel where they can sit undisturbed for 12 hours.
Notes
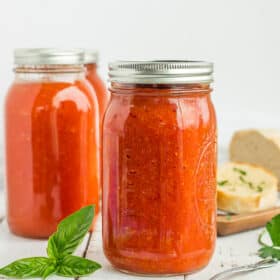
- Typically, 45 pounds of tomatoes will make 14 pints or 7 quarts of tomato soup.
- This tomato soup can be frozen in wide-mouth canning jars. Leave 1 inch of headspace in the jars to allow for expansion during freezing. Allow to fully cool in the jar before freezing.
- Your soup may separate in the jars after canning. This is totally safe as long as the jars are sealed. This is the result of using tomatoes with higher water (juice) content.
- Once the jars have sealed, remove the rings. Label and store sealed jars in a cool (best results are 50-70˚F) dark place for up to 12-18 months.
Nutrition
Nutrition information is automatically calculated, so should only be used as an approximation.

Get my Canning e-book!
It’s 51 pages of every helpful tip and trick you could want as a brand new canner, AND it includes 13 ad-free canning recipes that are designed to take you from novice to pro.