As an Amazon Associate, I earn from qualifying purchases.
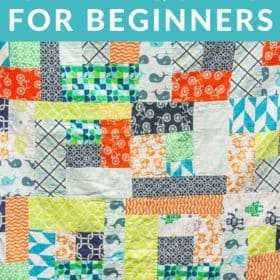

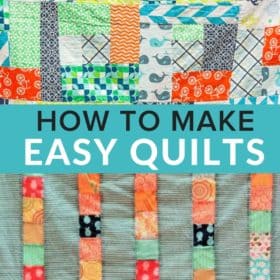
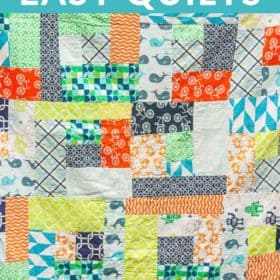
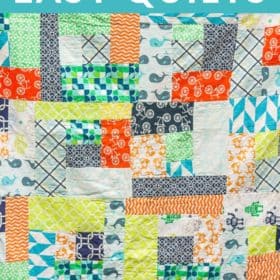
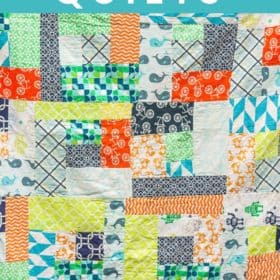
An easy to follow step by step tutorial on making simple Beginner Quilts. These quilt projects can be made on any sewing machine or sewn by hand.

Learning to quilt can be super overwhelming. But it doesn’t have to be. That’s where “cheater quilts” come in! These are the kinds of quilts that any beginner can tackle. If trying to thread a bobbin on a sewing machine leaves you in tears, THIS is the project for you.
Beginner Quilts/Cheater Quilts Supply List
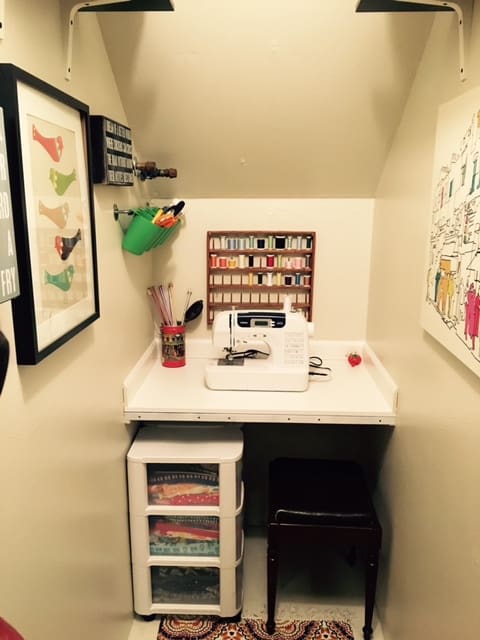
If you’re interested, here are supplies that I’ve accumulated over time that make this project easier. They’re optional, but helpful:
You’re going to need some fabric for this. Newsflash! The amount depends on what size quilt you’re going to be making. I always start with multiple kinds of fabric that is 1/4th of a yard. It’s cheap to buy 1/4th of a yard, and it allows you to use tons of different choices. Plus, it’s a great way to use up any scraps you might already have on hand.
How to Make Beginner Quilts/Cheater Quilts – Step by Step:
So, here’s what we’re gonna do. First, wash, dry, and iron all your fabric.
Next, figure out how large you want your individual strips to be. I typically make mine about 2-3 inches wide. Using some sort of guide (like this cutting ruler), cut the fabric in a strip. Then, make like 2-4 more strips of the same fabric. Repeat with all the other fabrics. Mix and match. Again, this is quilting for cheaters. I ain’t gonna judge.
Now you have a big ole pile of strips.


Then, take another strip, and add it “pretty” side to “pretty” side to one of the strips you just connected, and sew it together.


Then, cut off the non-equal edges from your strips. This is where the rotary cutter and rulers come in handy!


Take two of the strips, and place them “pretty” side to “pretty” side. Sew. Repeat until you have strips that are your desired length. Connect other strips until you have 5-6 that are of the same length.


Take the fabric you want for your “filler” in-between the strips, and cut 4-6 of the same width and length.

Take the “pretty” side of your quilted strips, and put it on the “pretty” side of your filler fabric. Sew. Add another piece of the filler to the other side of the quilted strip. You’re adding pieces as you did above to connect the solid strips.

Once the quilt top is at your desired size, stop adding strips. Cut a piece of fabric that is the same size as the top. This will be your quilt back. Put the “pretty” side of your quilt top on the “pretty” side of the quilt back. Sew the two pieces together around the edges, leaving about 6 inches of the outside unstitched.
When you only have those 6 inches left to connect, remove the quilt from the sewing machine. Turn the fabric inside out. You should now see the right side of the quilt top and the back.
Fold in the unfinished edges (the one you used for turning the quilt right side out), and pin it together. Topstitch over the pinned edges to finish the quilt.
And voila, you’ve just completed a “cheater’s” quilt, better known as an easy quilt!
More Easy Sewing Projects
- How to Make Fabric Gift Bags
- Zero Waste Produce and Bulk Bin Shopping Bags
- How to Make Rice Heating Pads
- Reusable Snack Bags


Honestly if you put batting in between, you don’t have to quilt, you can do what my grandma used to do and just tie yarn or embroidery floss in pretty colors in intermittent spots. (If you don’t do this, the batting will bunch up eventually with use.)
These instructions are really neat and easy. Good job.
I made a cheater quilt from instructions in Woman’s Day magazine about 20 years ago (I suck at sewing – I do not sew straight) and it only took me 8 hours – which is great for me. It is concentric diamonds. I am very proud of it!
What an easy quilt for beginners! You’ve described every step perfectly. Very easy to understand. Thanks so much for sharing your idea.????????
You’re so welcome Debbie! I’d love to see photos of any finished projects you make. 🙂
Hey. This looks super nice.
Can you tell me how large yours is?
😀
I’ll be honest in that I don’t really have a set size. I kinda just pick a size depending on the quilt recipient. Most are twin sized (ish).
I think the name of the quilt is Chinese Coins. The squares are the stacks of coins with background showing between. It’s a great way to use up scraps.
I am slightly more advanced than you, but I can read your posts all day. Keep posting. I need the smileys.
You are a riot! Thanks for the giggle.
Do you put any batting in between the top & bottom? Im just starting to learn to quilt and this sound so easy. Im going to try but, can’t figure out how you added in the batting if you do.
You can if you’d like. You’d sew the top of the quilt on to the batting. I don’t always use batting depending if the fabric is heavy/warm enough.
Of course, if you put batting in it, you’d actually have to quilt it. That would defeat the purpose of cheating.
My friend is a quilte r and I am not . I don’t have the patience she does . I did make an easy baby quilt using 9 inch squares .
I love how easy yours is . I am
Going to try it ! But did you put
Batting in ?
Let me add one more step to your quilt…wash all the fabric ahead of time and then iron. Fabrics shrink differently and if you wash ahead of time, you don’t have to worry about it. Quilt is cute! d
My only resolution for 2013 was to complete a quilt. Thanks to your tutorial I was able to complete this goal, only 12 days into the year.
I made one the other day for a gift! It was my first week with a sewing machine! I worked on it over 3 days, but only about an hour / hour 1/2 each day! Thanks for the instructions!
Ohhhh, email me a photo please!
I think now I can tackle making a quilt using your instructions. Thanks for sharing it with us.
I’m completely new to sewing but this is so cute I want to try! I’m wondering if I could make this using the little bundles of fabric squares you can pick up fairly cheap?
You could, but you’d be sewing each of those squares together individually. It would still be pretty easy, but would require a lot more starting and stopping of the sewing machine.
i’ve yet to make a blanket but this makes me want to give it a try 🙂
This is similar to Seminole piecing. You might want to check it out.
Need I say this again? You are freaking awesome. Now I’m not going to say it again because I don’t want you getting a big head. 😉
You made me laugh!
This is a really great, accessible tutorial for strip piecing. :o) Have you heard of Rita Hutchens? I went to a presentation she put on once . . . she takes this technique to the nth degree. Her quilts are astounding, and all done this way. Here’s her site–the galleries always blow my mind.
https://www.ritahutchens.com
This is awesome. Thank you!
Great idea! I’m very *non-crafty*, but I think I might even be able to give this a try. 🙂
I love this! Thank you so much! =)
Question? Where does the batting come in? She doesn’t show any or I’m missing something here.
There is no batting in these quilts.