As an Amazon Associate, I earn from qualifying purchases.


This easy to follow tutorial teaches you how to make chicken bone broth three different ways. Homemade stock from bones can be made in a crockpot, Instant Pot, or on the stovetop, and has so many wonderful uses for meals and soup.

Homemade bone broth is one of the healthiest, easiest, and most affordable ways to introduce delicious nourishing food into your diet. When I say easy – I mean EASY! I don’t lie. Ever. <Ok, I just lied about that, but I didn’t lie about the broth.
I once saw a famous TV chef making chicken stock from two whole uncooked chickens and beautiful fresh vegetables. The stock was gorgeous, but I could have cried when she just tossed all the components in the garbage after the stock was completed.
When I spend the money on an organic free-range whole chicken, I am investing in quality and our health. Right now when I make a paleo roasted chicken I can get a meal out of it, and extra meat for things like Instant Pot Chicken and Dumplings or the Copycat Olive Garden Gnocchi Soup. As my two boys grow I know that will seem laughable.
So to me, tossing a perfectly good chicken once it has served its purpose for just bone broth is not something I can get behind. This recipe uses the leftovers from something we have already enjoyed. It stretches the usefulness of the chicken and helps it become a more sustainable meal.
But sometimes there are days when you’re just not into making your own bone broth and that’s ok too! If you’re looking to purchase quality storebought versions, check out this post on where to buy bone broth. It even has a nerdy spreadsheet that breaks down the protein and sodium content as well as the price per ounce for various brands.
Ways to Make Bone Broth Affordable
If I am in the mood to make chicken bone broth after we finish our roasted chicken, I will use one of the three methods I’m about to talk about. And if the idea of making it doesn’t really tickle my fancy at that moment, I’ll toss the chicken into a freezer bag and deal with it later.
When you’re cutting up veggies throughout the week for meal prep, save all the peels, tops, and parts you aren’t going to eat and keep them in a bag in your freezer.
Leftover chicken carcass and veggie scraps turn themselves into liquid chickeny gold. Since it is basically made of trash, my husband calls it “garbage water”.
Are Chicken Bone Broth and Chicken Broth the Same Thing?
No. At its core, bone broth is what our grandparents called “stock”. Bone broth is stock with a better marketing team.
Ok, in reality, bone broth has many of the same components as stock, but it’s been simmered a lot longer to extract even more goodness from the bones.
- Basic broth is made by cooking meat (usually chicken, beef, or turkey), maybe some bones, aromatics, vegetables, and water.
- Basic stock involves using those same aromatics and vegetables but making sure there are bones being simmered as well.
- Bone broth takes it to the next level and cooks the veggies, aromatics, and bones for a long time. A really long time – like 18 to 24 hours! However, if you use the Instant Pot, it will considerably cut down the cooking time.
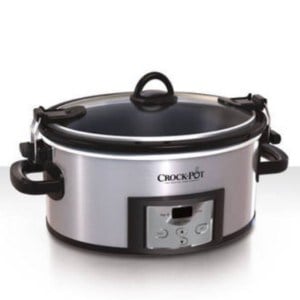
Can I Make Chicken Bone Broth in the Slow Cooker?
Yes! And it is such a hands-off way to make it. Put it in the pot, turn it on, and walk away. I like using the slow cooker because it means my stove isn’t on for hours and hours.
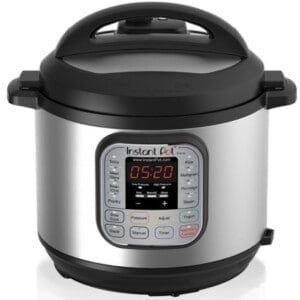
Pressed for time? I also have an Instant Pot method for you.
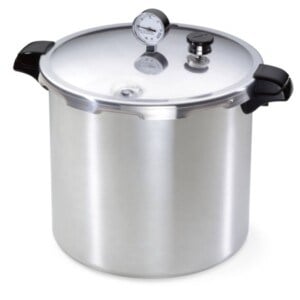
How to Make Instant Pot Chicken Bone Broth – Step by Step:
(note: stovetop and slow cooker instructions are included below in the printable recipe card)
If you are new to pressure cooking and the Instant Pot, check out this post on recipes for Instant Pot beginners.

Place all ingredients in the Instant Pot. Add water until it reaches the max fill line inside your pot.
Lock the lid into place and set the steam release handle (valve on top) to “Sealing”. Press manual>high pressure>120 minutes.
When it has finished cooking allow it to do a natural release. Given the volume of the liquid in the pot, it may take 30-60 minutes to fully depressurize.


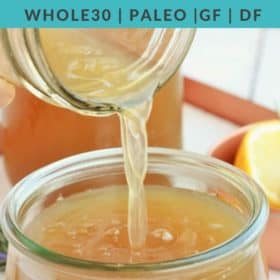
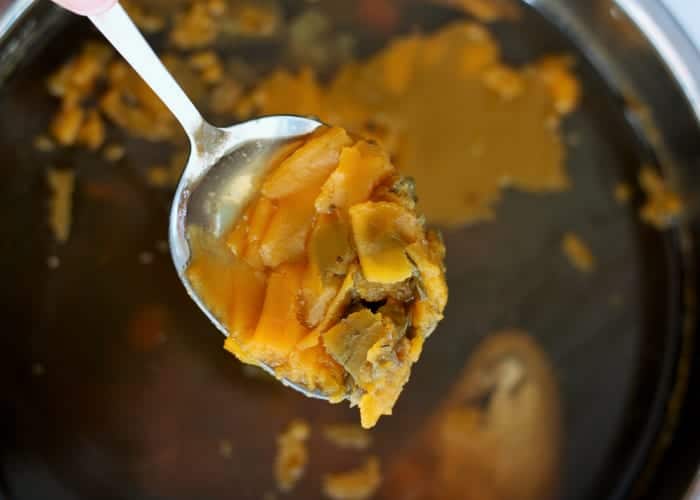
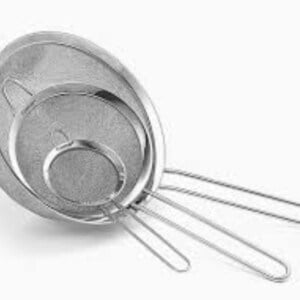
Place a strainer/colander in your largest mixing bowl. Carefully pour the stock into the strainer (you may need to do half at a time depending on the size of your bowl and strainer) and allow the stock to drain into the bowl.

Optional: Once the bone broth has finished draining, place a metal sieve (fine mesh strainer) over another bowl and pour the stock through the sieve. Refrigerate until completely cooled. Skim the fat off and discard or use for cooking.

I have also been known to use a smaller strainer propped over my canning jar while I pour in the stock to catch additional bits and bobs.

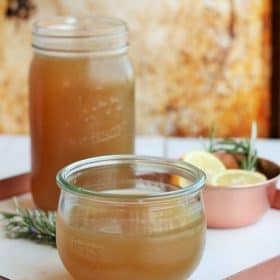
Homemade bone broth should be stored in the fridge (unless you are pressure canning it). If you are not planning to use the stock within five days, it is best to store it in the freezer. Want to make it shelf stable? Check out this post on Canning Chicken Stock.
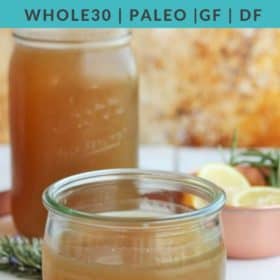
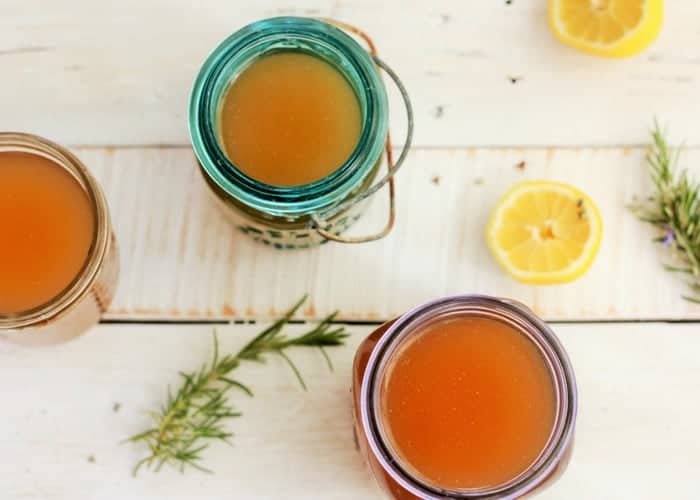
My favorite freezing method is to use wide-mouth canning jars. Fill jars with cooled stock leaving 1 inch of headspace (amount of space between the top of the food and the top of the jar) to allow for expansion during the freezing process.
Pro tip: use different sized canning jars for storage. Pint jars will give the equivalent of a can of stock from the grocery store. A quart will give you the equivalent of a box of stock from the store.
Recipe Notes/Pro Tips
- Stock that is cooked at too high of a temperature may produce a foam on the top. You can skim that off and discard it to produce a deeper and cleaner stock.
- The fat that you skim off the cooled stock can be used for cooking or roasting veggies. You can also discard it.
- If you want an even deeper tasting stock you can use two chicken carcasses per batch. This is especially helpful if you’re using a chicken that has been well cleaned of meat.
- Use your favorite veggies to flavor the stock. I tend to avoid most root vegetables (except onions and carrots) because they can often give off a “dirt” taste. Potato peels are not recommended, and beets while delicious would turn your stock a very shocking pink color.
- The herbs that are listed in the recipe are merely recommendations. Feel free to add your favorites. However, if you plan to can your stock, I would avoid garlic as it is a trickier ingredient to safely can. All meat products must be pressure canned for safety reasons.
- You can add chicken feet to the stock during the cooking process for an even richer stock.

How to Make Chicken Bone Broth – (Whole30, Paleo)
Ingredients
- 1 chicken carcass
- 1 tbsp apple cider vinegar
- 3/4 tsp black peppercorn
- 2 bay leaves
- 5 cups veggie scraps carrots, onions, and celery
- 1 tsp tarragon, dried
- 1 tsp thyme, dried
- water to cover
Instructions
Instant Pot Instructions
- Place all ingredients in the Instant Pot. Add water until it reaches the max fill line inside your pot.1 chicken carcass, 1 tbsp apple cider vinegar, 3/4 tsp black peppercorn, 2 bay leaves, 5 cups veggie scraps, 1 tsp tarragon, dried, 1 tsp thyme, dried, water to cover
- Lock the lid into place and set the steam release handle (valve on top) to “Sealing”. Press Manual>High Pressure>120 minutes.
- When it has finished cooking allow it to do a natural release. Given the volume of the liquid in the pot, it may take 30-60 minutes to fully depressurize.
- Place a strainer/colander in your largest mixing bowl. Carefully pour the stock into the strainer (you may need to do half at a time depending on the size of your bowl and strainer) and allow the stock to drain into the bowl.
- Optional: Once the stock has finished draining, place a metal sieve (fine mesh strainer) over another bowl and pour the stock through the sieve.
Slowcooker Instructions
- Place all ingredients in the slow cooker and fill with water up to the lid line.
- Cook on low for 12 hours.
- Place a strainer/colander in your largest mixing bowl. Carefully pour the stock into the strainer (you may need to do half at a time depending on the size of your bowl and strainer) and allow the stock to drain into the bowl.
- Optional: Once the stock has finished draining, place a metal sieve (fine mesh strainer) over another bowl and pour the stock through the sieve.
Stovetop Instructions
- Place all ingredients in a large pot and fill with water up to about 1/2 inch from the top.
- Place the lid on and cook on low for 12 hours. Stir occasionally. Pro tip: Either start this stock before you go to bed or first thing in the morning.
- Place a strainer/colander in your largest mixing bowl. Carefully pour the stock into the strainer (you may need to do half at a time depending on the size of your bowl and strainer) and allow the stock to drain into the bowl.
- Optional: Once the stock has finished draining, place a metal sieve (fine mesh strainer) over another bowl and pour the stock through the sieve.
Notes
Nutrition
Nutrition information is automatically calculated, so should only be used as an approximation.


I used the Instapot recipe today and I am so proud of myself. It was my first time making broth from a carcass and I’ve never felt more “Little House on the Prairie”! Called my husband at work to impress him with tales of my domestic triumph and he was not impressed- apparently they use this recipe all the time at the fire station (he’s a firefighter) with leftover chickens so I’m trying to not let him rain on my crunchy granola dreams haha Anyways, the recipe was super easy and made SO much broth, I’m looking forward to using it in soups as we move into fall.
Jeni, my husband is ALSO a firefighter and I guarantee no one at his station has ever made bone broth in the Instant Pot.
Don’t let your husband steal your Laura Ingalls moment! You go into town and get yourself an orange and a candy stick and enjoy it! 🙂
I used this recipe to make my own stock for the first time and I am kicking myself for not doing it years ago. It was so easy (I used my Instant Pot) and made so much stock! Much cheaper than buying it at the store, but what made me even happier is it is so much less waste. I always feel guilt with single-use containers and this recipe eliminated that for me.
Barb, so glad to hear you liked it so much. And I totally agree with you on the waste aspect!!
I never let my chicken carcass go to waste since I learnt how to make my own chicken stock thanks to you! Easiest recipe and such a flavourful broth
We use the slow-cooker method detailed in this recipe to make our own stock. The product is always delicious! Plus, we feel good about using “scraps” that would have otherwise just been through away. Getting every gram of goodness and usefulness from our groceries is a life (and money) saver!
Gotta love something delicious, free, and sustainable! 🙂
I brown my carcasses in the oven along with accumulated veggies then do the broth. Gives it a darker colour and more flavour.
Delicious addition!!
I’ve been on a bit of a roast chicken kick in our house lately and have a freezer full of carcasses wondering what the heck to do with them. So glad I tried this broth! It was so easy (especially since I already had a freezer bag full of kitchen scraps). I just dumped it in my slow cooker and left it on for 11 hours (a little longer as I did it overnight). Then I used it all up in two different soups today and all taste great.
I have 8 qt Instant pot. I am going to make bone broth with my turkey carcass. Last batch of broth I made looked a little lighter in color. Should I add more veggie scraps?
The color generally reflects how long the bird was cooked (and what kind of bird it was). But as long as you like the flavor then don’t worry about the color. Most storebought broths contain turmeric which gives it a richer golden color. I try not to do a color comparison between homemade and storebought!
How long did you process it in the IP?
I did 2 hours at high pressure and then let it do a natural release. It took a little over an hour for the natural release. The pot was filled to the max fill line.
And how was the taste?
Call us old school, but we have a chicken roast in our slow cooker every Saturday. We throw in some chopped veggies, and there’s dinner for five minutes of work. We then throw the picked clean carcass (such a gross word) back in the slow cooker with a splash of apple cider vinegar and a top up of water. 12 hours later and we have chicken stock. We don’t even bother with veggies scraps (the chickens in our community garden need to be feed)!
The chicken stretches to two more dinners (usually soup now that it’s winter here in Australia and rice paper rolls).
And we cook rice in chicken stock. I promise you’ll never go back to cooking it in water.!
I love adding veg to a roasting chicken. what are your favorites?
I’m surprised (given your profile name) that you didn’t call the “chooks in community garden”. I find it such a sweet name for chickens!
Yes, stock in rice all the way. I’m always shocked at the taste difference when I have rice somewhere else.
Any and all vegetables in season. Right now it is winter here, so we’re full of brussel sprouts, carrots, onions, broccoli, and cabbage.
Chicken stock rice is heaven. We also use it in stews.
Ha! I refuse to call them chooks. I’m an American turned Aussie. There are a few Aussie phrases I refuse to use.
ta= thank you (really is it that hard to even say thanks?)
rubber=eraser (you’ll never hear that coming out of my mouth)
thongs=flip flops (ditto on this one)
arvo=afternoon
Chrissie=Christmas
piss up=party
yous=plural of you
Love your posts Sarah! And thanks for your kindly wisdom this time last year with the drama with my daughter’s preschool. Changed schools and have a happy Little Lady one year later.
Oh yes, I remember you! You’re originally from the (forgive my brain if I get this wrong)…the upper midwest? So glad to hear that the new school is working out better for your kiddo.
How often do you say “good on you”? Jack had a Leap Frog reading game where the narrator was Australian and “good on you” was seared into my brain from having it listen to it so often.
Do you say “brekkie” for breakfast? I’ve seen that on Instagram and don’t really get the appeal.
Mmm, I love bone broth! I usually cook mine in the slow cooker for 24 hours. If I had lots of bones, I’ll even strain it, toss everything back into the slow cooker and make a second (weaker) batch.
Also, roasting the whole chicken gives the bone broth a more delicious flavor than cooking the whole chicken in a slow cooker first.
And bone broth made from Thanksgivings’s turkey is the best!
I have totally reused it too! The weaker broth is awesome for rice and veggies. I save the good stuff for soup.
How do you cook your Thanksgiving turkey broth? I have to put mine in my giant pressure canner because it is the biggest pot I have. I then have to drain, clean, and decontaminate the canner to then can the stock. It’s an annoying process. But worth it.
I just cook the turkey bone broth in our slow cooker. I might mash the bones down a bit to make them fit…
Holy carbohydrates Batman! I’m assuming those just come from the veggies you use and are not in the final product because you’re not eating them.
Hmmm, I’m not sure. I use a third-party nutrition generator. I’ll need to look into it more.
You probably will never know the exact nutritional information because of using scraps, each stock is technically different. When I make my own, I assume there’s a few carbs due to the veggies putting their goodness into it as well. Just not 31 total, 22 net, carbs.
I use the carcasses from roasted chickens to make stock. After we eat the roasted chicken, I de-bone it, use the meat for something else and then that carcass turns into beautiful stock. If I don’t have time right then, I bag it and stick it in the freezer. My husband makes fun of me, saying the freezer looks like a scene from a horror film.
Troy has dropped many a “Dexter” comments too about our deep freeze. Hee hee!
I save the stems from my herbs in the freezer bag of veggie bits for stock too. Works great and less waste
Yes, absolutely!!
All year I save up the chicken carcasses and when I remember veggie bits, then when wood stove season returns I did out the BIG stock pot and make a huge pot of stock because it can simmer for a day or more on the wood stove with no effort on my part. Then I chill it and remove some of the fat, divide it into family size yogurt containers and into the freezer.
OMG the woodstove? You’re making cry because that is SUCH a good idea and I can’t wait to try it!!
Yummy! This turned out great for me. I ended up freezing it into ice cubes as I don’t have any canning supplies. Thanks you so much!
I never thought of that! How long will the cubes keep in the freezer with regular door opening? We have just the normal fridge/freezer combo.
Once frozen, pop them out and store them in a freezer zip lock bag and they’ll be good for a while!
Great idea to use the crockpot. The next chicken carcass will go straight into stock this time.
chicken feet are inexpensive and readily available at your local ethnic supermarket.. they add the nutrient filled jelly like consistency to the broth, also don’t add any salt until after the cooking process because it hinders the
mineral leeching process. I am obsessed with making my own stock and work it into our meals as much as possible!
I make this almost but i add chicken feet.
Kellie
I think it’s just the mirepoix “meer-pwah” (look at me all fancy!) french term for celery, onion, and carrots basically. Used in a lot in stocks, soups, sauces, etc. 🙂
Can you use potato peelings in the stock?
I don’t know this pressure canner, but in my country (sounds silly to say it this way but we are in the global community now)we do it the old fashioned way. My mother told me to wash the bottles and lids, but not to dry them as the dish towel has germies on them, then to heat them in the oven to sterilize them (think 100 degrees Centigrade – or the temp at which water boils will do)- the glass bottles that is, the lids was just doused with boiling water.
This is a tricky method, because if your extremely hot bottle comes in to contact with say, a cold breeze, it will POP! I’ve had 3 bottles crack on me when trying to ladle in my still boiling jam (think it was tomato). I guess the sugar syrup was waaay hotter than the bottles or something like that. Mom had to come help me, and voila! 5 bottles of lovely red sweet gingery tomato jam! No cracking either and still stashed away in a cupboard somewhere to be enjoyed on toast some future date – when I’m not on a low carb diet!
Canning stuff is a great way of not wasting the excess of your tomato or any other crop and can totally last for years if stored correctly. My Granny made a fig conserve that turned as black as sin and which my dad would’ve sold his first born for, as he likes figs. Anywho, he opened it up about 10 years after she had died and it was still great – according to him… The sugar didn’t go sandy, the figs did go black, but I don’t know how much of what he reportedly tasted was wishful thinking. I find jams and fruit taste best nearest to bottling. You can still taste the fruit and not the sugar.
I find it interesting that we are returning back to the old way of doing for ourselves as life gets more and more expensive. Soon we will all have a little pen with chickens and goats and even dare I say it, pigs and a cow? And of course some vegetables and fruit trees too. There are worse skills to teach our children I guess.
Good entertaining blog, and keep the ideas coming!
Just an added note to anyone reading this: meat &/or it’s broth is a low-acid food, & MUST be pressure-canned!
I have managed to save a lot of chicken bones from some Nelson’s Port-a-pit (a smoked chicken people usually get for fundraisers) and wanna make stock with this. I hope it’s good cuz they smoke the shit outta that bird and it is melt in yo’ mouth good. Super excited to try your recipe!
Mmmmm smokey chicken broth? YUM!
Not to discourage your kick ass idea, but I did that once with a smoked Turkey carcass from Thanksgiving, and the stock was OVERWHELMINGLY Smoky. To the point of being useless. Let me know if yours turns out differently.