As an Amazon Associate, I earn from qualifying purchases.

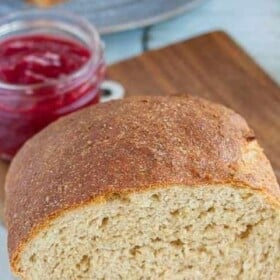
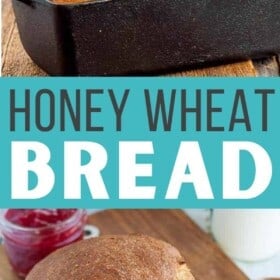
A simple homemade Honey Wheat Bread recipe that can be made without a bread maker. Homemade sandwich bread is easy to make (and freeze) and can save you so much money at the grocery store!
I have made all the mistakes over the years with baking whole wheat bread. Picture me hanging out in your kitchen, walking you step by step through the correct process.
We’re in this together so that you can make your own amazing homemade bread!
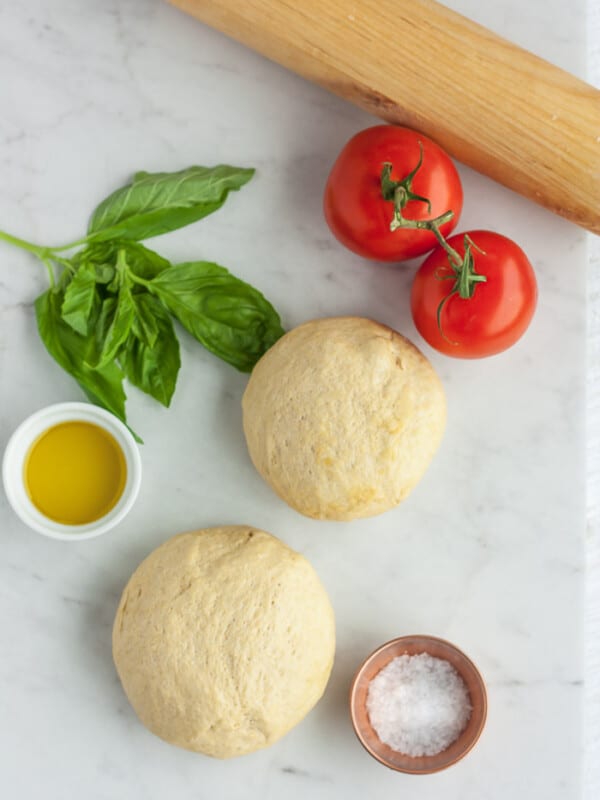
ingredients:
 and can save you so much money at the grocery store!")
- Honey – though if you need to make this vegan, you can replace it with sugar.
- Whole wheat flour – I grind my own flour (nerd alert!), but you can also buy it from any grocery store.
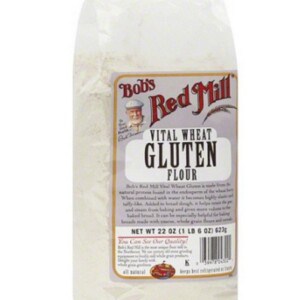
- Vital wheat gluten – the key ingredient to make this fluffy and soft
- Yeast – I prefer active dry, but you can also use instant/rapid-rise
- Sea/table salt
- Olive oil
How to Make Honey Wheat Bread
*I’ll walk you through it here with some photos and tips, and you’ll also find a printable recipe card at the bottom of the post with exact measurements, etc. You can also click “jump to recipe” to skip down.
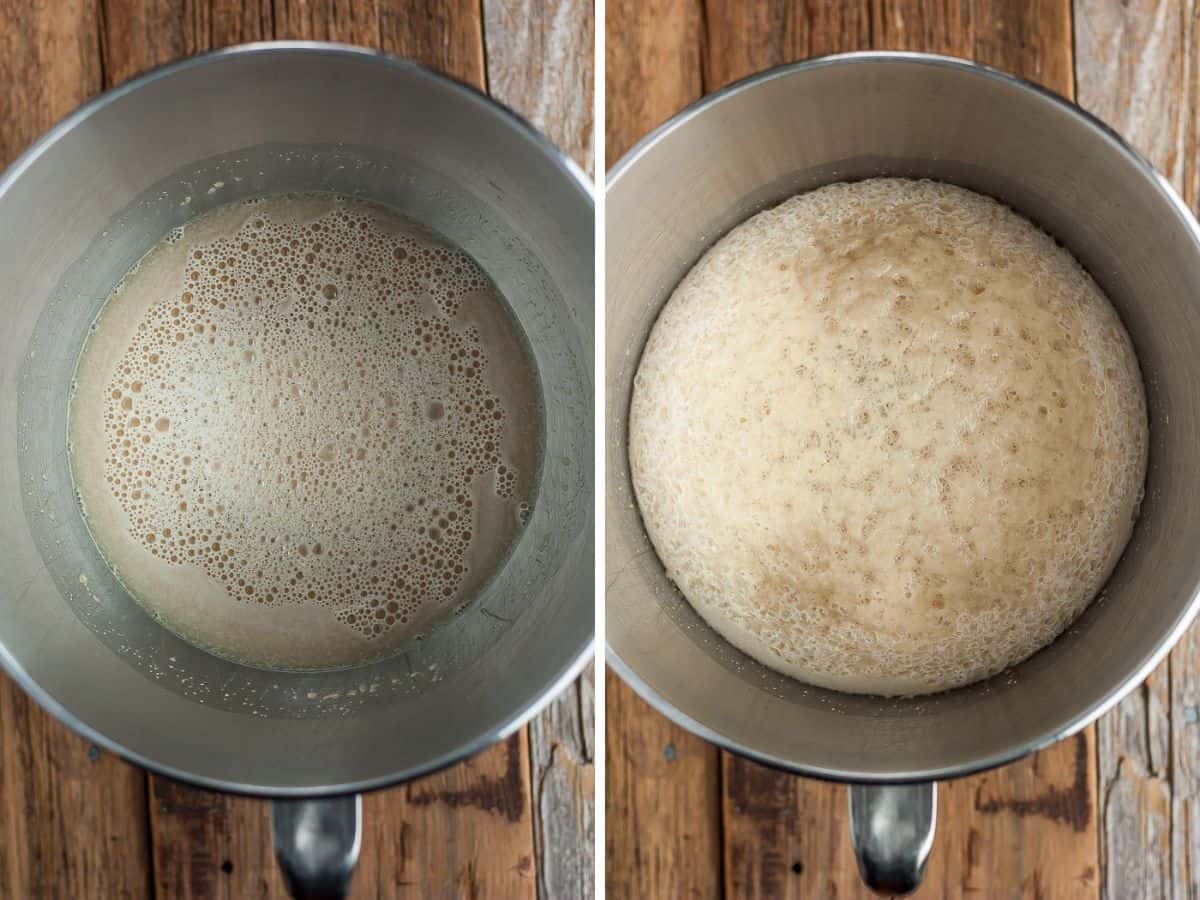
In the bowl of a stand mixer, combine the hot water and honey. Whisk to dissolve the honey. Add the yeast, and stir to combine.
Allow the bowl to sit, while the yeast proofs/activates. This can take 20-30 minutes, depending on the temperature of your kitchen. The yeast is proofed when everything looks foamy and has doubled or tripled in size.
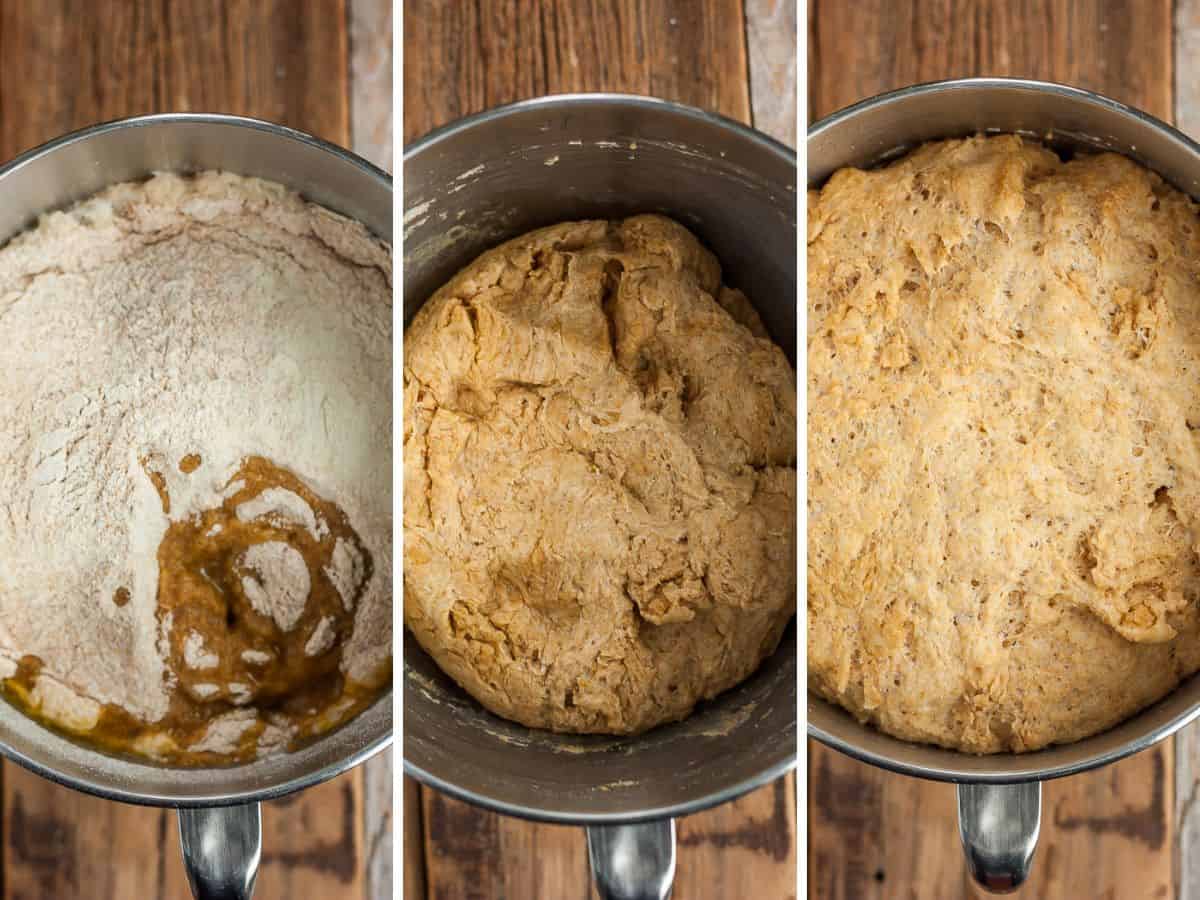
Add the salt, olive oil, vital wheat gluten, and whole wheat flour to the proofed yeast.
Using the bread hook on your mixer, mix the dough at speed “2” until it clings to the hook and almost all the dough is off the sides of the bowl. If the dough seems “shaggy” or is still sticking to the bowl, slowly add more whole wheat flour 1 tbsp at a time.
Gather the kneaded dough into a ball. Add a drizzle of olive oil to the mixer bowl and turn the dough to coat with the oil.
Cover the bowl with a clean wet kitchen towel, and set aside until the dough has doubled in size (about ~1 hour). Rising time will depend on the temp in your house. (See cold house notes in FAQ below)
Once the dough has doubled in size, mix the dough again using the bread hook at speed “2” for about 30 seconds.
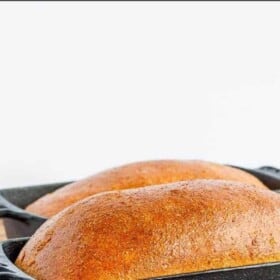
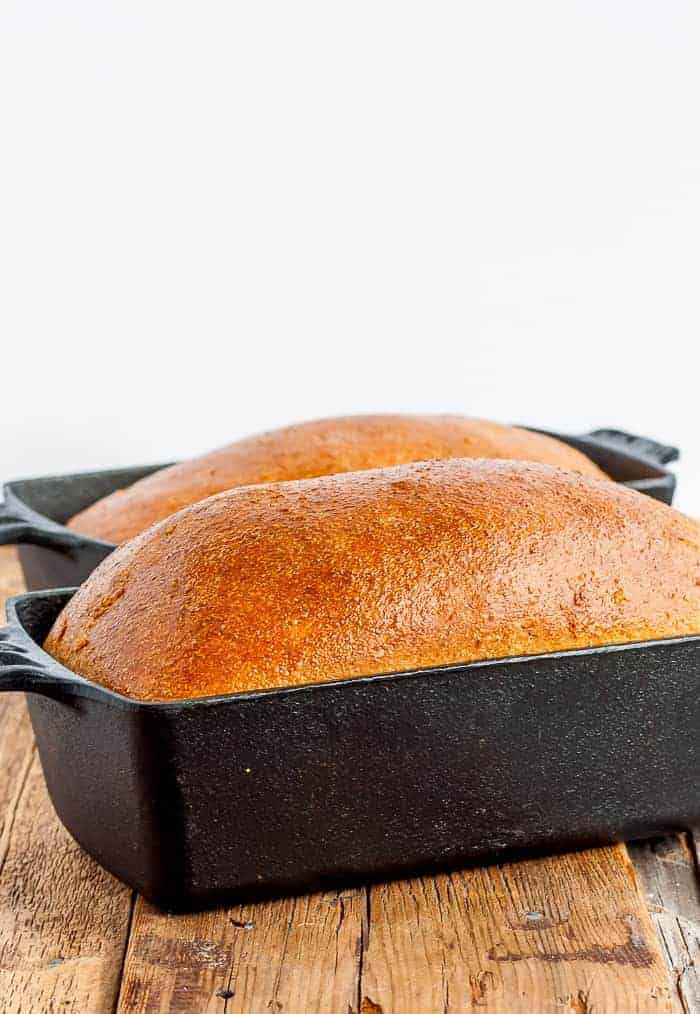
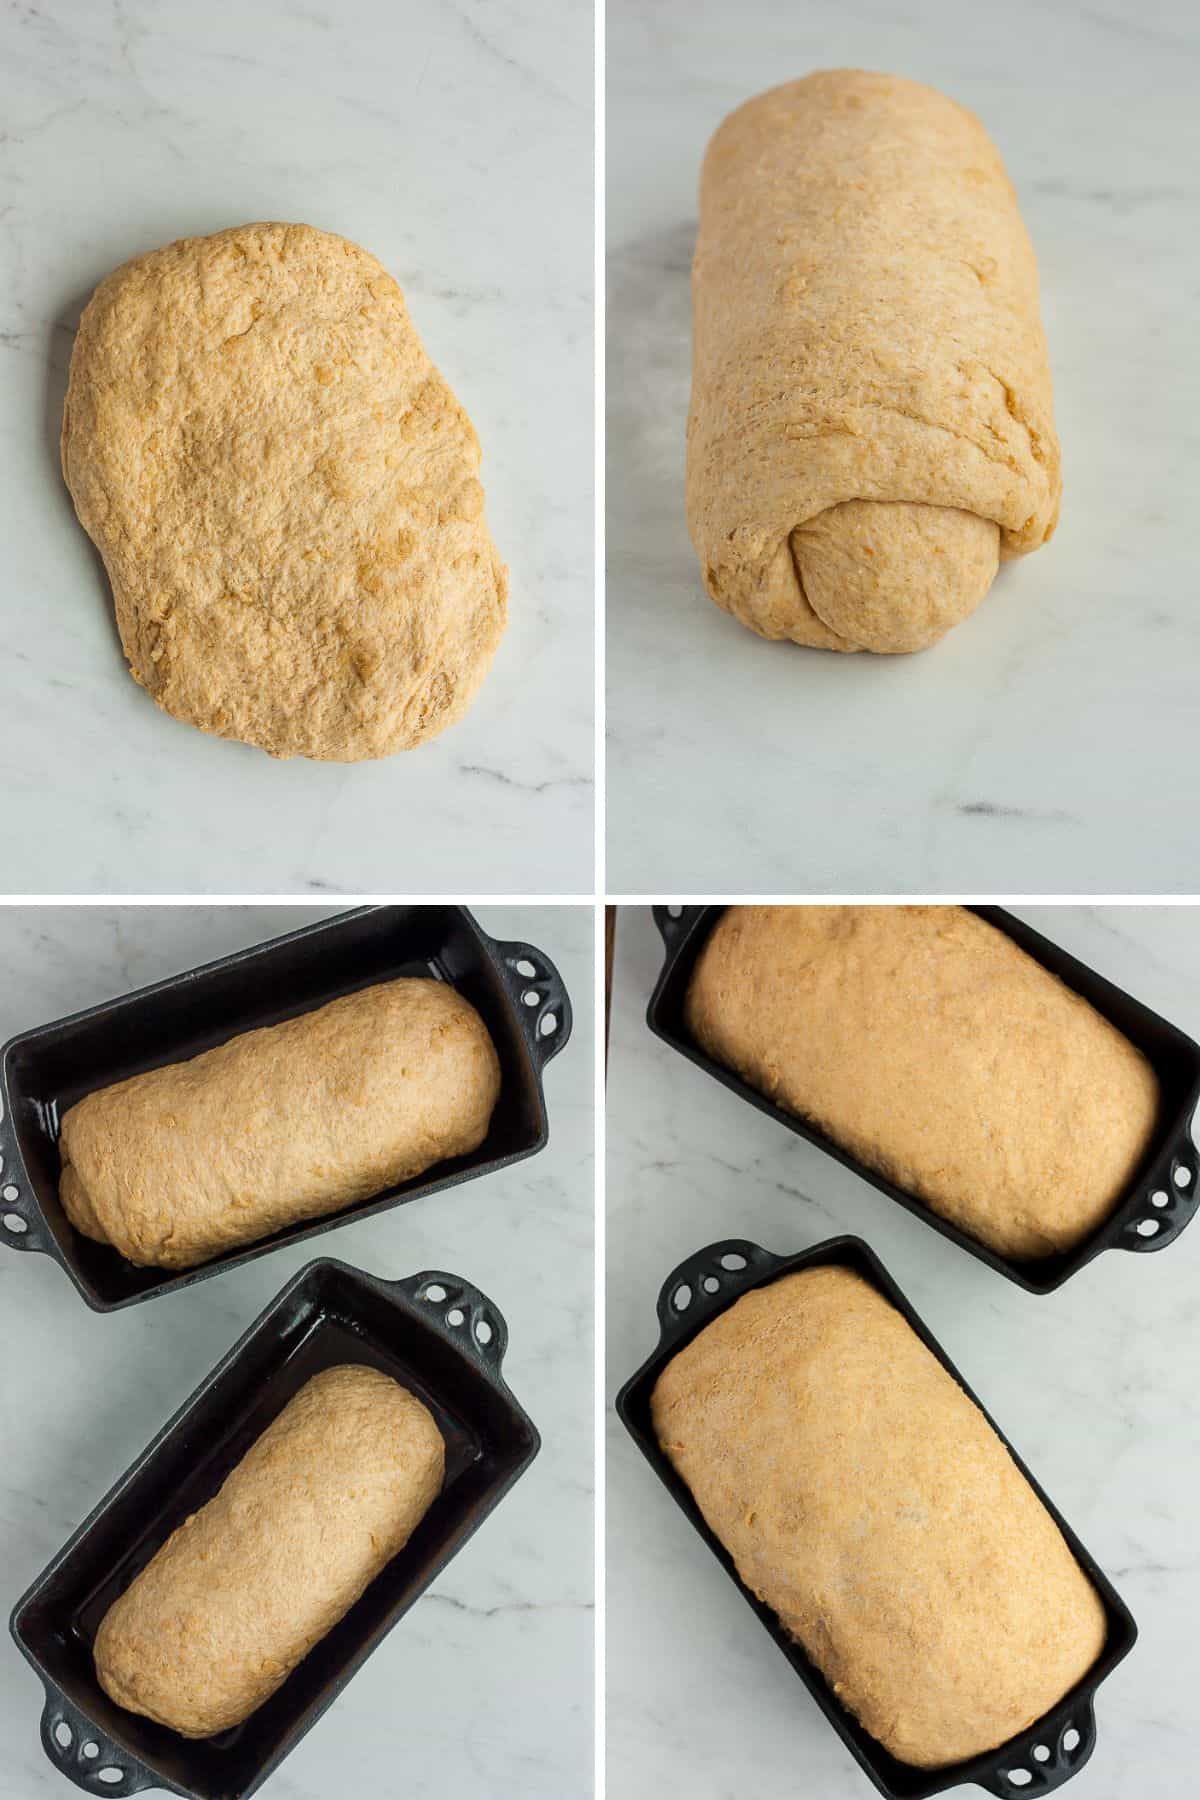
Grease two 9×5 bread pans, paying special attention to the corners of the pan.
Remove the dough from the mixing bowl, and break it into two equal portions. Flatten out each portion. Like you’re rolling a sleeping bag, take the long side of the dough and roll it up, tucking the short edges underneath to fit the length of the bread pan.
Let the dough rise in the pans until doubled in size. Rise time will depend on the temp of your house.
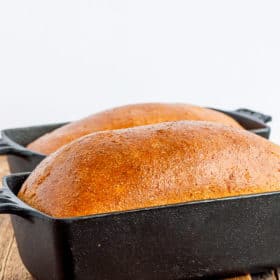
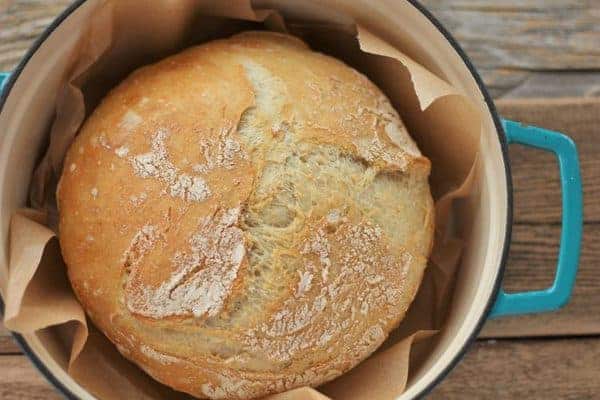
Preheat your oven to 350˚F. Bake both loaves together for 30-35 minutes, or until the loaf makes a hollow sound if you “thump” the top of it.
Remove the pans from the oven and let them cool in the pans on a wire rack for about 10 minutes. Then, remove the loaf from the pan and allow to fully cool on the baking rack.
How to Store Homemade Bread
Storing Bread: Homemade bread will keep in an air-tight container at room temperature for five days. If you live in hot climates, you can store it in the fridge for up to eight days.
Depending on the size of your loaves, you can store them in gallon-size plastic zipper bags, or old repurposed bread bags.
Freezing Bread: We wrap each loaf in foil and then put them in jumbo freezer bags. You can fit two loaves per bag. To thaw, keep in foil, and leave at room temperature for a few hours.
Pro Tips/Recipe Notes
- Sub in 1/3 cup of sugar if you don’t have access to or don’t consume honey because you follow a vegan diet.
- If you want to create a basic white bread recipe, replace the whole wheat with all-purpose or bread flour and leave out the vital wheat gluten. All measurements remain the same.
- I prefer metal, ceramic, or cast iron bread pans to glass. I find the glass prevents the bottom and sides of the bread from crisping up during baking.
 and can save you so much money at the grocery store!")
Homemade Honey Wheat Bread
Equipment
Ingredients
- 2 cups hot water {~110˚F}
- 1/3 cup honey
- 1 tbsp + 2 tsp active dry yeast
- 6 cups whole wheat flour
- 6 tbsp vital wheat gluten
- 1/3 cup olive oil {+1 tsp for coating the bowl)
- 1 tsp sea salt
Instructions
- In the bowl of your stand mixer, combine the hot water and 1/3 cup honey. Stir to dissolve the honey. Add the yeast, and stir to combine.2 cups hot water, 1/3 cup honey, 1 tbsp + 2 tsp active dry yeast
- Set aside for about 30 minutes, or until the yeast has activated and more than tripled in size.
- Add the whole wheat flour, vital wheat gluten, olive oil, and salt to the proofed yeast.1 tsp sea salt, 1/3 cup olive oil, 6 cups whole wheat flour, 6 tbsp vital wheat gluten
- Using the bread hook on your mixer, mix the dough at speed "2" until it clings to the hook and almost all the dough is off the sides of the bowl. If the dough seems "shaggy" or is still sticking to the bowl, slowly add more whole wheat flour 1 tbsp at a time.
- Gather the kneaded dough into a ball. Add a drizzle of olive oil to the mixer bowl and turn the dough to coat with the oil.
- Cover the bowl with a clean wet kitchen towel, and set aside until the dough has doubled in size (about ~1 hour). Rising time will depend on the temp in your house. (See cold house notes in post above)
- Once the dough has doubled in size, punch it down, and then mix the dough again using the bread hook at speed "2" for about 30 seconds.
- Grease two 9×5 bread pans, paying special attention to the corners of the pan.
- Remove the dough from the mixing bowl, and break it in two equal pieces. Flatten out each portion.
- Take the long side of the dough and roll it up, like you're rolling a sleeping bag, tucking the short edges underneath to fit the length of the bread pan.
- Let the dough rise in the pans until doubled in size. Rise time will depend on the temp of your house. (See cold house notes in post above)
- Preheat your oven to 350˚F. Bake both loaves at the same time for 30-35 minutes, or until the loaf makes a hollow sound if you "thump" the top of it.
- Remove the pans from the oven and let them cool in the pans on a wire rack for about 10 minutes. Then, remove the loaf from the pan and allow to fully cool on the baking rack.
Notes
- If you don’t have a stand mixer, you can mix the dough by hand. Add the flour 1 cup at a time, and knead until the dough is easy to work with and pliable.
- Sub in 1/3 cup of sugar if you don’t have access to or don’t consume honey.
- If you want to create a basic white bread recipe, replace with all-purpose or bread flour and leave out the vital wheat gluten. All measurements remain the same.
Nutrition
Nutrition information is automatically calculated, so should only be used as an approximation.


Such a great bread recipe that is SO MUCH EASIER than our family recipe. I used it to make my delicious wheat bread toast each morning (with a little pb and honey-so good!) and to make small rolls last week. DELICIOUS every time!
I’m so glad you’ve discovered all the versatility of this recipe. Next up: hamburger buns! 🙂
Can I dump the ingredients in a bread maker on the dough setting, then bake in the oven? Thinking it would this recipe cut in half for one loaf? Thanks!
Mary, I have not tried this because I don’t have a bread machine and am not really familiar with them. If you try it, please report back and let me know how it went and I can add details to the notes.
OK I tried it twice with the bread maker and it worked perfectly both times! I ground my own wheat—hard red winter berries, used the vital wheat gluten (thank you for the game-changing tip) and followed the recipe, just cut in half.
For the bread maker, I used the dough setting which took 1 1/2 hours and then I baked the loaf in the oven, following the recipe.
Thank you, Sarah!
Yahoo, so glad it worked! Thanks for the details; I have added your notes to the post!
And yes, vital wheat gluten is the best! Try it in pancakes, muffins, and any other whole wheat baked goods.
Thank you for this. I have a successful first run????????????
I’m so glad!!! Freshly baked bread might just be the most amazing smell in the world.
Ok, sooo the dough is 15 minutes into its rise. The dough took no time to come together in the KitchenAid on 2 as instructed. Maybe a few minutes. Is that right?? I’m paranoid because I’m used to bread making being a little more laborious. I mean I trust you because I’ve been following your blog like a creeper for years and you’re like a hardcore kitchen lady, but I’m dubious of my own yeast bread skills. Fingers crossed. Eek!
Haha at the creeper! Yep, a few minutes sounds just about right to me.
Can’t wait to hear how it turns out. 🙂
They turned out great! Don’t think I can post a pic, but really lovely and suspiciously easy. I was like, it can’t be THIS easy. And then it was. Also, I did an experiment w one glass pan and one of your coolio cast iron pans I bought, and dude. The cast iron is FAR superior. Amazing release and perfectly perfect loaf. So double thank you for an easy recipe and the loaf pan rec. game changers. I wanted to ask, can I increase the salt content slightly (maybe 1/2 t?) without affecting the bread chemistry? I do love just a bit more salt in my bread.
Cast iron for the win! You can email me a pic at [email protected]. I’d love to see it!
Yep, you can totally increase the salt without it being an issue.
I’ve been making basically this recipe except I use 1/3 cup honey with the yeast mixture then another 1/3 cup honey when i mixed in the flour. I use 5 cups bread flour and 3 cups whole wheat flour. This makes 3 loaves. It is honestly delicious.
Do you make it in a stand mixer? I find 6-7 cups of flour seems to be the max my Kitchen Aid can handle.
How much would this suffer without the vital wheat gluten? I’ve been making whole wheat no-knead bread, and I don’t especially *need* sandwich bread at the moment, but I am trying to get a little more adept at baking since it’s so much more precise than just throwing together things that taste good with each other. I’m not planning to grocery shop again until I really have to, so maybe I just need to wait until then when I can get some of it from the bulk section.
It will definitely be denser, but the flavor will still be great without it. You likely won’t get tall loaves but if you’re ok with that, the taste will be fine.
Thank you! Perhaps after I finish the loaf I’m baking today I can give this a go 🙂
FYI – I made it without the wheat gluten (I didn’t have any). I used 2 whole eggs instead and it worked beautifully. You’ll need to adjust/increase the flour as the eggs add moisture (I added flour but didn’t measure… just kinda eyeballed it until the dough was the right texture… sorry!), but it works in a pinch. My family DEVOURED this and I’m making another batch today.
If you make again today, try to measure the extra flour! I’d love to know how much you had to use.
I have been trying to find a good sandwich bread bread and this one may just fit the bill!
Just got a grinding attachment for my Kitchen Aid and am excited to get started. Do you use the hard white berries for your bread in this recipe for whole wheat sandwich bread?
Could I use this recipe in my bread machine?
I’m sure you could, but honestly I don’t know how bread machines work. I’m not sure what order you’d put things in, etc.
Always on the lookout for good bread recipes. Thanks for sharing! And I will be trying those bread bags. Perfect!
Sarah, I found the pans in a clearance section of a chef’s outlet in Michigan City, IN. (Wouldn’t it be great if there was a cast iron outlet!)
YUM ! 🙂
I feel ‘sarah-esque’ because I just scored two of those cast iron lodge bread pans at an outlet for 6.98 each! I had been making all my bread recipes in one of my dutch ovens (it makes everything better, I just inherited my dear MIL’s oval dutchie…call it the magic pot). So, it’s been 90 degrees for two weeks and I’ll be making lots of bread!
Jack is getting HUGE! I found you last year and went through all the prev. posts so I feel like I watched him grow up!
Hold the phone…Lodge has an outlet? OMG, where are you? Stay right there, I’m on my way. I think I would spend all my grocery budget on cast iron if given the chance!
How much do you love your dutchie? So amazing, right?
Jack is huge and has an attitude to match! Sigh. Four year olds.
If I remember correctly there is a Lodge cast iron store in the Sevierville/Pigeon Forge/Gatlinburg area of Tennessee right next to Smoky Mountain Knife works. I don’t know if it’s an outlet or just a store but if you’re ever on this half of the continent it may be worth checking out!
We go through some bread at our house!!! PB toast in the morning x3 and then sandwiches x2 for lunches. It seems like I buy 4 loaves of bread every time I go to the store. I only buy the 100% whole wheat so by the time it is done it can get pricey. And no I don’t eat any of this bread. Hubby and 2 girls eat it like it is going out of style. I
I have made my own bread in the past and they like it but they only like it fresh out of the oven and don’t like it for sandwiches.. because it falls apart. Or hubby doesn’t have time to slice it for sandwiches in the morning.
I need to make homemade as easy as store bought for my hubby and girls to use and eat. Which means it needs to be sliced and ready to go and not fall apart.
After your loaves have cooled do you slice them all before you store/freeze them?
Do you use one of those slicing dealies so you don’t have super huge slices?
What do you do about cooking in the summer? I normally don’t use my oven in the summer because don’t want to heat up my house that I am paying to cool down 🙁
I just want to try baking my own again so I don’t have to buy…
I have tons of old bread sacks so I was going to use them to store the bread in.
I do not slice it before freezing as we find it just easy enough to slice it as we need it. But, if you wanted to slice it before freezing, make sure it is 100% cooled before you do so.
We have a bread knife that came with our knife set that we got for our wedding 9 years ago. It’s this one and works fabulous: https://www.amazon.com/gp/product/B00004RFNI?ie=UTF8&camp=1789&creativeASIN=B00004RFNI&linkCode=xm2&tag=thisb02-20
Oh, and I try to time my baking for cooler days. We don’t have AC, and currently my house is 85 degrees. If I have to bake when it’s hot, I try to do so either first thing morning, or late at time.
Beautiful pictures of a beautiful boy! (Even if he is a less than willing model!)
Aw, thank you!
I’ve used so many of your recipes, and they always turn out great! So far, my favorite is the hamburger buns! I haven’t quite been successful with baking bread with my whole wheat flour yet… and so far one of the biggest problems I run into is… cutting it without making it look like a horror movie. Can you give some tips? Thanks!
We have a bread knife that came with our knife set that we got for our wedding. I’m pretty sure this is the same knife:
https://www.amazon.com/gp/product/B00004RFNI?ie=UTF8&camp=1789&creativeASIN=B00004RFNI&linkCode=xm2&tag=thisb02-20
Even 9 years later, it still cuts through the bread like butter!
I would like to second the question on cutting it!
Question: Does “Quick like a bunny rabbit, flip the loaf over on the rack so that the top doesn’t cave in. Allow to cool completely before storing.” Mean flip it out and cool as is, upside down or turn it right side up?
So the part of the bread in the pan, let’s call that the butt. The part of the bread that rises from the top, let’s call that the head.
You’d dump the loaf on to a cooling rack “head” down and then flip it over so that it cools on its butt.
Clear as mud?
Shut the front door! 30 min for yeast & roll up like a cinnamon roll! No wonder my bread turns out dense & kind of flat. Can’t wait to try these tips
Girlfriend, how long do you let your sponge rise? Your bread is not dense!
Wait, did you mean to say every 2-3 WEEKS? If not, how do you make 8 loaves of bread stretch for 3 months? Do you just not eat a lot of bread?
That looks delicious, by the way. One of my absolute favorite “toys” is my bread machine. When I first got it (about 15 years ago) I was making a loaf every day. Oy! I had to eventually put the kibosh on that. My bread machine also churns butter, so we were REALLY in trouble! hahaha!
We used to eat a TON of bread until we went on the GF fast last July. After that, we slowed down our consumption. Also, we used to make Jack lunch to take to my aunt and uncle’s house, but now they provide that which means I’m not making a PB&J on the daily!
Makes bread AND butter? Lord have mercy!
Oh yum. Look at all of those beautiful loaves! And the beautiful kid too! How do you keep them? Do you freeze them? Plastic/zip lock bag it?
A combo of the two (from the post):
Allow to cool completely before storing. We always store the loaf we’re currently eating in a bread bag (yes these things really do work). The others get wrapped in foil and then stored in a 1.5 gallon Ziploc.
We can get 2 loaves in a 1.5 gallon bag.