As an Amazon Associate, I earn from qualifying purchases.

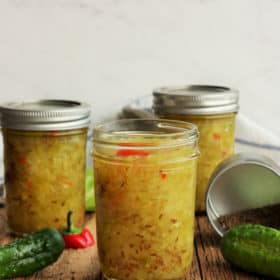
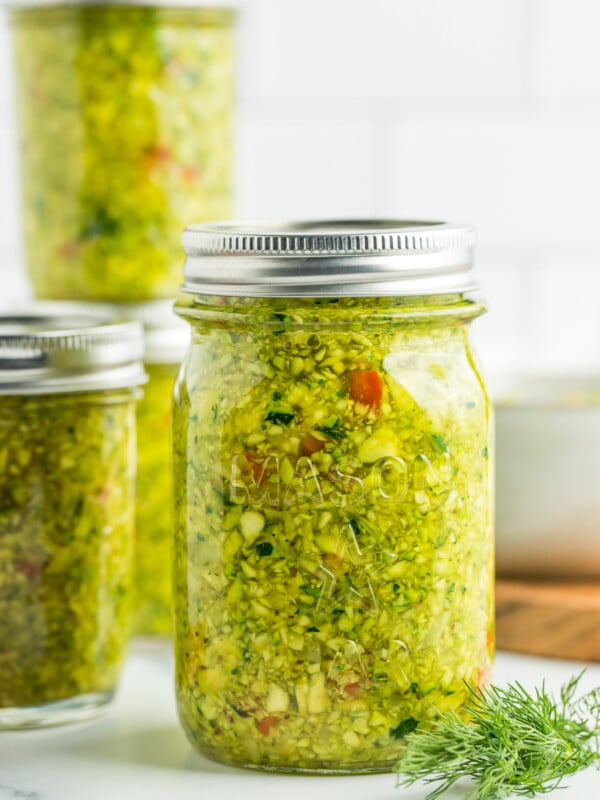
A simple and easy recipe for canning homemade Dill Pickle Relish. This tangy dill relish recipe is perfect for anyone new to canning. Enjoy it on burgers, hot dogs, in potato or chicken salad.

This dill pickle relish is tangy, packed with flavor, and tastes amazing on burgers, hot dogs, and in potato salad.
It’s also an important ingredient in our homemade tartar sauce and sweet potato fries dipping sauce.
Looking for a relish recipe that uses zucchini? Check out our Zucchini Relish recipe and Pickled Zucchini.
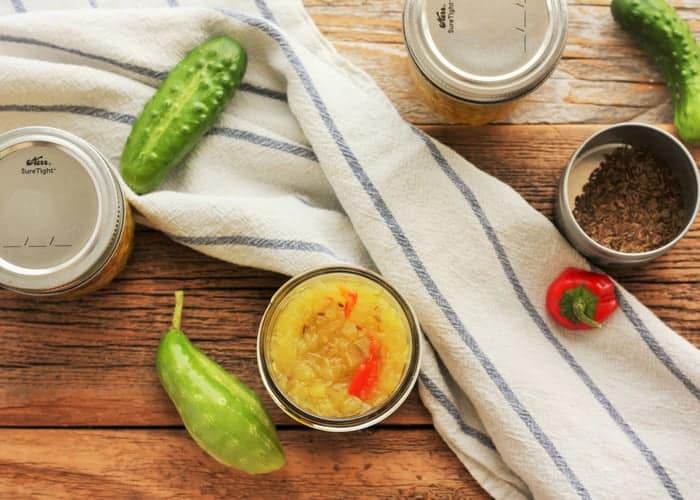
Dill Relish Ingredients

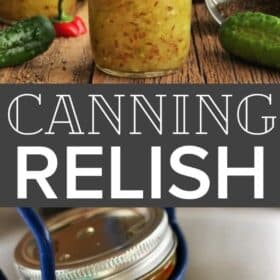
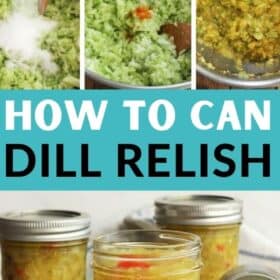
How To Make and Can Dill Relish
I’ll walk you through the process here in photos because it really helps, especially if you’re new to canning. At the bottom of the post, you’ll also find a printable and detailed recipe card.
Wash the cucumbers using a vegetable scrub brush. Cut the ends off and slice them into 8 sections. Cut the seeds out of each section. Cut into 1-2 inch chunks.
In a food processor, pulse (use “pulse” instead of “on”, or else you’ll end up with cucumber sauce) the cucumber chunks in batches until the pieces look “relishy”.

Put the cucumber pieces in a large bowl, sprinkle with canning salt and turmeric, and then pour the water over it. Cover, and let stand at room temperature for 2 hours.

After 2 hours, put the cucumbers in a colander or fine mesh strainer, and rinse thoroughly. Let drain and squeeze the cucumbers to release excess water.
In your food processor, chop the onion and pepper, or dice by hand. Add to a heavy-bottomed saucepan.
Add the cucumbers, sugar, and dill seed to the saucepan with the onions and peppers. Pour both kinds of vinegar over everything, and bring to a boil (this will create a liquid called brine).
Reduce the heat, and simmer for 10 minutes, stirring occasionally. Pro tip: It’s a good idea to start your water in the canner at this point.

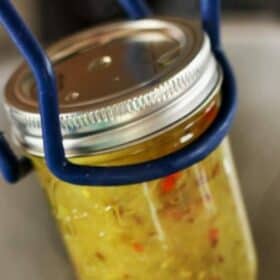
Ladle the hot relish into your jars. Top with the hot brine (excess liquid from the pot). Leave 1/4 inch of headspace (the amount of space between the top of the food in the jar and the top of the jar).

Wipe the rim with a clean damp towel, and place your sanitized lid on top. Secure the ring.

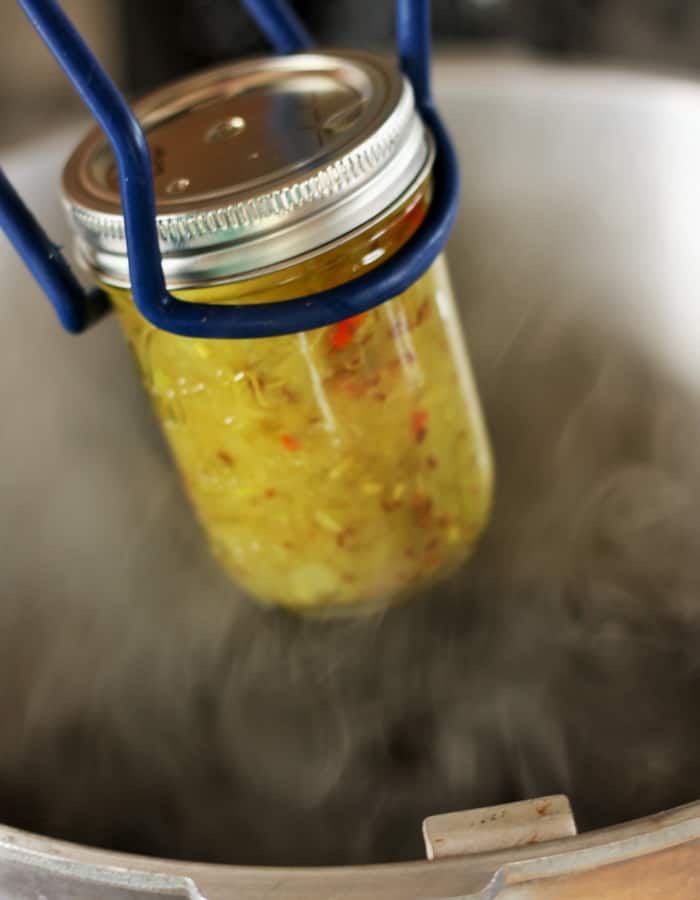
Place the jars in the water bath canner, and put the lid on. Processing times will vary based on altitude. See the chart below.
Processing Times for Dill Pickle Relish
| Processing Times for Dill Pickle Relish | ||||
| Processing Times at Altitudes of | ||||
| Style of Pack | Jar Size | 0-1,000 ft | 1,001-6,000 ft | 6,000 ft and above |
| Hot | half-pint or pint | 10 min | 15 min | 20 min |
| *Source: National Center For Home Food Preservation | ||||
Remove the canner from the burner when the processing time is up. Let everything sit for 5 minutes, then use a jar lifter and remove the jars from the canner. Place the jars on a thick towel. Let the jars cool completely (at least 12 hours), check the seal, and store for up to one year in a cool dark location.
Dill Relish Variations
Dill seed can be hard to find in normal grocery stores. I have to buy it online (I use this brand).
But, if you would prefer to use fresh dill for this recipe, substitute the dried dill seed with 8 heads of fresh dill.
You can use zucchini instead of cucumbers to make zucchini relish if you’re knee-deep in zukes right now. Processing time remains the same.
Sweet relish – it depends on how sweet you prefer your relish, but you can add 3-4 cups of sugar per 8, 8 oz jars. I recommend that you start with a minimum amount and add additional sugar in 1/2 cup increments until it has reached your perfect sweetness.
Spiced/hot dog relish – Include 1 cinnamon stick, 1 cup of brown sugar, and 1 tsp of cloves in the saucepan while simmering the base recipe.
Storage for Homemade Relish
Once the jars have sealed, remove the rings. Label and store sealed jars in a cool (best results are 50-70˚F) dark place for up to 12 months.
If you have the space available, do not stack the jars on top of each other more than two jars high.
Dill Pickle Relish Pro Tips/Recipe Notes:
- Leave the bowl of cucumbers, salt, turmeric, and water at room temperature during the brining process. This time is important for drawing out extra moisture from the cucumbers. Cold temps will slow that process.
- It is important to use pickling/canning salt in this recipe as regular salt has anti-caking agents which can impact the appearance of your relish.
- To give the flavors a chance to meld, wait one week after canning before opening.
- Upon opening, store the jar in the fridge for up to four weeks.
- If you don’t have enough jars to fill the canner, consider Canning Water in a few jars to stock your emergency drinking water supplies.
Dill Pickle Relish
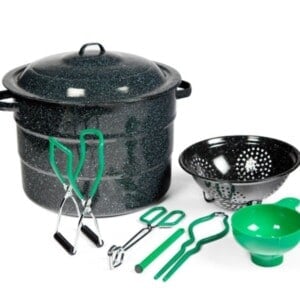
Equipment
Ingredients
- 9 pounds pickling cucumbers {to yield ~7-8 cups of chopped cucumber}
- 1/2 cup pickling salt
- 2 tsp turmeric
- 4 cups water
- 3 cups white vinegar
- 1 cup apple cider vinegar
- 1.5 cups diced white onion
- 1 tbsp sugar
- 2 tbsp dill seed
- 1/4 cup red pepper, chopped {fresh}
Instructions
Making Dill Relish
- Wash cucumbers using a vegetable scrub brush.9 pounds pickling cucumbers
- Cut the ends of the cucumber off, slice into 8 sections.
- Cut the seeds out of each section, and then cut the sections into 1-2 inch chunks.
- In a food processor, pulse the cucumber chunks in batches. No food processor: grate or finely chop the cucumbers.
- Put the chopped cucumber in a large bowl, sprinkle it with salt and turmeric, and then pour the water over it. Cover, and let stand at room temperature for 2 hours.1/2 cup pickling salt, 2 tsp turmeric, 4 cups water
- After 2 hours, put the chopped cucumber in a colander, and rinse thoroughly.
- Let drain and squeeze the cucumbers to release excess water
- In a food processor, dice the onion and pepper (or dice by hand). Add to a heavy-bottomed saucepan.1.5 cups diced white onion, 1/4 cup red pepper, chopped
- Add the chopped cucumber, sugar, and dill seed to the saucepan with the onion/peppers.1 tbsp sugar, 2 tbsp dill seed
- Pour both vinegars over everything, and bring to a boil for 1 minute.3 cups white vinegar, 1 cup apple cider vinegar
- Reduce the heat, and simmer for 10 minutes, stirring occasionally.
Canning Dill Relish
- Prepare water bath canner by filling it with water, so that there will be at least 1 inch of water over the tops of the jars.
- Wash and clean your jars. Fill with hot water or keep them warm in a clean dishwasher or oven.
- Wash your lids and set aside in clean place.
- Place a lid on the canner and set it on the stove with the burner set to high.
- Ladle the hot relish into your jars. Top with the hot brine (excess liquid from the saucepan). Leave 1/4 inch of headspace (the amount of space between the top of the food in the jar and the top of the jar).
- Using a wet clean rag, wipe the rim to make sure there isn't any residue on the jars.
- Place a clean lid on the jar and then a ring. Tighten the ring to fingertip tight.
- Using canning tongs, add jars to the boiling water, and put the canner lid on. Pro tip: you must have at least 1 inch of water over the tops of the jars for safe canning.
- Process pints and half-pints based on the elevation guide below:*0-1,000 ft = 10 minutes*1,001-6,000 ft = 15 minutes*6,000 ft+ = 20 minutes
- Remove the canner from heat, and let sit for 5 minutes.
- Remove the jars using canning tongs and place them on towels on the counter undisturbed for 12-24 hours.
- After everything has cooled, check the seal by pushing down on the middle of the lid. If it doesn't give way, it's sealed. If the lid bows a little bit, put that in the fridge and use it within 3 weeks.
- Wait one week after canning before enjoying the relish. It will give the flavors time to meld.
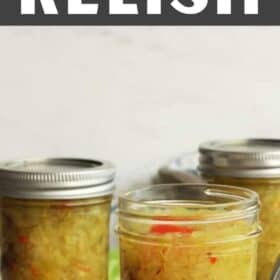
- Label the sealed jars, and store in a cool dark place for up to a year.
Notes
- Turmeric is mainly used for color and a bit of flavor. It is optional to add.
- Makes about 7 pints or 14 half-pints.
- If you would prefer to use fresh dill for this recipe, substitute the dill seed with 8 heads of fresh dill. Add them to the jars before ladling in the hot relish.
- Upon opening, store the jar in the fridge for up to four weeks.
Nutrition
Nutrition information is automatically calculated, so should only be used as an approximation.

Get my Canning e-book!
It’s 51 pages of every helpful tip and trick you could want as a brand new canner, AND it includes 13 ad-free canning recipes that are designed to take you from novice to pro.


I was sharing my squash relish recipe and in return they sent me your dill pickle relish.now as much as I love dill pickles and I can a lot along with squash and zucchini relish.I’m always leaning that my grandmother’s squash relish recipe that my friends and family truly love it is just a little on the sweet side!still awesome but I’m more of dill!so I’m going to give this a try except I think I’ll cut it down to less than 5lbs of cukes not that I don’t have abundance of them but I might be the only one eating it!i’ve already canned right at 75 Jars of pickles and 35 jars of squash relish and squash and zucchini relish and most gets consumed in less than a year and of course I share it with friends and family..so I’ll get back on how it turns out when I get the measurements to 4lbs
This recipe is great! I’m making it for the second time & curious about two things:
How long will a jar of this last in the fridge after opening? (I’m new to canning)
If I use 4 oz jars, do I keep the boiling time to 15 minutes? (I like to have just enough for dill dip sometimes)
Thank you! : )
So glad you are enjoying it, Hollie!
There is a note in the recipe card about how long it lasts: “Upon opening, store the jar in the fridge for up to four weeks.”
4 oz jars would process at the minimum time for an 8 oz jar depending on your elevation. Step 9 of the recipe card has the processing times listed by elevation. This part of the recipe was recently updated, so if you happen to have an old printed copy, please refer to the new online version.
Thanks! Apologies for overlooking the info about how long they keep after opening.
I did some 8oz & some 4oz jars. So looking forward to using it! : )
Relish rules! Enjoy! 🙂
I have some canned sliced pickles from 2 years ago and they’re too soft for my liking. Can I turn them into relish or would they be too processed being canned twice?
I would not consider them safe if they were canned 24 months ago.
Hi, I’m new to your site. Ive never made relish before so I’m trying to find a good recipe. Yours sounds great, but I’ve seen on other dill relish recipes that they add the diced onion with the cucumbers when you let sit in the salt for two hours. Do you know why they would do this? Does it help keep the onion crisp as well? Also they add the turmeric in when cooking the brine. Doesn’t the turmeric just get washed away when you rinse the cucumbers after the salt soak, Or does it soak in? Thank you!
Hi Britney! The cucumber doesn’t really stay crisp in the relish-making process, so I can’t say why someone would add onion while salting the cucumbers. It could very well be.
The turmeric is more for color and a tiny bit of flavor. It would be more concentrated if you add it to the brine. If you’re a big turmeric fan, it would definitely work to make it part of the brine. I find it overwhelming unless added with the cucumbers.
Why onion? No commercial dill relish has onion – – – I’m so trying to recreate just dill relish – at least yours is not chock full of sugar too which I can’t understand why it is in dill pickle relish.
Personal preference/taste. You’re welcome to leave the onion out, but recreating commercially available foods has never been my goal. I know my nana’s dill relish always had onion in it. 😊
Please explain the red pepper. Have red bell, red chili, red sweet pepper
When you say red pepper,is it a hot pepper or what?.
Chef’s choice! Use what you prefer. Red chili will result in a spicy relish which I would love but maybe not all future guests who I serve this to would enjoy. I typically just use red bell.
I tried your recipe yesterday and I LOVE it! The taste it has ( I tried a spoonful or 2, lol) is THE BEST! But….. I would like a recipe for SWEET relish. I tried one from another site and it didn’t turn out so good. It only made 2 pints of actual relish and the rest was just “juice”. Can you convert the “Dill” recipe to “Sweet”? Thank you so much for sharing with us.
I’m so glad you enjoyed it, Ruby!
Truth time: I think sweet relish is super gross. I’m not a sweet and savory person so this is a “me” thing and not a knock on sweet relish. I checked online with Ball’s recipes and it would appear that sweet and dill relish recipes are similar for all the ingredients except no turmeric or dill + adding sugar. It appears that the sugar is almost 1/2 cup per pint which seems excessive.
I’d recommend taking my dill recipe, remove the dill and turmeric and start with 1 cup of sugar for the whole batch. And then add additional sugar 1/4 cup at a time, tasting as you go to see how you like it.
Thank you so much for your help. I’ll definitely try tweeking those ingredients. Thank for your efforts if researching the answer for me.
My pleasure! 🙂
I really enjoyed this recipe! I’m never happy with the texture of my home-canned dill pickles. This solves the texture problem and still lets me have the delicious taste of dill pickles on sandwiches and burgers. Thanks!
So glad you enjoyed it, Lindsey. And I totally feel you on the pickles; I have YET to find a recipe that gives me the texture I like. Instead, I make fridge pickles and those stay perfectly crispy.
Do you know if this recipe is gluten free?
It is
I made this and find it a bit bitter- how long do you leave it till trying?
Hi April, in the recipes notes I recommend: “wait one week after canning before opening to give the flavors a chance to meld.”
How long did you wait to try it?
If I use a Bigger jar do I still process for the same amount of time?
Bigger than a half-pint, like a pint? I would do 20 minutes.
Can I leave the tumeric out all together?
Yes if you’d like!
Did you mean seven and a half PINTS instead of seven half-pints? Because I just filled seven half-pint jars and there’s no end in sight to the amount of relish I need to can.
Hi Brian, no, it should make 7 half-pints or 7 8 oz (jelly) jars.
edit: sorry, no, you’re correct it is 7 pints. Sorry for the confusion. I have many canning recipes and confused this one with another.
I love (and totally agree) with your comment about sweet relish. It’s a waste of a perfectly good cucumber. And I appreciate that you can adjust the recipe for a specific quantity before printing. Going to try this out tomorrow!
It’s evil Jay, evil!!! 🙂
Thank you a bunch for sharing this with all people you really know
what you’re speaking about! Bookmarked.
Can you tell me how many cups of post-chopping zucchini I use for this recipe?
The recipe makes 7 pints, so between 7-8 cups of chopped cukes/zukes.
I want to try this recipe but use zucchini instead. How would I modify step 3 for this, since zucchini holds so much water already? Thanks for your help! I can’t wait to try this!
I would follow the same process. Cucumbers have a super-high water content as well. The soaking process is to infuse the cukes with the flavor. You’ll get the extra water out later in the recipe.
If you substitute fresh dill do you add it to the boiling brine or put it in the jars like pickles?
I would put it in with the cucumbers.
Can this recipe be halved safely since I have a little less than 8 lbs of cucumbers?
Absolutely! Down in the recipe card you’ll find a little slider that says “servings”. Move it around until it is halved and the recipe card will show you the amount of ingredients for a reduced batch.
The processing time will remain the same.
What if you don’t have turmeric? Will that affect how the recipe turns out?
It doesn’t impact the taste much. Turmeric gives it the yellowish color you find in storebought relish.