As an Amazon Associate, I earn from qualifying purchases.
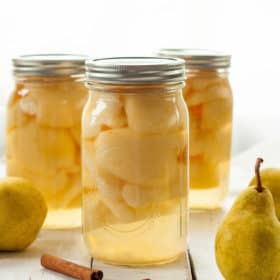
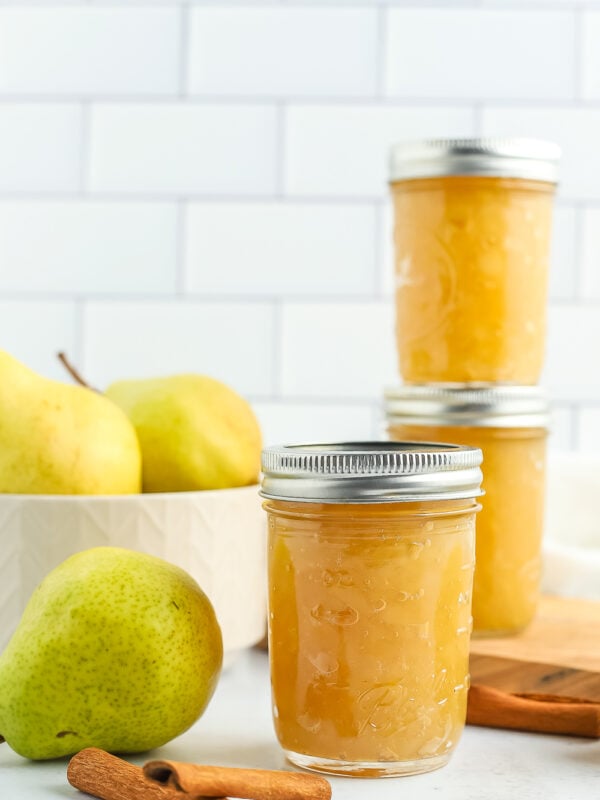
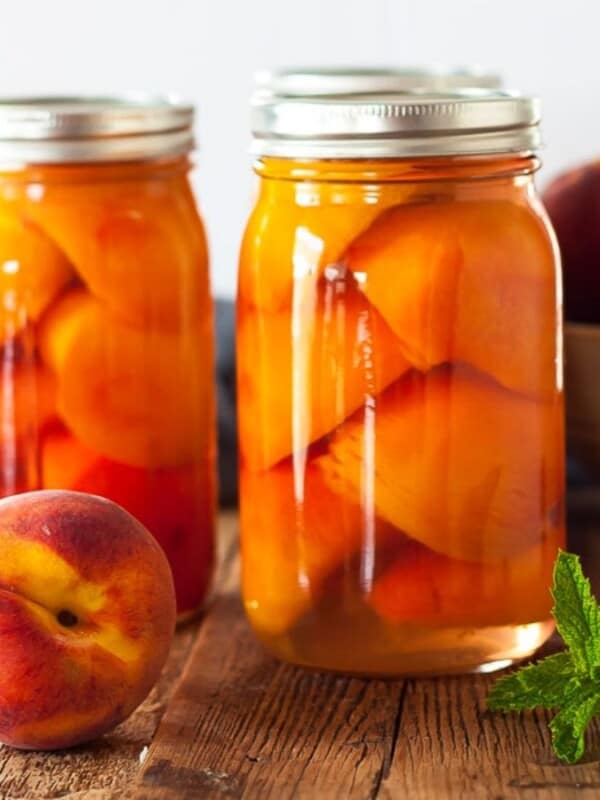
An easy step-by-step tutorial on Canning Pears. This easy recipe for preserved pears is perfect for newbies and experienced canners alike. Instructions include low-sugar and no-sugar options.

Of all the things I can, pears get eaten the fastest.
There are a thousand reasons to can, but nothing is more rewarding after all that hard work than opening a jar of “fresh” fruit on a cold and snowy January evening.
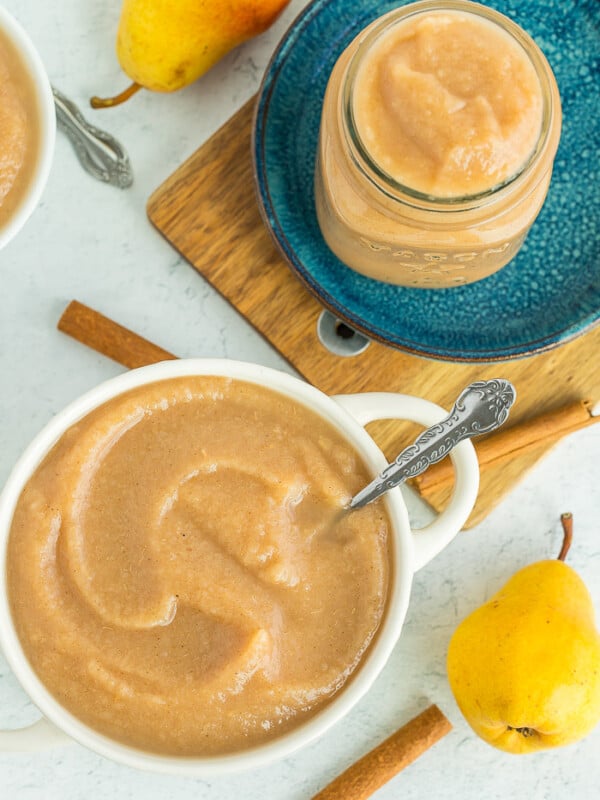
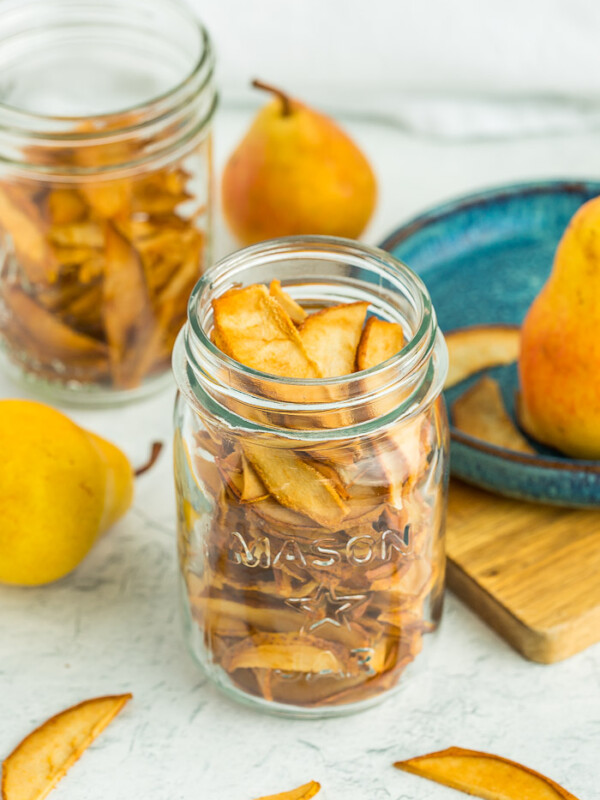
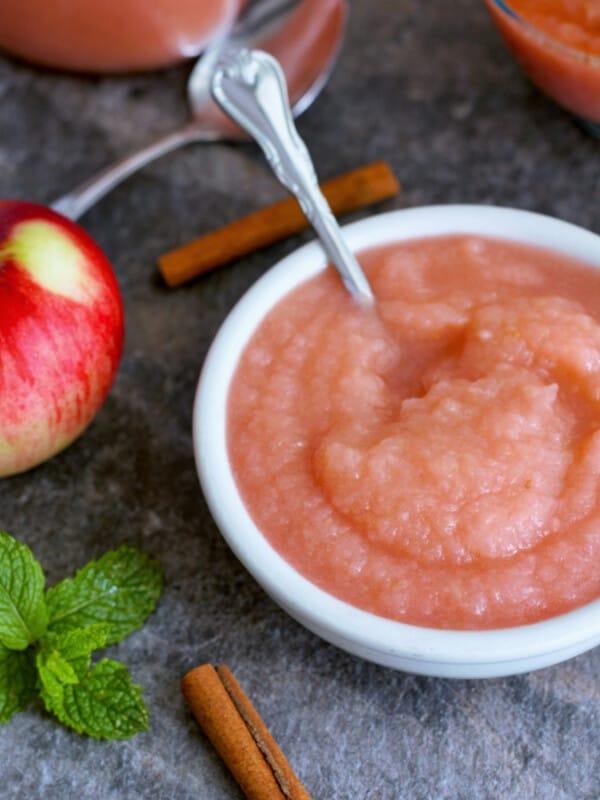
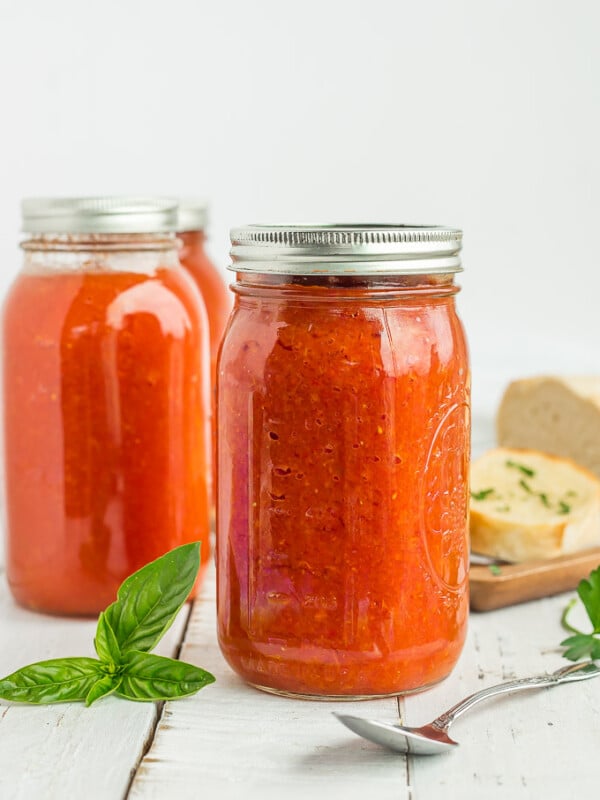
If you love the idea of home-preserved fruit sitting on your shelves, check out these posts on drying pears, canning peaches, canning applesauce, and canning apple pie filling.
What Is The Best Pear For Canning?
It is generally agreed that Bartlett is the best for canning. At the end of the day, you can use any kind of ripe pear.
Asian pears are safe to can but require a separate process to acidify them prior to canning. This post from the National Center for Home Food Preservation has more details.
Can You Can Pears Without Sugar?
You sure can! Sure “can”. Get it? 🙂 Soooo much sugar is traditionally recommended for preserved pears and that is all the nopes from me.
That being said, sugar is used in canning for flavor, preservation, and color. Sweet food generally tastes better, keeps longer, and the color of the food stays bright and fresh.
Pears have enough natural sugar and don’t need any sweetener added while canning to be considered safe. If you leave out the sugar, your final product may look a bit different and have a shorter shelf life.
Personally, I walk the line between no sugar and low sugar for canning peaches and preserving pears. Please use your best judgment when altering any official canning recipe.
Syrups for Canning
| Syrups for Canning | ||||
| Type of Syrup | Sweetener | Amount of Sweetener | Water | Yield |
| Very light | Sugar | 1 cup | 6 cups | 5 3/4 cups |
| Light | Sugar | 2 1/4 cups | 5 1/4 cups | 6 1/2 cups |
| Medium | Sugar | 3 1/4 cups | 5 cups | 7 cups |
| Heavy | Sugar | 4 cups | 5 cups | 7 cups |
| Honey | Honey | 1 cup | 4 cups | 4 1/4 cups |
| Juice | Apple or white juice concentrate | 1 1/2 cups | 4 1/2 cups | 6 cups |
| *Source: National Center For Home Food Preservation | ||||
RAW PACK FOR CANNING PEars
Raw packing pears simply means placing the peeled fruit in the jars without precooking them, filling the jars with syrup, and processing them in the canner.
If you are preserving pears without additional added sugar (ex: sugar, honey, fruit juice), you must hot pack them.
Raw packing pears is much faster than a hot packing process, but there are some drawbacks. No matter how well you pack the jars, the density of the fruit will change during their time in the canner.
This often leads to something called “fruit float” in which the fruit will float to the top of the jar, leaving all syrup on the bottom. You’ll find this when you’re canning whole tomatoes and canning apricots as well. There is nothing wrong with fruit float as long as your jars are still sealed.
As it is faster, I tend to do most of my canned fruit raw-packed.
HOT PACK FOR CANNING PEArS
Hot packing involves cooking the pears briefly in hot syrup before packing the fruit into jars for canning. You’ll want to boil them in the canning syrup for about 5 minutes and then add them to your jars, ladling the hot syrup over the top.
The appeal of hot packing are that you typically can fit more fruit per jar, and the near elimination of fruit float.
How to Can Pears Step by Step
*I’ll walk you through the process with photos and tips below. And a printable and detailed recipe card is available at the bottom of the post.
CANNING PREP
Prepare your water bath canner by filling it with water. You just need to have enough water to cover the jars by 1 inch once the water is boiling.
Set the canner on the stove. Turn the burner to high. Once it reaches a boil, reduce it to simmer. You want to keep the water hot so that everything is ready when the packed jars are.
Wash and sanitize your jars. You’ll want to keep them warm to avoid having them crack when placed in the canner. You can fill them with hot water, or place them on a tray in the oven at 170˚F.
Wash your lids and set them aside in a clean place. You no longer need to simmer lids in water to keep them sterile. Woot!
Prep the Fruit
To set up a work area, I use a big cutting board, a chef’s knife, a paring knife, a vegetable peeler, a big bowl of cold water with 1/3 cup of bottled lemon juice mixed in, a garbage bowl, a clean towel (for wiping hands), and a bowl/box full of clean fruit.

Cut the tops and bottoms off of the fruit. I like to do about 12 at a time so that I’m not switching back and forth between using knives and peelers with slimy pear hands. Dibs on “slimy pear hands” for a band name.
Using a vegetable peeler, peel off all the pear skins. I start from the top and make a straight peel downward. It takes a few times to learn how to efficiently peel a pear, but you’ll get there by at least the third or fourth pound!
After that, cut the fruit in half from the top to the bottom. Take the paring knife (they do make special corers, but a paring knife works great for me), and make a cut from the stem to the bottom on one side.
Repeat on the other side, then jiggle the core out. Discard the core, and put the halved fruit in the water with the lemon juice.

When you have a bowl that is getting full of ready fruit, start your syrup. In a large pot, mix 1 cup of sugar per 6 cups of water and heat over medium.

Back to the fruit! Finish up the pears that still need skinning.
(If you’re doing a hot pack) Once the syrup is boiling, add the fruit one layer at a time (a canning term that basically means don’t totally fill the pot) and heat for 5 minutes.
Using a fork, grab the cooked pears one at a time, and put them cavity-side down in the canning jar. After a while, you learn how to maximize your space when filling the jars. It’s like a fruity version of Tetris.

At this point, return your water in the canner back to a rolling boil.
Using a canning funnel and a ladle, slowly pour the hot syrup into the jars until the pears are completely covered. Pro tip: add the syrup very slowly as it needs to works its way through the jar to find the spaces among the fruit to fill.
Leave 1/2 inch of headspace. Remove any bubbles from the jar (I use a plastic chopstick).

Use a wet clean rag and wipe the rim of the jars to make sure it is free of any food or syrup.
Place a clean lid and ring on the jar and tighten the ring to fingertip tight (tight enough that it won’t come off, but not so tight that a normal person couldn’t budge it).

Once the water in the canner is boiling again, gently place your jars in one at a time using tongs (I prefer canning tongs, but you can technically use any rubber-tipped tongs).
Once your jars (typically 6-7 quart jars can fit in the canner) are completely covered with the boiling water, put the lid on and boil for 20 minutes (pints) or 25 minutes (quarts). See below for processing times at different altitudes.
Processing Time for Pears
| Processing Time for Pears | |||||
| Process Times at Altitudes of: | |||||
| Style of Pack | Jar Size | 0-1,000 ft | 1,001-3,000 ft | 3,001-6,000 ft | Aove 6,000 ft |
| Hot | Pints | 20 min | 25 min | 30 min | 35 min |
| Quarts | 25 min | 30 min | 35 min | 40 min | |
| Raw | Pints | 25 min | 30 min | 35 min | 40 min |
| Quarts | 30 min | 35 min | 40 min | 45 min | |
| *Source: National Center For Home Food Preservation | |||||
Once your jars are starting to process in the canner, fill up your next 6-7 jars with hot fruit, syrup, etc.
Once the jars have been processed for the appropriate amount of time, remove the canner from the burner, carefully take off the lid off the canner, and allow the jars to sit in the canner for 5 minutes. Pro tip: I tend to just slide it into the middle of my stove, as it weighs a ton.
Carefully remove the jars using canning tongs, and place them on a thick towel in a place where they can be undisturbed for 12 hours. The lids should start to pop within 20-30 minutes of being removed from the water.
After a few hours, to check for sealing, gently press down in the middle of the lid. If the lid has no give, it’s sealed. If you can press the lid in and it pops a bit, your jars are not sealed. You can reprocess them or store them in the fridge or freezer (only freeze jars that are wide-mouth).

Pressure Canning Pears
If you prefer to pressure can your pears, follow the prep and packing process above and the canning process below.
Add 3 quarts of water to your pressure canner and put it on a burner set to high. Make sure there is a canning rack in the bottom of the canner.
Using canning tongs, gently place the jars in the canner. Lock the lid. Soon, steam will start coming through the vent pipe (I call it the steam chimney).
Allow the steam to pass through for about 10 minutes. Then put the pressure regulator (I call it the chimney cap) on top. (see the 4 photo grid below for a visual of this process step by step)
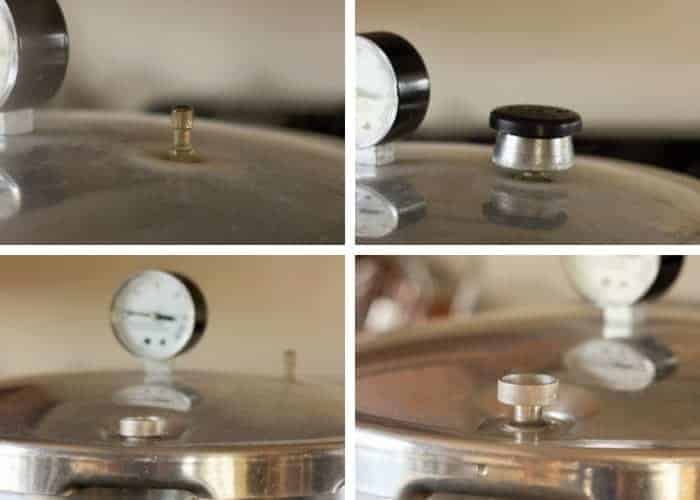
Pretty soon, the air vent will pop up. That is a sign that you’re starting to build pressure inside the canner (get excited. This is happening!). Processing times will vary based on altitude. See the charts below.
Pressure Canning Pears in a Dial-Gauge Pressure Canner
| Canner Pressure (PSI) at Altitudes of | ||||||
| Style of Pack | Jar Size | Processing Time | 0-2,000 ft | 2,001-4,000 ft | 4,001-6,000 ft | 6,001-8,000 ft |
| Hot | Pints or Quarts | 10 min | 6 lbs | 7 lbs | 8 lbs | 9 lbs |
| *Source: National Center For Home Food Preservation | ||||||
Processing Time for Pears in a Weighted-Gauge Pressure Canner
| Canner Pressure (PSI) at Altitudes of: | ||||
| Style of Pack | Jar Size | Processing Time | 0-1,000 ft | Above 1,001 ft |
| Hot | Pints or Quarts | 10 min | 5 lb | 10 lb |
| *Source: National Center For Home Food Preservation | ||||
When the dial gauge reaches the appropriate PSI, reduce the burner temp to medium, and start your timer. The pressure must stay at the PSA or (a little bit) above for the duration of the cooking time. You’ll likely need to adjust the temp on the burner a few times depending on your stove.
When the time is up, remove the canner from the burner and allow it to sit until you hear a distinctive “click” of the air vent dropping. Remove the pressure regulator and carefully remove the lid of the canner (Pro tip: I always use oven mitts when I take the lid off because the steam is super hot).
Let the jars sit for 5 minutes in the canner with the canner lid off and then lift them out with canning tongs. Pro tip: allowing the jars to sit in the canner with the canner lid off can help reduce the siphoning of liquid in your jars.
Place hot jars on a towel where they can sit undisturbed for 12 hours.
After a few hours, to check for sealing, gently press down in the middle of the lid. If the lid has no give, it’s sealed. If you can press the lid in and it pops a bit, your jars are not sealed.
STORAGE FOR HOME CANNED PEARS
Once the jars have sealed, remove the rings. Label and store sealed jars in a cool (best results are 50-70˚F) dark place for up to 12-18 months.
If you have the space available, do not stack the jars on top of each other more than two jars high.
HELP! WHY ARE MY JARS LEAKING JUICE?
If you find that juice has leaked out after they have sealed, you have experienced a common canning issue called siphoning. It happens to the best of us!
Siphoning is typically caused by not allowing the jars to rest in the canner after they have finished processing. In the directions, you’ll see that I recommend you remove the canner from the burner, remove the lid, and let it sit for 5 minutes.
This is important as it allows the jars time to rest before being allowed to cool on the counter. Doing this process will significantly cut down on siphoning.
IF YOU HAVE SIPHONING IN YOUR JARS, FOLLOW THESE STEPS:
- Check – are the lids still sealed?
- Look – have you lost less than half of the amount of liquid in the jar?
- Examine – do the pears look fresh with bright colors?
If the answer to the above three steps is “yes!”, then they are safe to eat. If you lost quite a bit of syrup, the uncovered fruit will turn color more quickly. Plan to eat those jars first.
WHAT IF MY JARS DON’T SEAL?
If you’ve correctly processed your fruit, and the lids still didn’t seal, you can reprocess them.
Double-check to make sure there are no:
- Chips in the rim of the jar
- Dried syrup or bits of pear on the rim (anything between the rim and the lid may prevent a seal.
Best practices would involve using brand-new lids for reprocessing. Set aside the old lids to use for dry storage (related: Pantry Essentials for the Home Cook).
If the jars don’t seal on the second attempt, you likely have a bad batch of lids, or your canning process has a step missing. Email me and we’ll try to troubleshoot what is going on.
For unsealed jars, you can place them in the fridge. Eat the fruit within three weeks.
CAN I MAKE CANNED PEAR SLICES?
Yes! If you’d prefer to cut your fruit into slices, that is absolutely fine. Think about how you plan to use them after canning. Do you want to eat them as is? If so, halved pears will be the easiest and fastest way to can them.
If you use them in crisps/crumbles, other desserts, or yogurt (related: Easy Instant Pot Yogurt) slices make a lot of sense!
Pro tip: with canning pear slices, you’ll need to put a bit more effort into removing bubbles from the jars. There will be more opportunities for “pockets” to occur in the jars, and those bubbles need to be removed for safety.
PRO TIPS/RECIPE NOTES
- You’ll need about 17 pounds of pears to fill seven quarts, 11 pounds to fill nine pints. A bushel of pears weighs 50 pounds and will yield 18-25 quarts.
- Feel free to add some whole spices to the jars just prior to canning. Add 1 cinnamon stick, 1/2 tsp whole allspice, and 1/4 tsp whole cloves to each jar.
- Store in a cool dry place for up to 12 months.
- If you don’t have enough jars to fill the canner, consider Canning Water in a few jars to stock your emergency drinking water supplies.

Get my Canning e-book!
It’s 51 pages of every helpful tip and trick you could want as a brand new canner, AND it includes 13 ad-free canning recipes that are designed to take you from novice to pro.
Canning Pears {Preserved Pears}
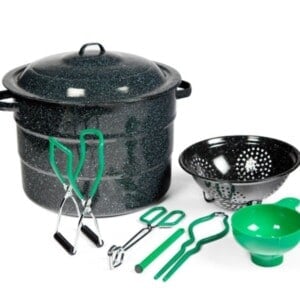
Equipment
Ingredients
- 17 pounds pears
- 1/3 cup bottled lemon juice
- 6 cups water {plus more for the canner}
- 1 cup sugar
Instructions
Canning Prep
- Prepare your water bath canner by filling it with water. You just need to have enough water to cover the jars by 1 inch once the water is boiling.
- Set the canner on the stove. Turn the burner to high. Once it reaches a boil, reduce it to simmer. You want to keep the water hot so that everything is ready when the pears are.
- Wash and sanitize your jars. You’ll want to keep them warm to avoid having them crack when placed in the canner. You can fill them with hot water, or place them on a tray in the oven at 170˚F.
- Wash your lids with hot soapy water and place them in a clean bowl for now.
Prep the Pears
- Fill a large bowl halfway with water and mix in 1/3 cup of bottled lemon juice.1/3 cup bottled lemon juice
- Cut the tops and bottoms off of the fruit.17 pounds pears
- Using a vegetable peeler, peel off all the pear skins.
- After that, cut the pear in half from the top to the bottom.
- Take the paring knife and make a cut from the stem to the bottom on one side. Repeat on the other side, then jiggle the core out. Discard the core, and put the pear in the water with the lemon juice.
- When the bowl is getting full of skinned/cored pears, start the syrup. In a large pot, mix 1 cup of sugar per 6 cups of water and heat over medium.6 cups water, 1 cup sugar
- (Hot pack option) Once the syrup is boiling, add the pears one layer at a time (a canning term that means don’t totally fill the pot) and heat for 5 minutes.
- (Hot pack option) Using a fork, grab the now softened pears one at a time, and put them cavity side down in the canning jar.
- (Raw pack option) use a fork and place pears cavity side down in the canning jar.
- Return the burner under the canner back to high to get the water back to a rolling boil.
- Using a canning funnel and a ladle, slowly pour the hot syrup into the jars until the pears are completely covered. Leave 1/2 inch of headspace. Headspace is defined as the space between the top of the food and the top of the jar.
- Remove the bubbles from the jar (I use a plastic chopstick).
- Use a wet clean rag and wipe the rim of the jars to make sure it is free of any food or syrup.
- Place a clean lid and ring on the jar and tighten the ring to fingertip tight.
Canning the Pears
- Using canning tongs, gently place your jars in the canner. Put the lid on, and set your timer. Pro tip: the water must return to a boil in the canner before you can start the timer.
- Once your jars are completely covered with the boiling water, put the lid on and process based on the elevation and type of pack (hot vs cold) below.
- Process HOT PACK pints and quarts based on the elevation guide below:*0-1,000 ft – Pints =20 min Quarts =25 min*1,001-3,000 ft – Pints =25 min Quarts =30 min*3,001-6,000 ft – Pints =30 min Quarts =35 min*6,000 ft+ – Pints =35 min Quarts =40 min
- Process RAW PACK pints and quarts based on the elevation guide below:*0-1,000 ft – Pints =25 min Quarts =30 min*1,001-3,000 ft – Pints =30 min Quarts =35 min*3,001-6,000 ft – Pints =35 min Quarts =40 min*6,000 ft+ – Pints =40 min Quarts =45 min
- Once your jars are starting to process, fill up your next 6-7 jars with hot pears, syrup, etc.
- Once the pears have processed for the appropriate amount of time, remove the canner from the burner, and carefully remove the lid of the canner (Pro tip: use oven mitts to take the lid off because the steam is super hot).
- Let the jars sit in the canner with the canner's lid off for 5 minutes.
- Remove the jars using canning tongs and place them on towels on the counter undisturbed for 12-24 hours.
- After everything has cooled, check the seal by pushing down on the middle of the lid. If it doesn't give way, it's sealed. If the lid bows a little bit, put that in the fridge and use it within 3 weeks.
- Label the sealed jars, and store in a cool dark place for up to a year.
Notes
- You’ll need about 17 pounds of pears to fill seven quarts or 11 lbs for 9 pints.
- No matter how well you pack those jars, your pears may/will float to the top of the jars after canning. This is called fruit float. This is totally safe as long as the jars are sealed.
- Feel free to add some whole spices to the jars just prior to canning. Add 1 cinnamon stick, 1/2 tsp whole allspice, and 1/4 tsp whole cloves to each jar.
- If you’re planning to can multiple batches of pears all at once, I use my crockpot to create and keep the syrup hot. It frees up space on the stove.
- Once the jars have sealed, remove the rings. Label and store sealed jars in a cool (best results are 50-70˚F) dark place for up to 12-18 months.
Nutrition
Nutrition information is automatically calculated, so should only be used as an approximation.


Thanks for sharing. I’ve canned many things over the years, first time with pears. Right off Mr tree in backyard. Delicious!
What a wonderful bounty in your own yard, Ricky!
So glad our tutorial was helpful.
If you don’t have a pressure cooker can you just use a big pot with a lid?
Hi Linda, you don’t actually need a pressure cooker to can pears. A water bath canner works great. And if you don’t have one of those, a big pot with a lid also works! You will want a rack on the bottom of the pot so that the jars aren’t sitting directly on the bottom.
I followed all steps. Had no issues. 38 lbs bosc pears , hot pack in apple juice, 12 quarts finished in 3 hrs including cleanup.
My wife said yeeeeeehaaaa!!
So glad to hear that, Croft! Super impressive time, including clean up.
I hope you enjoy those tasty pears on the coldest of winter days.
Question – does it have to be bottled lemon juice? Not fresh? Looking forward to trying this!
Hi Andrea, it can be fresh if needed. The only point of the lemon juice is to prevent the pears from browning.
Can the pears be sliced or “chunked” instead of quartered for canning?
ETA: Mitzi, I’m so sorry, but I initially copied information from our “Canning Peaches” post below. I should know better than to respond to comments in the morning!
I have updated the c/p below to reflect the information about pears instead of peaches.
Hi Mitzi, yes you can. There is information about that in the post. I’m going to copy and paste it below. The formatting may come through a bit wonky.
CAN I MAKE CANNED PEAR SLICES?
Yes! If you’d prefer to cut your fruit into slices, that is absolutely fine. Think about how you plan to use them after canning. Do you want to eat them as is? If so, halved pears will be the easiest and fastest way to can them.
Pro tip: with canning pear slices, you’ll need to put a bit more effort into removing bubbles from the jars. There will be more opportunities for “pockets” to occur in the jars, and those bubbles need to be removed for safety.
Thank you for the detailed instructions. I’m afraid I don’t understand the instruction that says to “remove the rings”?
What is the purpose of this when the ribs can be left on the jars and simply removed/replaced as you use the canned pears?
Hi Richard, I’m not sure what you mean by ribs. This is not a canning term I am familiar with.
For storage, the rings can hide if there has been leakage or siphoning of the jars weeks or months after you have canned them. Removing the rings just gives you a quick visual from time to time to make sure everything is safe. You can leave them on, but best practices are to remove them for storage.
And since most people have excess rings, you can use them to for storage once you have opened a jar and stored them in the fridge.